
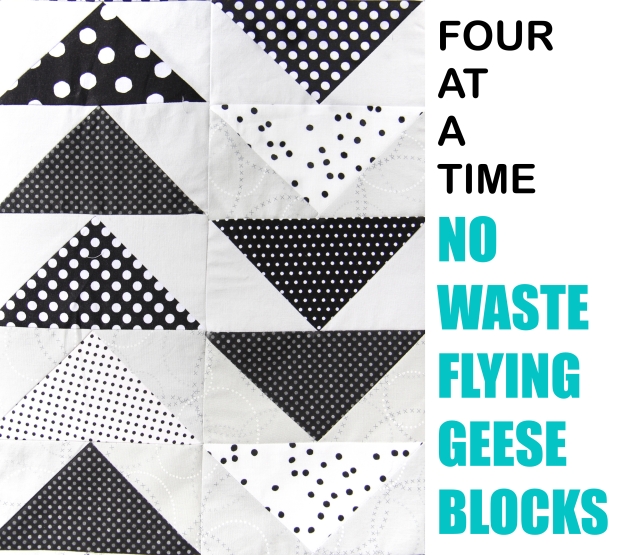
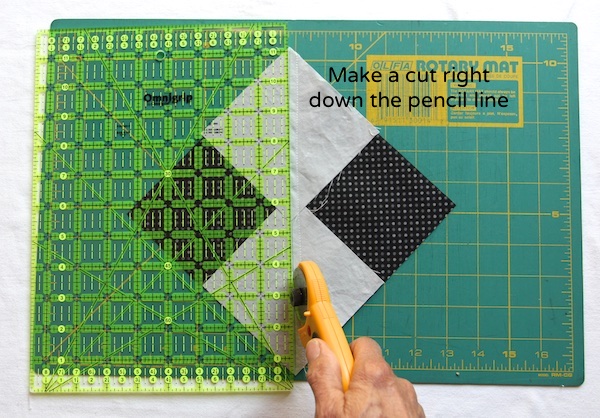
I used to avoid making Flying Geese blocks because of all the wasted corners of fabrics you have to cut off. I couldn’t bring myself to do that. But did you know you can make Flying Geese blocks with no wasted fabric? This was a game changer for me and now I love this block.
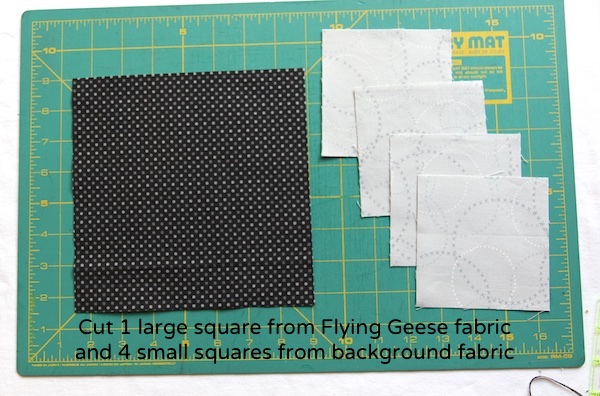
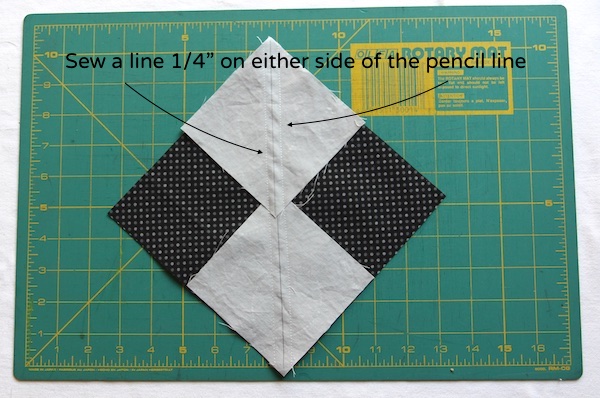
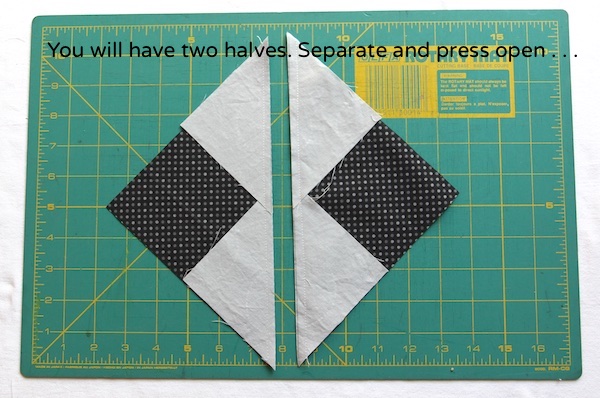
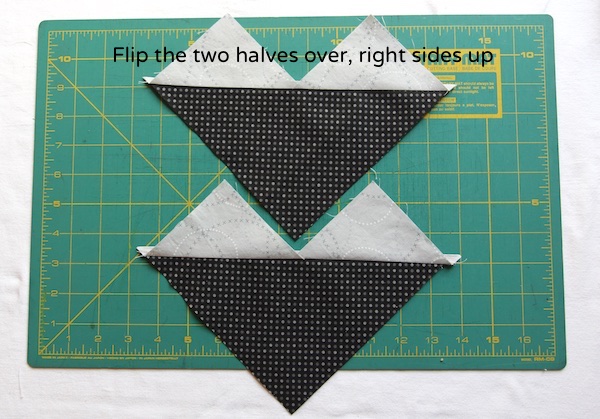
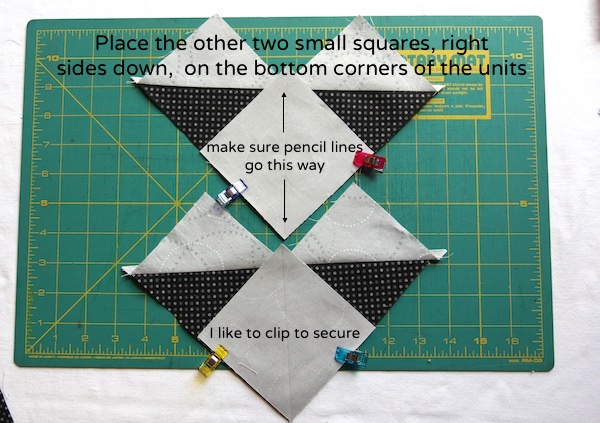
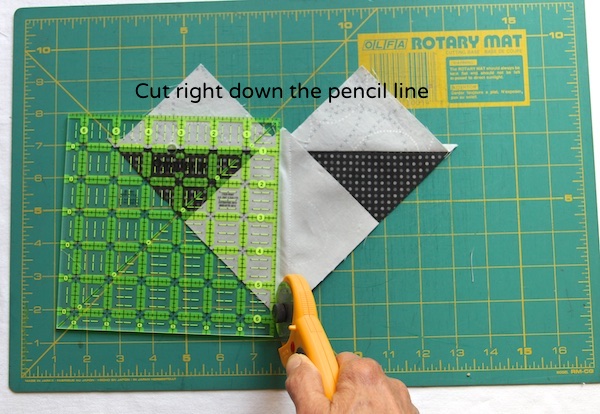
I’m showing you how to make these blocks four at a time. I like to make these a little oversize, so I can trim them to perfect sizes. You cut one large square of fabric from the fabric you want for your Flying Geese (your main fabric). Then you cut four small squares from your background fabric. This chart shows you what to cut for various sizes. Remember – the finished Flying Geese Size in the chart is after being sewn into your project. After you trim them (before they are sewn in) they will be ½” larger than your desired finished size, so that you have ¼” seam allowance to work with.
I hope this tutorial is helpful. Some Flying Geese tutorials are complicated and don’t seem to explain the technique very well – I hoped to make one that is very simple to follow. Happy Sewing!
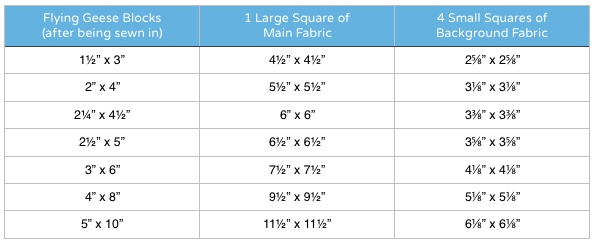
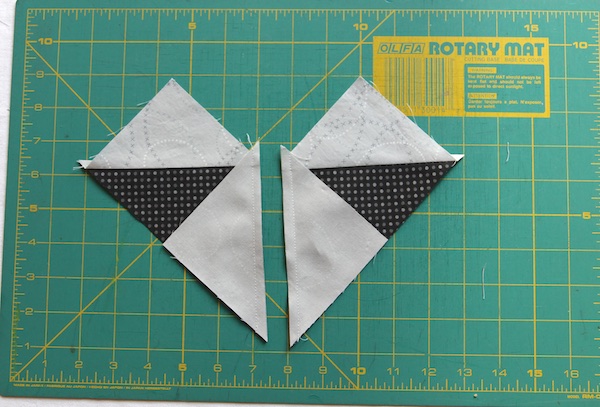
With this method, you will end up with four Flying Geese blocks.


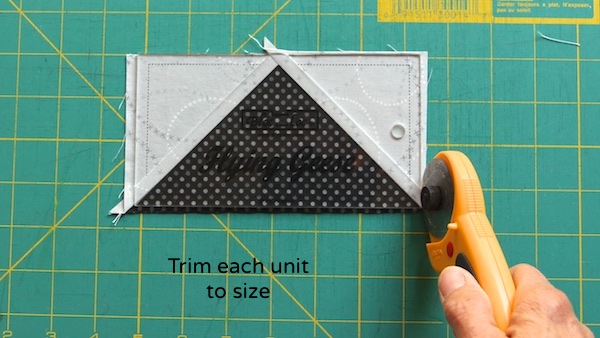
I like to trim my blocks with Bloc Loc Rulers

Thank you for this tutorial! I am rather new to quilting and have avoided flying geese until now. I may tackle this skill next!
LikeLike
Great tutorial. Now I feel more confident to make these. Thank you 👍🏽
LikeLike
Great tutorial! Thank you, I’ll give it a try 🙂
LikeLike
Fantastic! Thankyou.
LikeLike
Thank you.
LikeLike
Yes! I haven’t tackled flying geese for the wasted fabric! Fabulous idea and a great tutorial. Now I might just consider them!
LikeLike
The last line in the second paragraph says: “After you trim them (before they are sewn in) they will be ¼” larger than your desired finished size, so that you have ¼” seam allowance to work with.” Shouldn’t the block be 1/2″ larger (not 1/4″ larger) than the desired finished size because there is a 1/4″ seam on each of the four sides?
Thank you for the tutorial.
LikeLike
Jan: Yes! You are right and wouldn’t you know I proofread that post multiple times and didn’t catch that. All I was thinking that they were 1/4″ larger all the way around. Let me fix that and thank you for catching that!
LikeLike
Super tutelage! I can’t wait to give it a try! Thanks for taking the time!
LikeLike
Thanks! I was wondering if there was a way to use the bloc loc ruler (which are fabulous, though ridiculously pricey!) with the four at once method. Is there a formula that you used to arrive at these cutting sizes? (for making sizes other than you’ve used here) also – if one went up 1/8 in and cut in 1/4 in increments instead – would it throw things off? or would you just have a smidge of waste? or maybe you could use a slightly larger seam allowance than the scant 1/4 inch?? (I find that the BL rulers have a generous 1/4 in S/A…) hmmm….
LikeLike
Never mind – I’ve been playing and I answered my own questions 🙂 Thank you so much for sharing this, and giving me a place to start! (your polka dot quilt is fabulous 🙂 )
LikeLike
Thank you, Tracy!
LikeLike
I know this is several years late. I am grateful for your tutorial. I am on a quilt and the pattern calls for cutting a lot of triangles for flying geese. I much prefer to avoid exposing the bias because I always distort the fabric. I usually use squares, but there is so much was cutting off half. This method is my ideal method. Thank you for the clear instructions.
LikeLike
Hi ggreat reading your post
LikeLike