
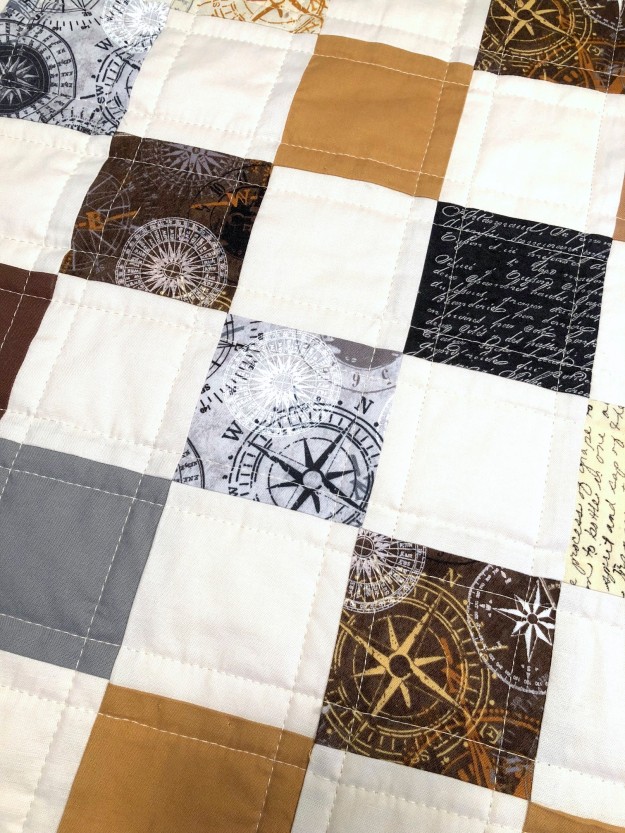
I found this really interesting line from Windham Fabrics called “Measure”. They have fabrics that show compasses and rulers and writing and I just loved it. I had been looking for a color palette of browns, creams and maybe a touch of black. This fabric line was perfect for the 16-patch quilt I had in mind.
I’m also going to show you how I made the 16-patch blocks and give you my measurements for cutting.
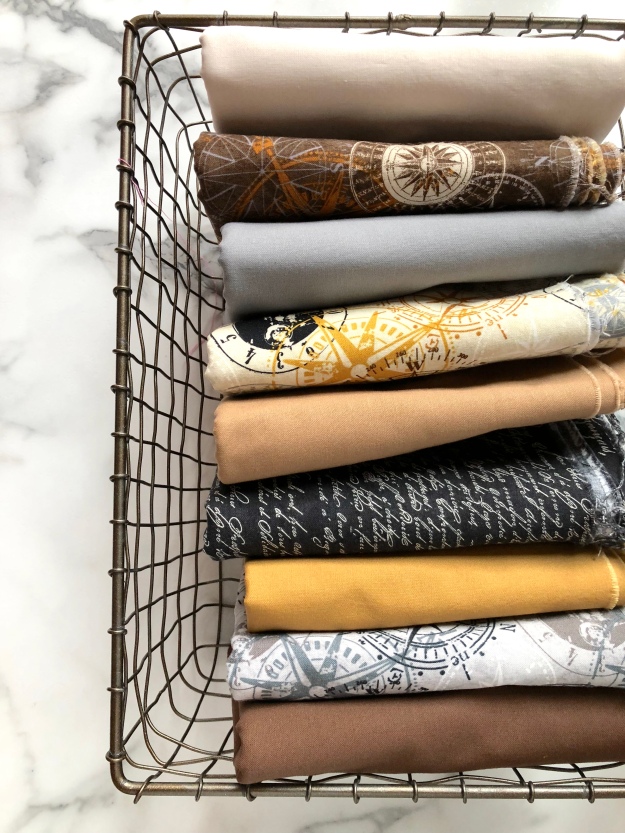
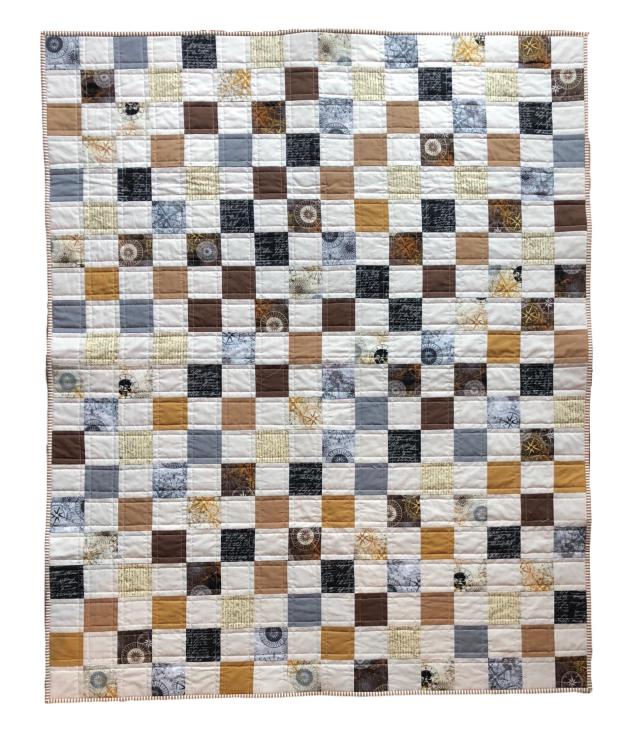
I added some Kona solids and another text print called “Bee Creative” by Deb Strain for Moda. For the background, I used Kona Ivory. The finished quilt size is 48″ x 60″, which I consider an ideal size for a throw quilt to curl up with on the sofa.

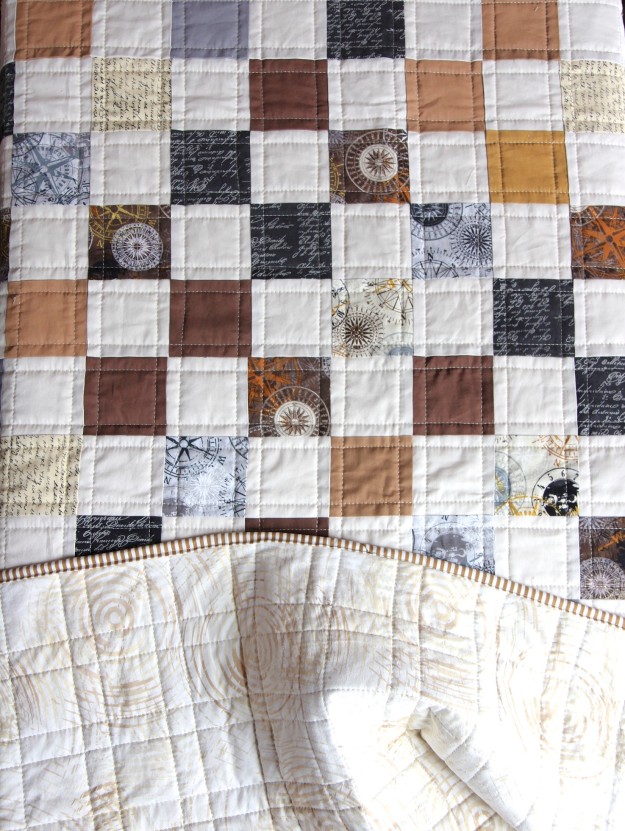
This quilt was composed of twenty 16-patch blocks. The squares in the finished quilt are 3″. The 16-patch blocks in the finished quilt are 12″. I prewash all my fabrics – if there are any surprises, I want them now and not when I wash the finished quilt.

If you are interested in some of the particulars, here’s what I did:
I cut (40) 3.5″ WOF strips total, 20 in the various prints and 20 in the background fabric. You need 2 yards of the background fabric and 2 yards of various prints.
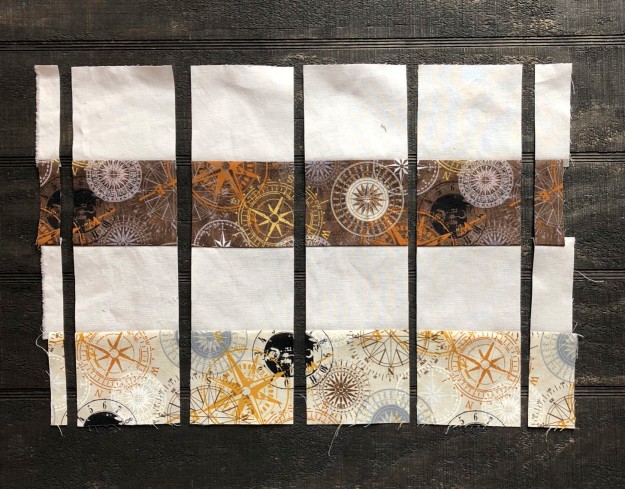
I cut the WOF strips into 15″ strips. I sewed 2 prints and 2 background strips together, like this:
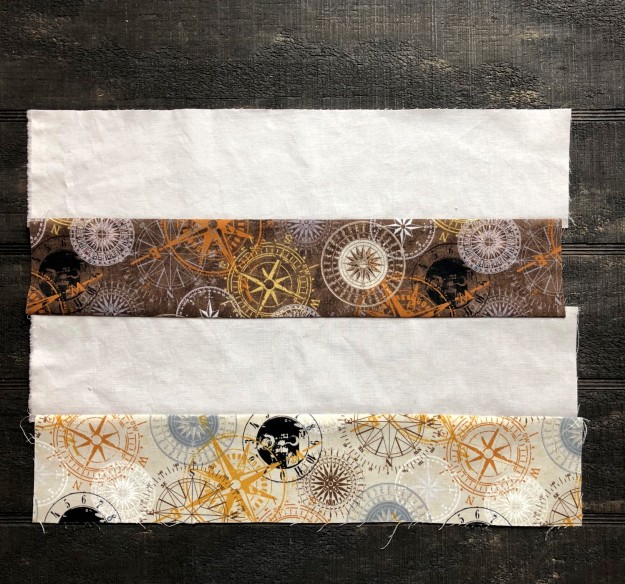
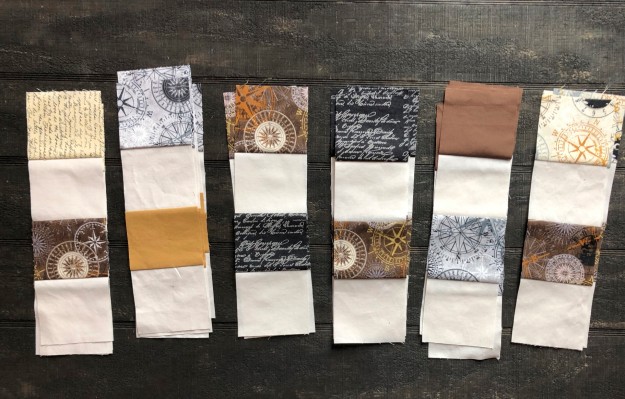
Press seams to dark sides. This strip set gets subcut into (4) 3.5″ sections:
Repeat with your other prints, varying which fabrics you have in the top and third positions, so you have a great variety.
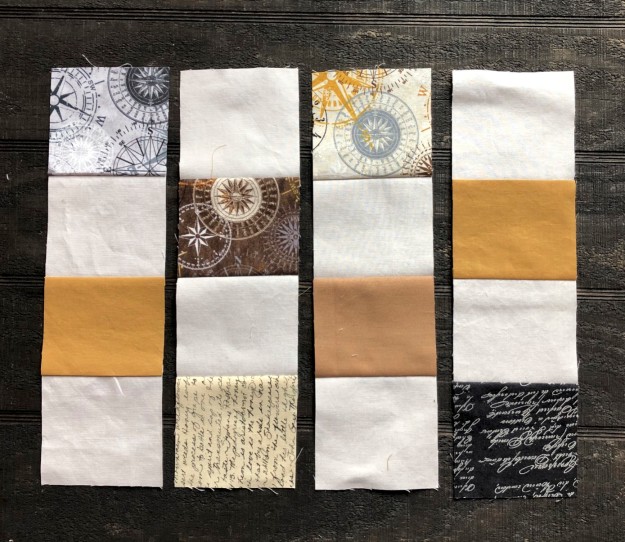
Then lay these out into 16-patch blocks, starting with a dark fabric in the top left position.
Sew together into blocks. The seams should all nest.
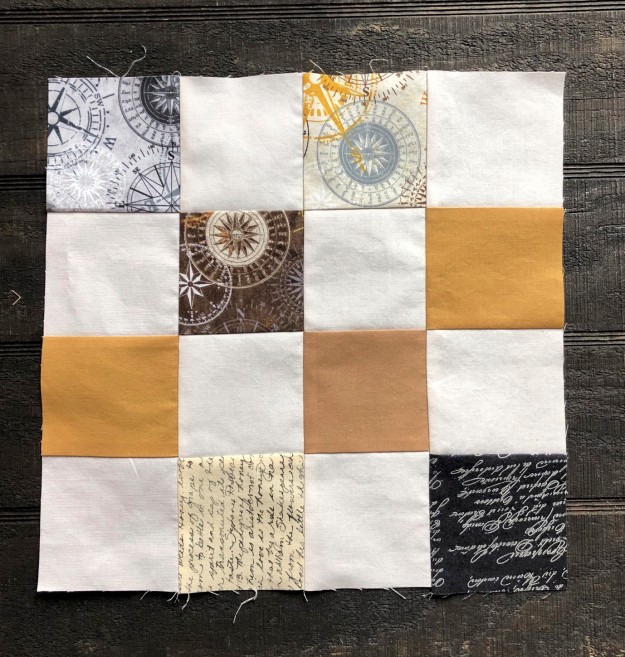
Repeat until you have 20 16-patch blocks and then just lay all the blocks in a pleasing array – four blocks across, five blocks down, and sew together.
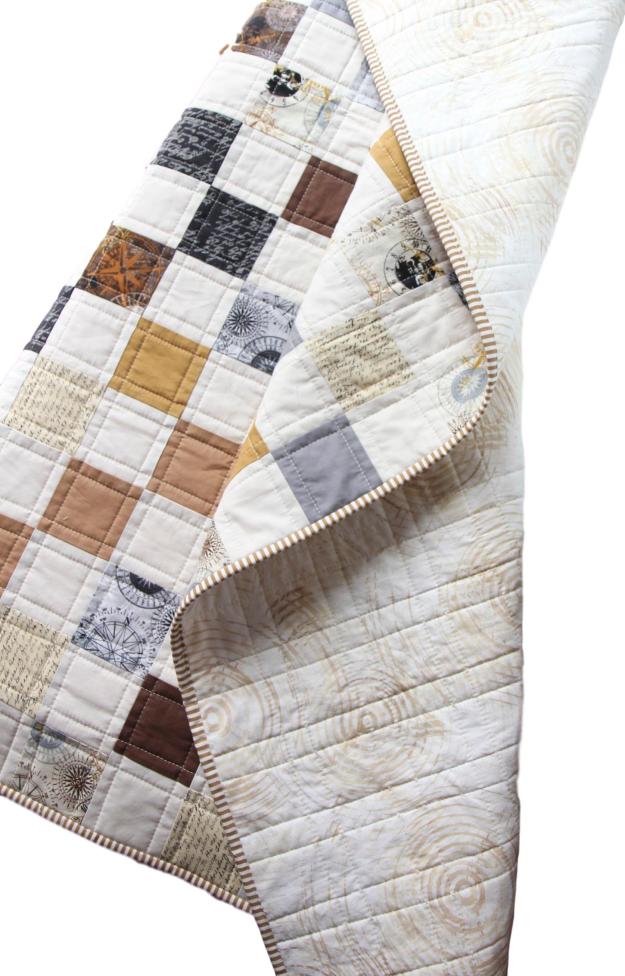
I used a fabric for the backing called “Henry Glass Principle Circle Play in Cream“. It is a 108″ wide quiltback which is terrific – no piecing of the back! There seems to be more 108″ wideback fabrics available now than there used to be.

I used my new favorite quilt batting, Quilter’s Dream in the Supreme loft. I love this batting – it’s more expensive, but it makes a heftier, cozier and softer quilt than Warm and Natural.

I quilted this using a 4.5″ stitch length and used Aurifil 40# cotton thread.
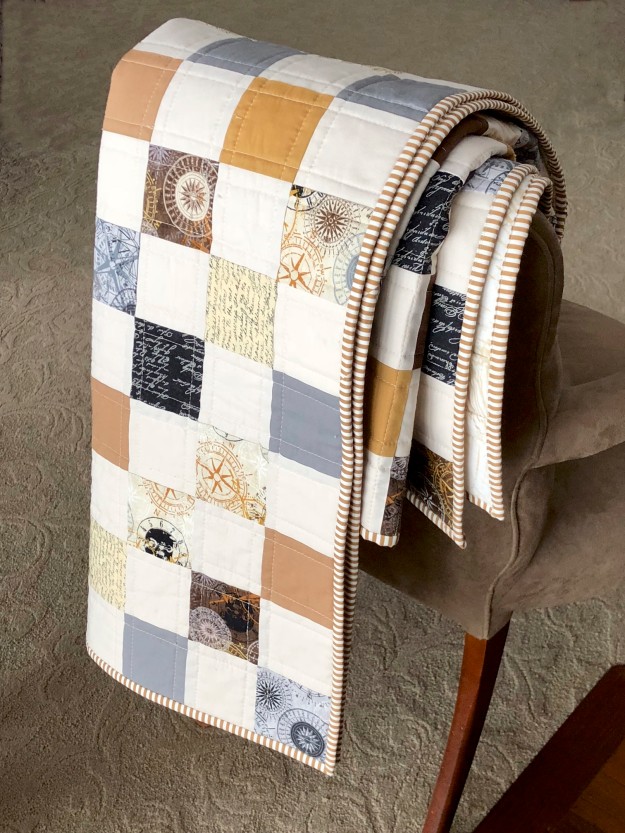
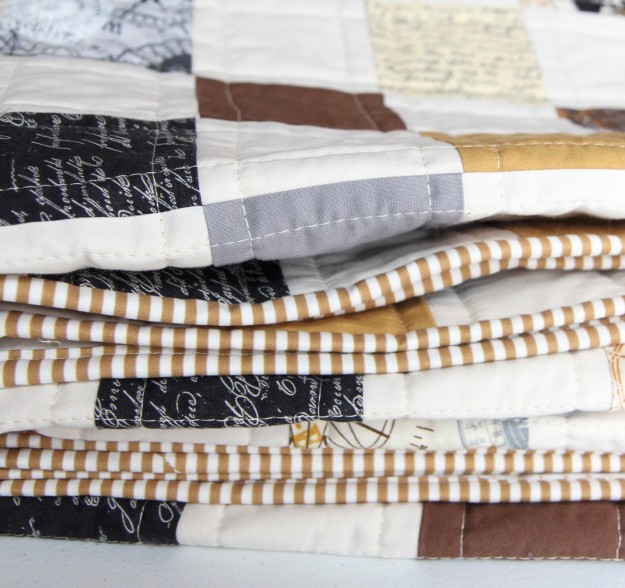
For the binding, I did go with a classic stripe. Hawthorne Threads actually digitally prints lots of really interesting fabrics themselves and they do a whole line of stripes called “Dress Stripes” that are perfect for bindings – if you can’t find the color you want for stripes, check them out – they have almost any color you need. I used “Ochre” for this binding.
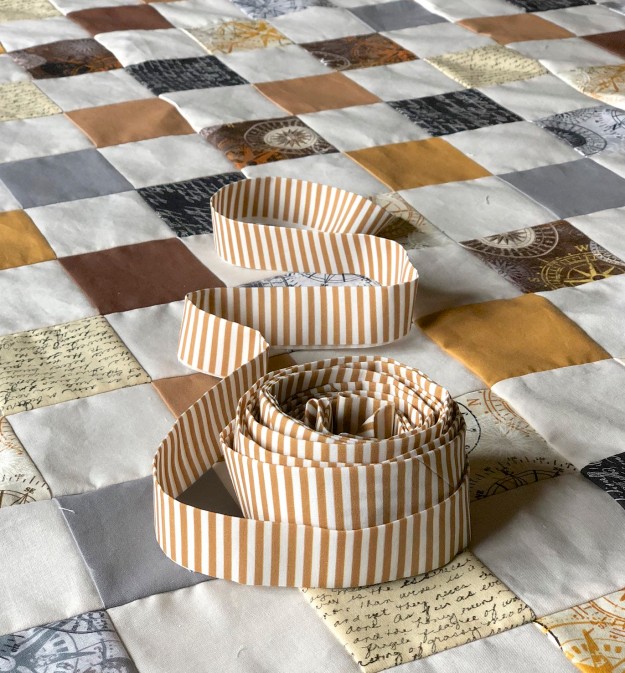
I cut 2.5″ strips for the binding. I have a tutorial on how to machine bind a quilt, if you need to know how to do that. I do use a walking foot when I attach the binding.

And here is the quilt after I washed it. I definitely wanted that crinkle look for this one:

Can’t wait to send this off to its new owner!
Thanks for stopping by. Hope you’re making something!
Elaine

I love how this looks! I think you’ve just inspired me to get quilting again!! Thanks.
LikeLike
Love it. Great color choice and backing.
LikeLike
Definitely have to try this. Beautiful!
LikeLike
Absolutely beautiful!!
LikeLike
Wonderful. So easy but beautiful.
LikeLike
Great job…lovely outcome! Have you noticed any of the Tim Holtz collections Eclectic is think is the name. I made a great quilt usung his fabric! Check it out Happy quilting! from Snowy Huntsville, Ontario Canada
LikeLike
Absolutely beautiful! Love your colour combinations! Thanks for sharing!
LikeLike
I make baby quilts each year (beginning in Jan.!!!) for our local HOPE Pregnancy Center. I was wondering how I could use my tans and browns and after seeing this quilt on your page today, I knew this would be perfect with some of my “denim” colored blues and ecru fabrics. Thank you so very much. BEAUTIFUL!
LikeLiked by 1 person
You’ve done it again Elaine; your collections and colour choices are awesome. So many quilts… not enough time. Can’t wait for my sewing room to be done … soon ⌛️
LikeLike
What a beautiful quilt! All the colors I love as well. And the fabric is one of my favorites! Thanks for sharing!!
Carol L
LikeLike
Another gorgeous quilt! Thanks for sharing!
LikeLike
Wow. Love the fabrics. I make quilts myself. Right now I have @45 tops ready to be quilted.
Sent from my iPhone
>
LikeLike
I LOVE your quilts! 💕 This one is beautiful! I kept pinning your images on pinterest and realized I needed to start following you on Facebook. Thanks for this tutorial.
LikeLike
So nice to hear! Thank you.
LikeLike
Wow. Absolutely beautiful! Love your colour combinations!
LikeLike
Thank you, Regina!
LikeLike
It really is an interesting and unique quilt–classy and beautiful! Great photos and tutorial!
Could you give us some basic instructions (yardage and cutting) for the Child’s Pinwheel Quilt? I’d love to make that one!
LikeLike
Lydia: Actually, I’m in the process of writing a pattern for that quilt! Stay tuned!
LikeLiked by 1 person
This lovely. Thanks for posting the instructions. I’ll have to give this a try.
LikeLike
Gorgeous quilt! Nice to know you don’t need fancy free motion quilting to make a really spectacular quilt!
LikeLike
Love the quilt and de colours!
LikeLike
This pattern turns out cute in any color and your color combinations are great. I’ve made four so far – one baby size in the owls and two for our veteran give away sewing club. And one now with “Little House on the Prairie” fabric. It goes together quite fast, except for the cutting!
LikeLike
Lovely, really, thanks.
LikeLike
This baby quilt is perfect…nothing else needs to be said!
I’ve just subscibed…need to fully explore all your creations…beautiful.
LikeLike
Love this! You are so inspiring! Can you share the color names of the Kona Cotton solids you used?
LikeLike
I’m sorry I don’t have some labels on my Kona solids in my stash! I don’t know exactly what those solids were but you can come very close to matching them I’m sure by looking at the photo of my fabric pull in the post. (The background fabric is Kona Ivory – I do know that). Sorry!
LikeLike
Beautiful!! When you machine quilt all the layers together do you start sewing through the middle top to bottom, or side to side? Can you share any more of your quilting strategies? Thank you!!
LikeLike
Toby: I always start quilting in the middle of the quilt. Sometime I start on the long side and sometimes on the short side, it doesn’t matter to me. But I start right in the middle of one side, quilt right down the middle and then go back to the top and finish quilting that whole side. I flip the quilt around and do the other side. Then I will switch the orientation and begin on the middle of the other side and do the same thing. Hope this helps.
LikeLike