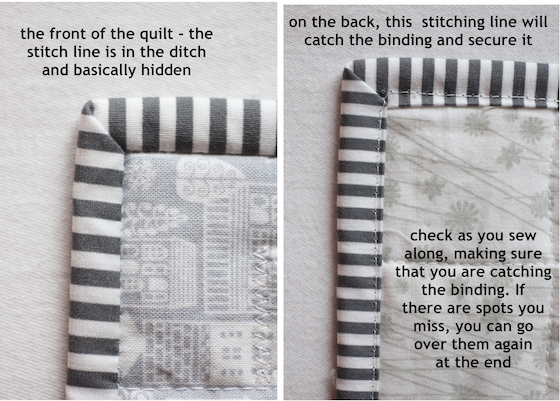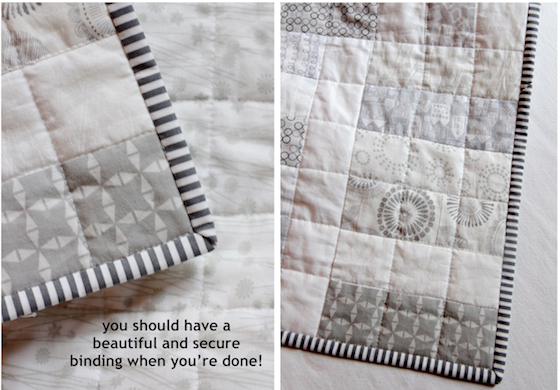
Having a beautiful mitered binding on a quilt is the perfect finishing touch and the part I love the most. There are different ways to produce a binding like this – I prefer to stitch my binding down on the front, wrap it around to the back and stitch in the ditch on the front, so the stitches are hidden and the sewing line only shows on the back. It is just personal preference and you will have to decide how you like your binding to look.
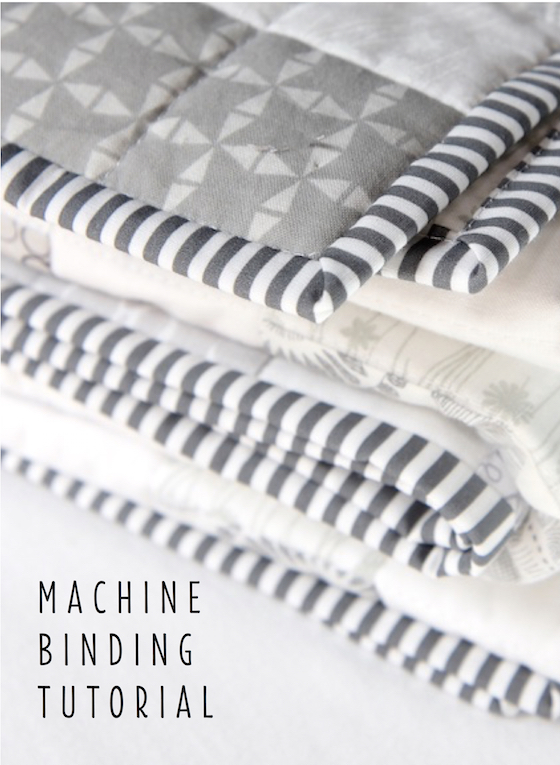
I like to make my own binding, choosing a fabric that complements the quilt and sets it off nicely. A stripey binding is very popular with quilters and adds a little zing to the edges. Any small repeat is nice, too. You can also use a solid or even use scraps and make a scrappy binding.
You will be cutting strips cross-grain to make this kind of binding and then sewing them together to make one long continuous strip. The tutorial shows you how to join the strips together on a diagonal, so the seams lay a little nicer.
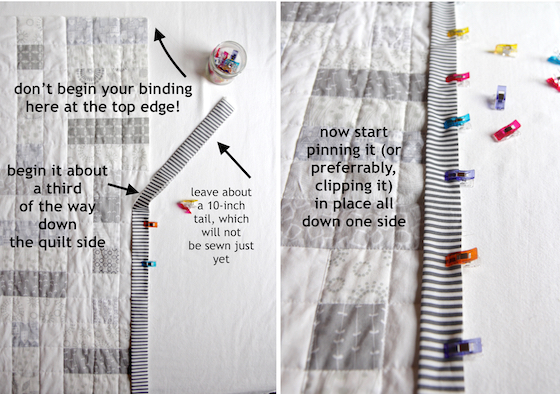
This binding is not difficult to do, but requires slow stitching for precision. I recommend using Wonder Clips from Clover instead of pins. They are faster, easier to use and more precise. They will hold your binding better than pins and will not shift as you clip and unclip them.
Calculating Yardage:
There are several ways to calculate how much yardage/strips you will need to make your binding. Different people use different formulas, some of which are way too generous and I think waste a lot of fabric. I personally love to use this app by Robert Kaufman that is super easy. I downloaded it from the iTunes store and I highly recommend it.
If you don’t want to use a phone app, here is a web site that functions very close to the Robert Kaufman app and is very easy to calculate your binding: lily street quilts. Just plug in the dimensions of your quilt and scroll down to the bottom of the page and plug in your binding width desired. Click “calculate” and it will give you the yardage and # of strips you need.
If you don’t want to use an app like this, here is a good formula to calculate the strips. You simply add up the sides of the quilt (width, width, length, length), add a few extra inches for the corners (about 10) and the tail ends and divide by 40, which is a safe usable area of fabric from a common 44/45″ width piece of fabric:
W+W+L+L+10″ ÷ 40 = how many strips you will need (always round up)
STEP-BY-STEP PHOTO TUTORIAL:
Make your binding by cutting strips from selvage to selvage: