Category Archives: techniques

How to Make a Super Easy Quilt Back

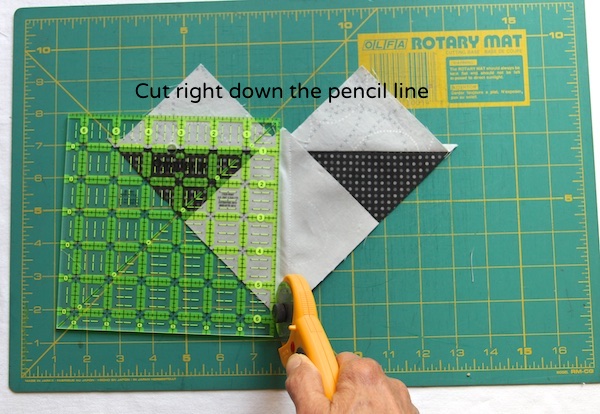
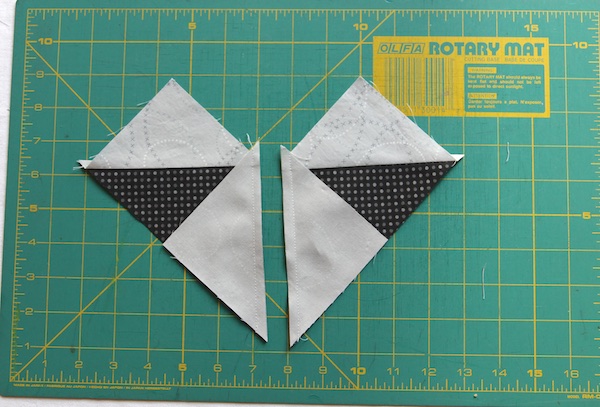
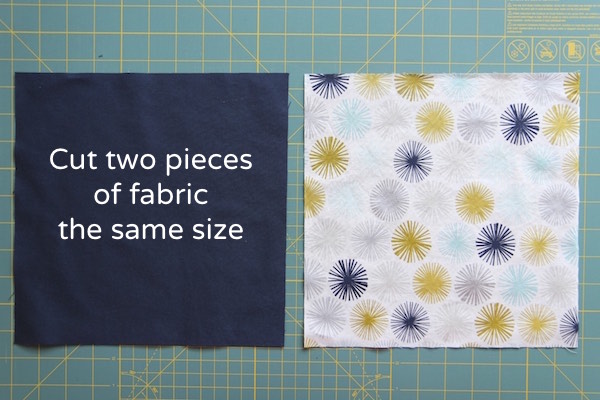
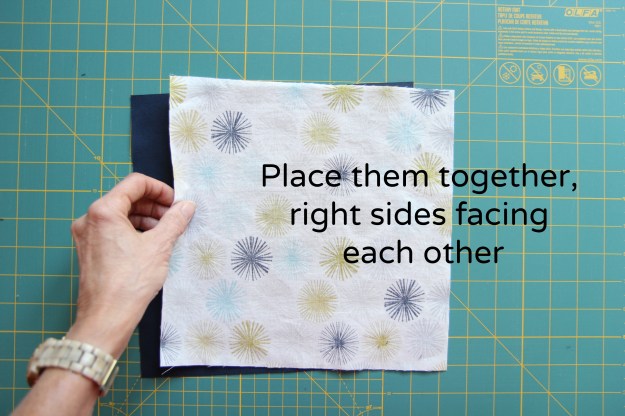
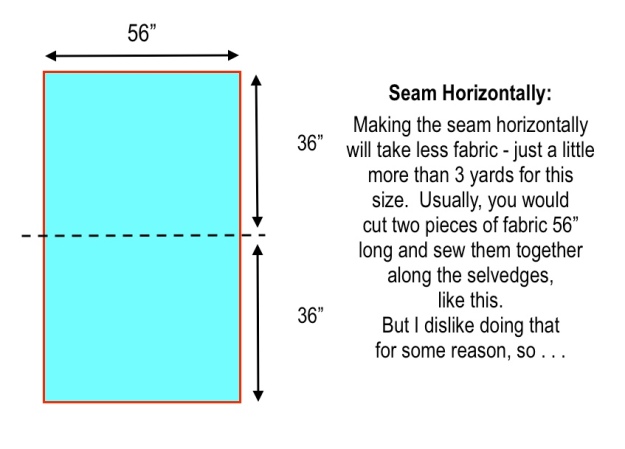
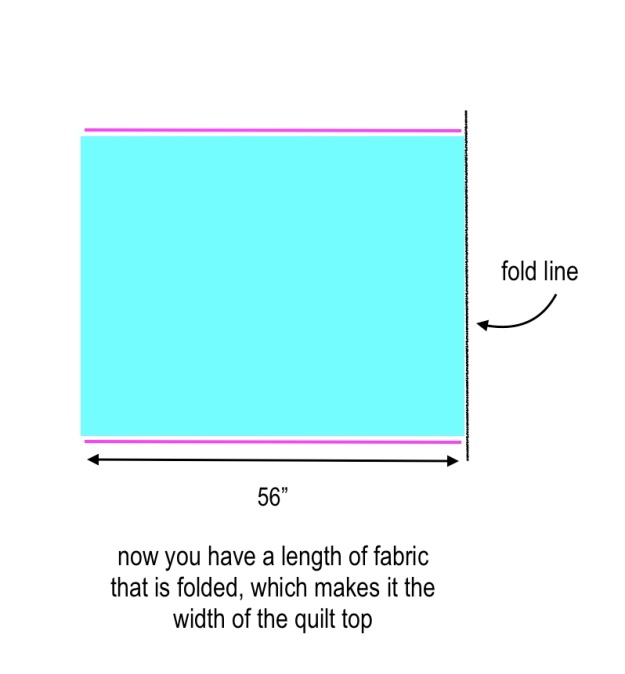
The only part of making a quilt that I do not enjoy is sewing the quilt back.  I just hate calculating the dimensions, cutting the pieces and then sewing them together.  There are many, many ways to make a quilt back.  You can even use 108″ wideback fabric, and not have to cut anything – but the fabric choices for those are limited. So, unless it’s a baby quilt, you almost always have to piece a quilt back. I can give you a method to make it a little easier. Instead of cutting two separate pieces of fabric and sewing them together, you cut one long piece, fold it together and then sew right down one side.  You then cut off the little fold line and open the fabric up and you’ve got a quilt back.  It’s very easy.

I get a lot of quilting questions from beginner quilters, so I am going to diagram this method out in a really basic way (I hope).  If you’re more of an advanced quilter, you won’t need such detailed instructions.

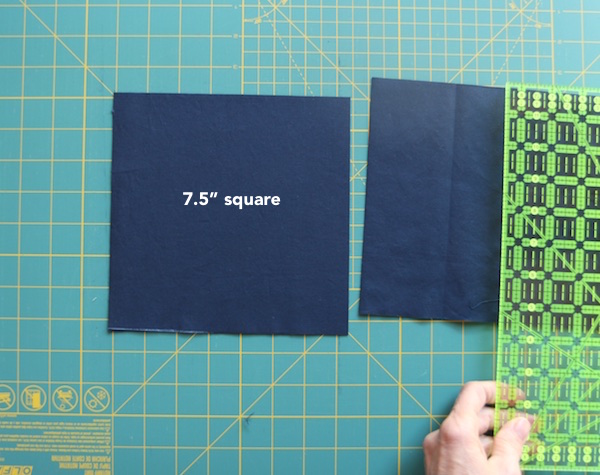
Keep in mind when you calculate dimensions for your quilt back, you have to take into account that although fabric width (WOF) is about 42 – 43″, you have to subtract the selvedges and you need to figure in ½” seams in your allowances.  Also, if you want an overage on your quilt back, making it a bit larger than your quilt top, adjust accordingly – I always allow a couple inches all the way around the quilt for an overage. So remember to allow for those in your calculations.  The example below doesn’t include overages – it’s just a example.

Also, I’ve recommended this phone app before and I use it all the time – it calculates how much yardage you will need for your backing.  It’s QuiltingCalc by Robert Kaufman.  Very handy.

This method actually works well for certain directional fabrics, because folding the fabric over on itself lines up the pattern in the same direction.  Also, this method only works on quilt tops which are under 80″ in length.

quilt-back-1quilt-back-2quilt-back-3quilt-back-4quilt-back-5quilt-back-6quilt-back-7quilt-back-8


quilt-back-9

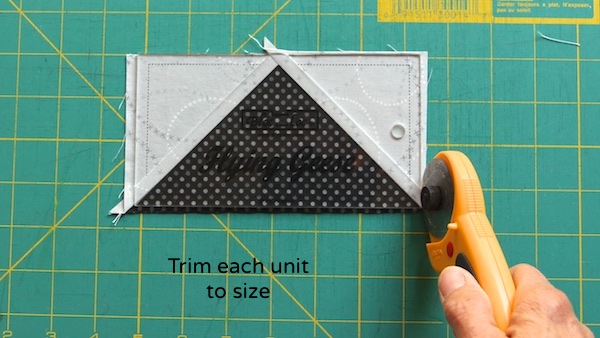
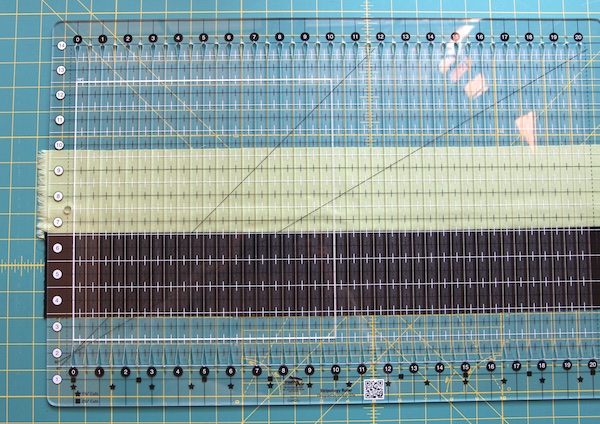
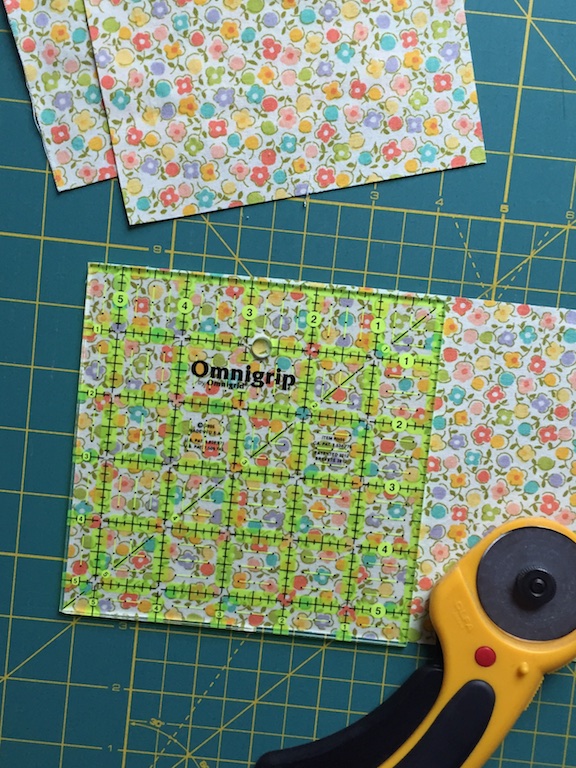
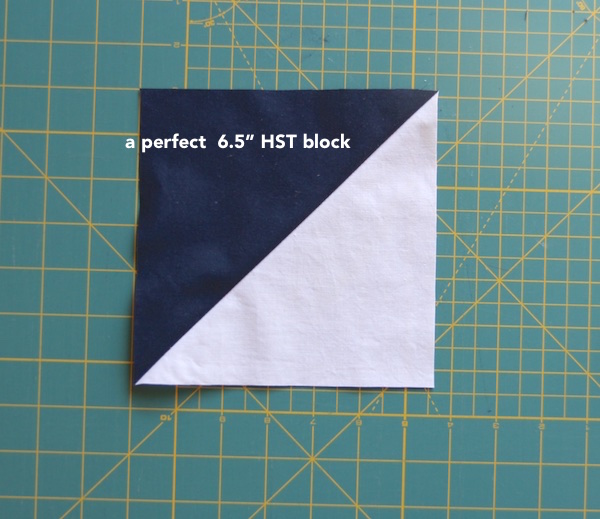
Now just trim the length to the size you want.

Tips:

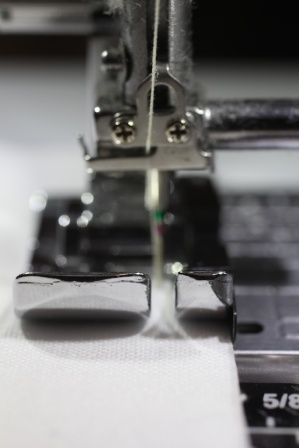
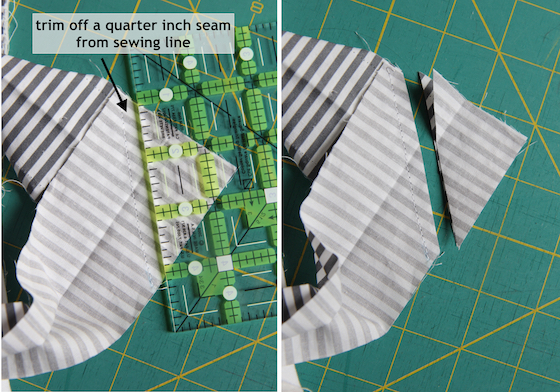
● Cut the selvedges off before you press the seam open – they are tighter and have less give than the fabric itself and can cause a pucker sometimes.  Make a big enough seam so that you can do this.  So make your sewing line ½” away from the selvedge.  Press the seam open so it lays flat.

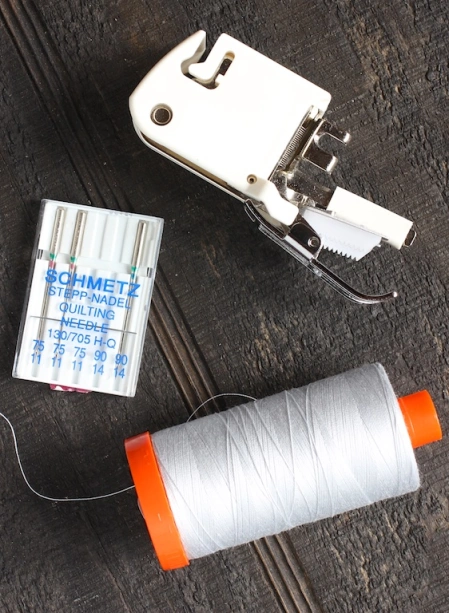
● Use a walking foot if you can to sew the seam – it will move the fabric along better, so that it is even.

I hope these instructions make sense and that they are helpful.  Do you have a favorite method of piecing a quilt back?

Elaine

Save

Save

Save

Save

Save

Save

Save

Save

Make Eight Half Square Triangles at a Time With This Super Fast Method

8-hst-at-a-time

This is Method #3 in my tutorials on how to make Half Square Triangles.  The first method makes 2 at a time, the second  method makes 4 at a time and this method makes 8 at a time.  It is for sure the fastest way to make HSTs.  And it’s super easy – 2 squares of fabrics, sew 4 seams, make 4 cuts and trim.  You can really crank them out with this method.  And there are no bias edges on these blocks.

You begin with cutting two squares of fabric the same size.  I cut them generously because I like to trim my finished HST to size, so they are perfect.  Here is a chart to give you the sizes.  I have included a cutting size you can use if you don’t want to cut them oversize.

hst-8-at-a-time-chart


hst-8xtime-1

hst-8xtime-2

hst-8xtime-3

hst-8xtime-4

hst-8xtime-5

hst-8xtime-6

hst-8xtime-7

hst-8xtime-8

hst-8xtime-9

finished-hst-8-at-a-time


Four-at-a-Time No Waste Flying Geese Blocks

No Waste Flying Geese.jpg

I used to avoid making Flying Geese blocks because of all the wasted corners of fabrics you have to cut off.  I couldn’t bring myself to do that.  But did you know you can make Flying Geese blocks with no wasted fabric?  This was a game changer for me and now I love this block.

I’m showing you how to make these blocks four at a time. I like to make these a little oversize, so I can trim them to perfect sizes.  You cut one large square of fabric from the fabric you want for your Flying Geese (your main fabric).  Then you cut four small squares from your background fabric.  This chart shows you what to cut for various sizes.  Remember – the finished Flying Geese Size in the chart is after being sewn into your project.  After you trim them (before they are sewn in) they will be ½” larger than your desired finished size, so that you have ¼” seam allowance to work with.

I hope this tutorial is helpful.  Some Flying Geese tutorials are complicated and don’t seem to explain the technique very well – I hoped to make one that is very simple to follow.   Happy Sewing!

flying-geese-chart

With this method, you will end up with four Flying Geese blocks.

flying-geese-tutorial-1flying-geese-tutorial-2flying-geese-tutorial-5flying-geese-tutorial-6flying-geese-tutorial-7flying-geese-tutorial-8flying-geese-tutorial-9flying-geese-tutorial-10flying-geese-tutorial-11flying-geese-tutorial-12flying-geese-tutorial-13flying-geese-tutorial-14flying-geese-tutorial-15

I like to trim my blocks  with Bloc Loc Rulersflying-geese-tutorial-16

Save

Save

Save

Save

Save

Save

Save

Save

Save

Save

Save

Half Square Triangle Tutorial, Method II, Four at a Time

Half Square Triangle Tutorial Four at a TIme

I promised you way back when that I would post about how to make Half Square Triangles using a different method, making four at a time.  The HST continues to be the most fun block to design with, because of the endless combinations  you can make with it.  In my first tutorial, I showed you how to make one at a time.  This second method, making four at a time, is super easy and very fast.  The only drawback to this method is that you will end up with edges that are bias edges – which just means they can stretch a little bit.  So, when pressing these blocks, be extra careful not to iron them and stretch them out – just press them.

The advantage to this method is that it is super fast – you just place two squares of fabric, right sides together, sew a quarter inch seam around the entire outside edge, cut an “X” corner to corner and you have four HSTs.  All you need to do is press them open and trim off the little dog ear corners.  You don’t even need to draw any lines with a pencil on your fabric with this method.

In order to figure out how big to cut the two squares of fabric, the calculation is very easy. Do not be scared of the following math! Figure out how big you want your HSTs – and that means the size of your “unfinished” HSTs, before you sew them together into your quilt – and divide by .64, which is easy to do on your calculator.  For instance, if I wanted finished 3″ blocks in my quilt, I would need 3.5″ unfinished HSTs.   So I just take 3.5 and divide by .64 and I get 5.468, which I will then round up to 5.5″ squares of fabric.

3.5 ÷ .64 = 5.46875  so I will round this up to 5.5
I will cut 5.5″ squares of fabric to make 3.5″ “unfinished” HSTs,
which will end up being 3″ finished HSTs in my quilt

When using this calculation, keep in mind that this is not an oversized HST that you will trim. If you like to make your HSTs oversized and then trim them, down, just calculate a little bigger and then you can do that.  To trim them down to a perfect HST, this technique is my favorite for trimming.

In my next tutorial on the HST, I will show you Method III – how to make eight at a time!

I hope this tutorial is helpful!

Elaine

HST II two fabrics squares

HST II fabric squares together

HST II clipping fabric squares

HST II sewing perimeter

(Above: I flipped the square over to the dark side so you can see the stitching)

HST II cutting line on square

tip: the cutting is easier to do on a small little cutting mat, if you have one, because you can make the first cut, spin the whole mat around and make the second cut.

HST II cutting squares

HST II cut squares

HST II opening squares

HST II trimming squares

My Five Tools for Making Faster Quilts

My Five Tools for Faster Quilts.jpg

I want to give you some tips that I have found actually make my work faster.   I’m not going to give you advice that tells you to prewind bobbins or “organize your workspace”.   I love to do those things, too, but these tips are actually going to speed up your work.  Really.  This post is about tools that I have found to be actual time savers in my work and make a real difference. If you are new to quilting, maybe you don’t even know about these tools. There is no way I could be as efficient in my work without using these.  They really have been time savers and I want to share them with you and have included a couple of videos which might help you.

Use a Stripology Ruler
When you have a lot of strips to cut for a project a Stripology Ruler will make your work SO much faster.  This is one of the best things ever. With my Stripology ruler, I can cut multiple  strips quickly and without having to move my ruler.   This tool has cutting slots in it for your rotary cutter.  Let me show you:

I even use it to do my subcuts sometimes. Just lay your strip sets underneath and make multiple cuts without moving the ruler!  It’s pretty awesome:

Sripology Ruler Subcuts

A Stripology Ruler is a bit of an investment, but you will use it all the time to cut strips, once you try it!

Ditch the Pins
Are you still using pins?  If you haven’t discovered Wonder Clips, you don’t know what you’re missing. This could be the single tool that speeds up my work the most.  Placing pins into seams takes two motions – one to insert the pin down into the work and another to pop the pin back up to the top of the work.   Sounds like a miniscule motion, but when you add it up to the hundreds of times you insert a pin, it takes time.  If you use clips instead of pins, you save time – clipping takes one motion and that’s it.

Wonder Clips on Binding

They are also so much better on heavier seams than pins. No need to try to insert pins into heavier seams – that can also distort your accuracy – the Wonder Clips hold firmly and without shifting.  Clover even makes Jumbo sized Wonder Clips.

This little project would have been very hard to manage with pins.  But with Wonder Clips, they held the binding so easily and securely:

Wonder Clips BIB

Then when it comes time to sew your seams, I find removing clips is a little faster than removing pins – sometimes pins can stick a little (and clips don’t poke you!).

Use Dedicated Sized Grid Rulers
When cutting squares or trimming blocks, it is a time-saving investment to buy square grid rulers in sizes you use the most.  I have square grid rulers in just about every size from 2.5″ up to 6.5″. This range covers the size blocks I make the most. When subcutting squares or trimming blocks, I don’t have to worry about lining up grid lines and making sure my measurement is correct.  I just cut along the ruler and that’s it.  Saves SO much time.  Try trimming 100 blocks that need to be 5″ with a 6.5″ grid ruler.  It takes forever.  Try trimming 100 blocks that need to be 5″ with a 5″ ruler.  You’ll be finished in no time.

Dedicated Grid Ruler
Making 5.5″ blocks with a 5.5″ ruler is much faster

Use Bloc-Loc rulers. 
If you are a fan of Half Square Triangles like me, Bloc Loc rulers  will be a revelation to you. They also make rulers for Half Square Rectangles and Flying Geese.   I like to make my blocks oversized and then trim them to size.  Why are these so great?  They have a groove cut into the ruler from one corner to the opposite corner that hugs your seam line and allows you to trim HSTs (or whatever) into perfect, uniform blocks without any slipping.  Let me show you how this works and how fast it is:

It really does make a huge difference in your time trimming.

Get a Quarter Inch Presser Foot
Most seams in quilting are a quarter inch. You can certainly line up a quarter inch with your presser foot and just keep your stitching line on that point, but a dedicated quarter inch presser foot makes your sewing faster.  It has a guide on the side, to keep your fabric on the right line.  It really does speed up the work and I use mine all the time.

Quarter Inch Presser Foot III


I hope this post is helpful to you!  If you try even one or two of these tools and it speeds up your work time, it will have been worth it.

Thanks for dropping by,
Elaine

Six Tips for Machine Quilting

Six Tips for Machine Quilting

Are you new to machine quilting?  You may have made tied quilts for a while and now want to explore machine quilting.  I’ve seen a lot of advice given for how to machine quilt but I think most of it lacks a couple of points that are important for successful machine quilting.  If you are having some issues or maybe just don’t know what needle to use, these can help.

grey goose stitch detail

I’m going to give you six tips for straight line machine quilting.  However, if you are especially having problems with puckering or tucking on the backs of your quilts or skipped stitches on the tops of your quilts, there are easy solutions to these problems in the following tips.

  1.  Use a Walking Foot.  If you’re trying to machine quilt with a regular presser foot, you’re going to have problems.  Invest in a Walking Foot (sometimes called an Even Feed Foot) if you don’t have one.  A walking foot will make your fabric feed evenly on the top and the bottom, not just on the bottom like a regular presser foot will.  There will be no bunching up of the fabric when you use a walking foot. Each manufacturer has a walking foot to fit their machines.
  2.  Use a Quilting Needle.  This makes a difference. Don’t use a Universal Needle, which has a slightly rounded point, for machine quilting.  Although it can work just fine and you may not have any trouble, quilting needles are better for machine quilting.   Quilting Needles are made for a reason!  They have slightly heavier shafts and a sharper point to get through thick layers of batting and intersecting seams. If you are having skipped stitches sometimes, a Quilting Needle can eliminate this problem.  It can also help a lot with any tucking or puckering on the back of your quilt.
  3.  Use a Heavier Needle.  I piece with an 11 needle and I switch to a 14  when I begin my machine quilting.  Makes a BIG difference! Many people do not switch up a size when they quilt.  Your quilting will be easier if you use a heavier needle.  I like to buy these packs of Quilting needles by Schmetz, which contain the two sizes I use most often, 11 and 14.
  4. Decrease Your Presser Foot Pressure.  If your machine has this adjustment, use it.  My Janome is set to 5 for regular sewing, but I switch it down to 3 when I start quilting.  It makes it easier for the quilt sandwich to move through the machine. This can also help with any tucking or puckering on the back of your quilt.
  5.  Use Quilting Gloves.  These gloves are grippy and will be a revelation to you if you’ve been quilting without them.  They enable you to really firmly hold on to the quilt as you move it through the machine.  Plus I believe they help prevent any oils and dirt from your hands in getting on the quilt as you are quilting it.  These are the kind I use but there are many different manufacturers.
  6. Change Your Needles Often.  It’s never good to let your needle get dull.  This can cause problems – like skipped stitches – and needles are cheap.  Some people change their needles every time they begin a new quilt.

sewing tools.jpg

These are tips that I feel will help you immensely, especially if you are wondering why you might be getting tucks on the back of your quilt or skipped stitches.  Give them a try on your next quilting project.

SOME HELPFUL LINKS:

Machine Needle Guide by Schmetz

sewing needles

Ever have a needle laying around and you don’t know what it is?  Stop guessing!
How to Identity your Schmetz Needle by the Color Band

Have a great week!
Elaine


Half Square Triangle Tutorial – Method I (Traditional)

HST Tutorial

If there’s one block in all of quilting that you should know how to make, it’s the Half Square Triangle (HST).  To me, it’s the most versatile block in quilting and you can do endless things with it in design.  With this one block, I can make a wide variety of quilts. In this post, I’m going to show you the Traditional Method of making them, two at a time.  In my next post, I will show you a way of making them four at a time.

This technique is simple and easy to learn and is actually very quick after you get an “assembly line” system going.  Two squares of fabric are cut, placed right sides together (RST), sewn from corner to corner and cut apart.  You end up with two HST blocks.

hsts in progress

To figure out what size to cut your squares of fabric to sew these up with, you need to determine what size you want your working (finished) blocks to be (before sewing them into your quilt). When you determine what size you want your working blocks, just add one inch.   Lots of people recommend that you add 7/8″ to the desired size, but I like to add one whole inch. I want a little bit of extra fabric in the end so that I can square up my blocks nicely and it makes the calculations easier.  So if you want a finished working block size of 6.5″, you need to cut squares of fabric that are 7.5″.  (Remember that after you sew your 6.5″ finished blocks into your quilt, you will lose the half inch in the seams and they will be 6″ blocks in your finished quilt.)
With this method, you don’t need any chart to figure out how big to cut your squares.

Desired Finished Block Size + one inch = how big to cut your squares

This method makes two HSTs at a time.

HST I 1 HST I 2HST I 3 HST I 4 HST I 5 HST I 6HST I 7HST I 8HST I 9HST I 10HST I 11HST I 12HST I 13HST I 14HST I 15HST I 16HST I 17

Machine Binding Tutorial

MachineBindingTutorial1

Having a beautiful mitered binding on a quilt is the perfect finishing touch and the part I love the most. There are different ways to produce a binding like this  – I prefer to stitch my binding down on the front, wrap it around to the back and stitch in the ditch on the front, so the stitches are hidden and the sewing line only shows on the back.  It is just personal preference and you will have to decide how you like your binding to look.

I like to make my own binding, choosing a fabric that complements the quilt and sets it off nicely. A stripey binding is very popular with quilters and adds a little zing to the edges.  Any small repeat is nice, too.  You can also use a solid or even use scraps and make a scrappy binding.

You will be cutting strips cross-grain to make this kind of binding and then sewing them together to make one long continuous strip.  The tutorial shows you how to join the strips together on a diagonal, so the seams lay a little nicer.

This binding is not difficult to do, but requires slow stitching for precision.  I recommend using Wonder Clips from Clover instead of pins.  They are faster, easier to use and more precise.  They will hold your binding better than pins and will not shift as you clip and unclip them.

Calculating Yardage:
There are several ways to calculate how much yardage/strips you will need to make your binding.  Different people use different formulas, some of which are way too generous and I think waste a lot of fabric.  I personally love to use this app by Robert Kaufman that is super easy.  I downloaded it from the iTunes store and I highly recommend it.

If you don’t want to use a phone app, here is a web site that functions very close to the Robert Kaufman app and is very easy to calculate your binding: lily street quilts.  Just plug in the dimensions of your quilt and scroll down to the bottom of the page and plug in your binding width desired.  Click “calculate” and it will give you the yardage and # of strips you need.

If you don’t want to use an app like this, here is a good formula to calculate the strips.  You simply add up the sides of the quilt (width, width, length, length), add a few extra inches for the corners (about 10) and the tail ends and divide by 40, which is a safe usable area of fabric from a common 44/45″ width piece of fabric:

W+W+L+L+10″ ÷ 40 = how many strips you will need (always round up)


STEP-BY-STEP PHOTO TUTORIAL:
Make your binding by cutting strips from selvage to selvage:

bindingpage1

bindingpage2

bindingpage3

bindingpage4

bindingpage5

bindingpage6

bindingpage7

bindingpage8

bindingpage9

bindingpage13

bindingpage11

bindingpage12

bindingpage14new

bindingpage15


bindingpage16


bindingpage17


bindingpage18


bindingpage19


bindingpage20


bindingpage21


bindingpage23


bindingpage24


bindingpage25


bindingpage26


bindingpage27


bindingpage28


bindingpage29

Save

Save

Save