Category Archives: finished quilts

Sugar Sack Quilt, Cuddle Blankie & Pillow

16-Patch Sugar Sack Pillow, Quilt, Blankie

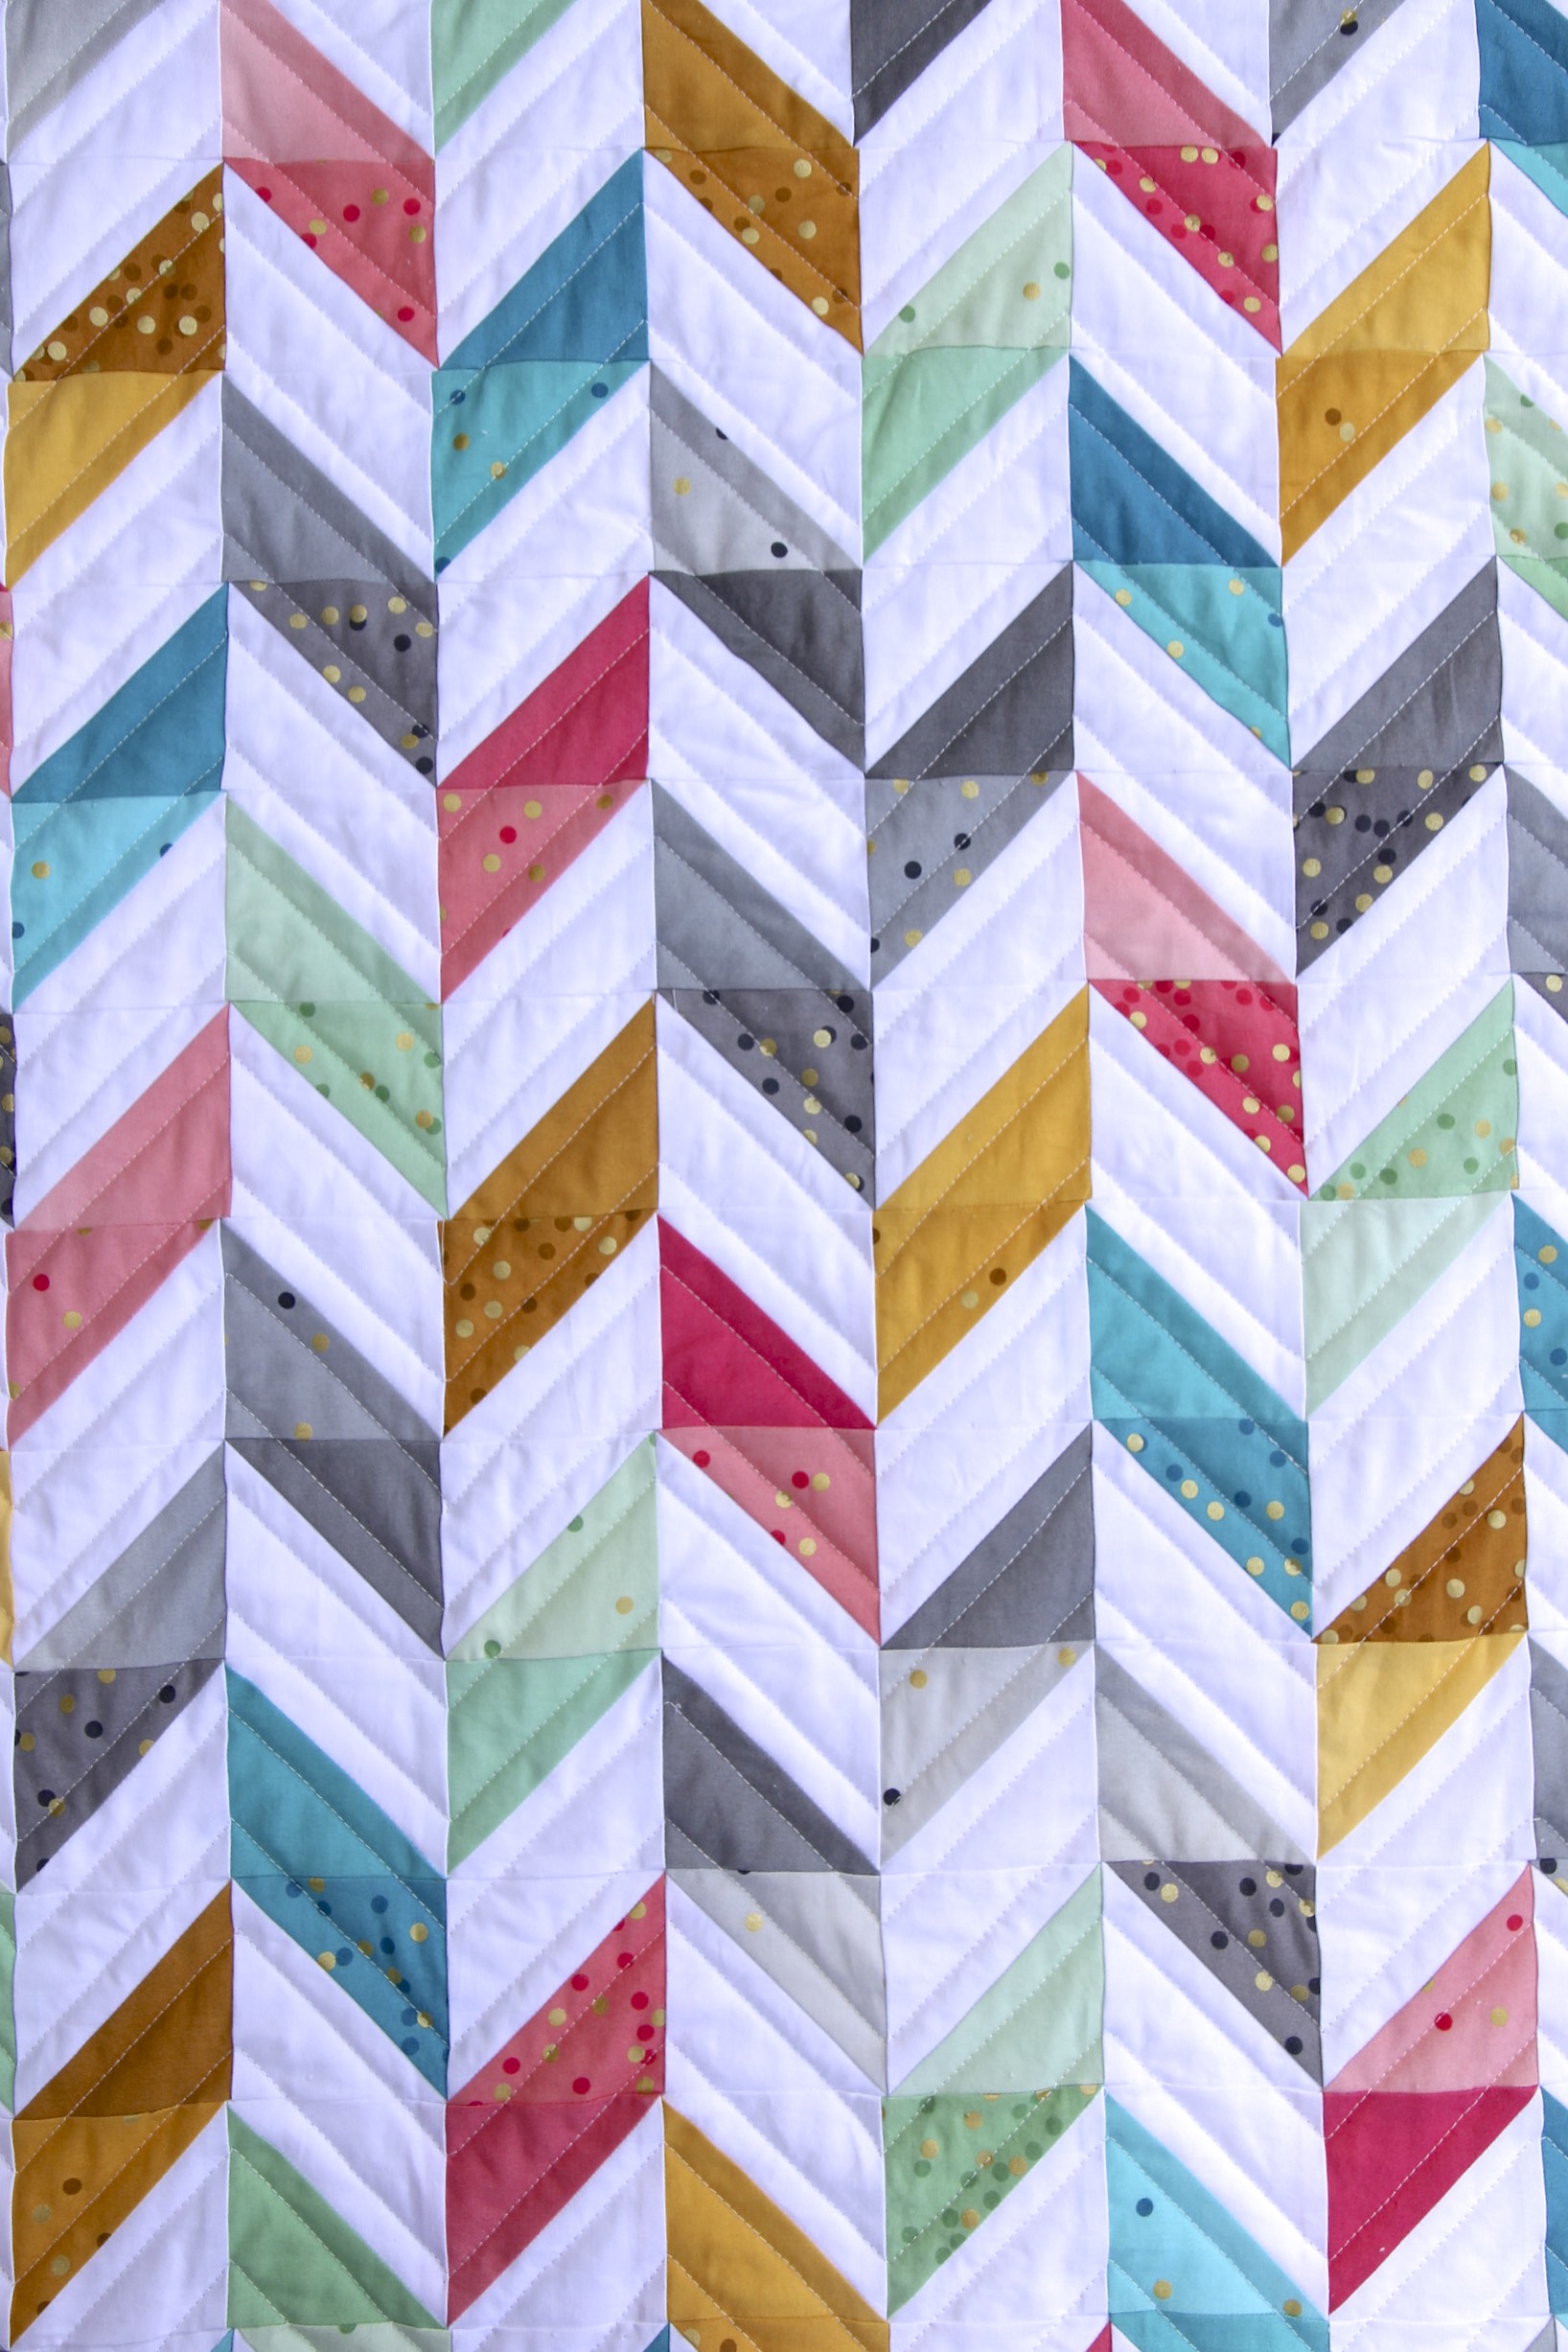
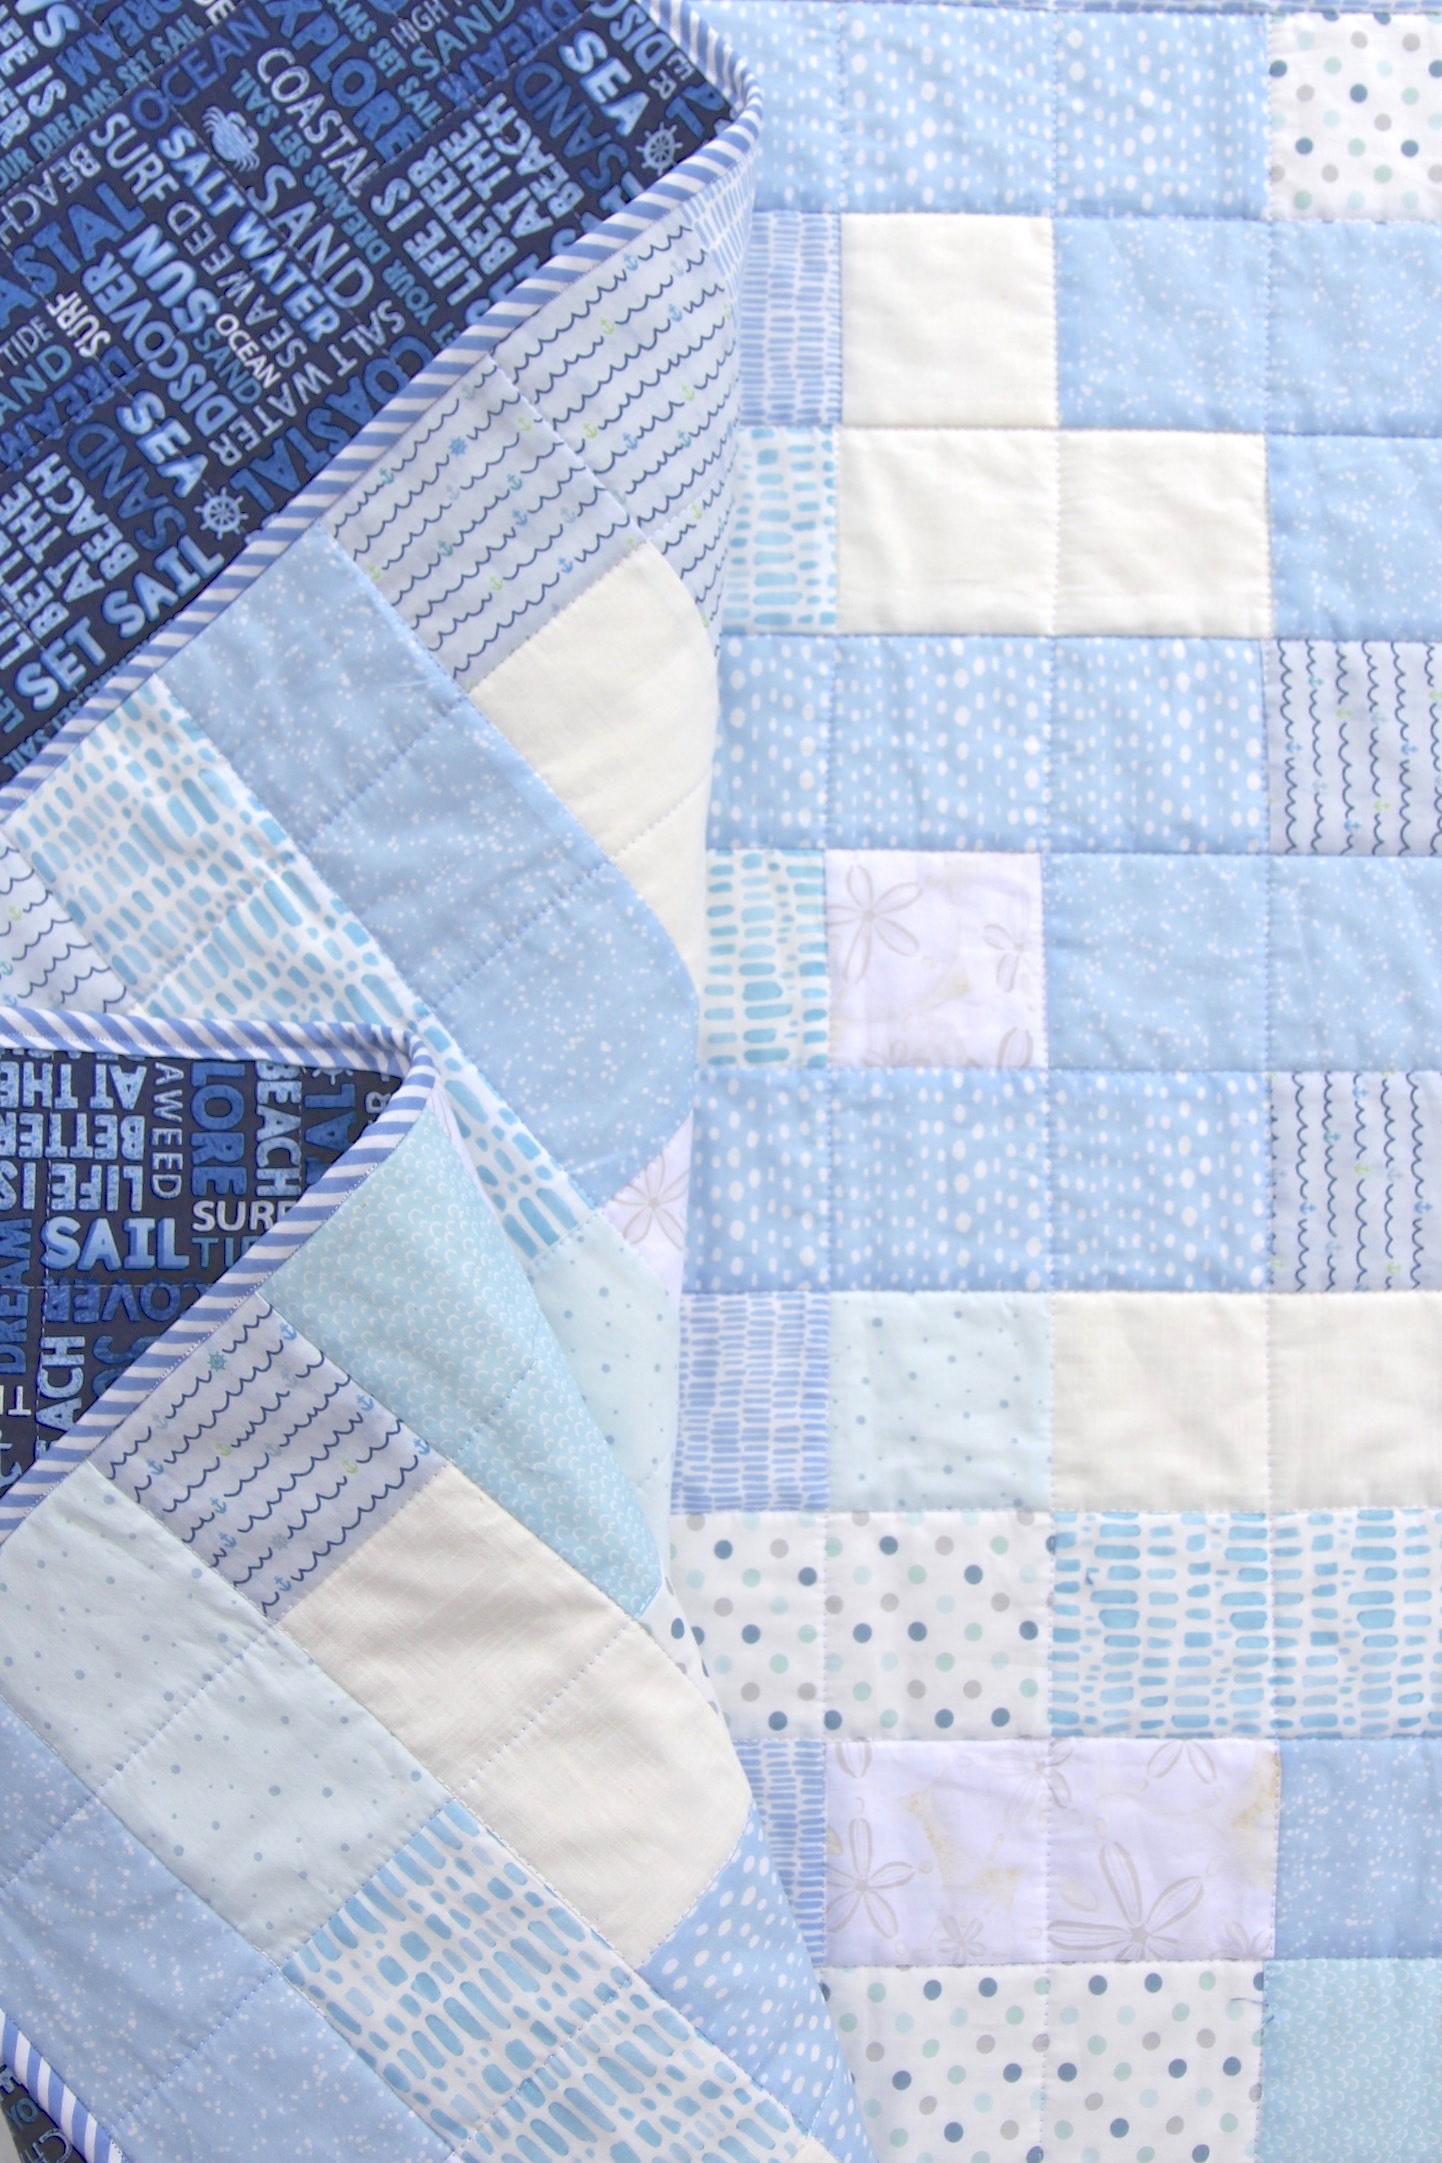
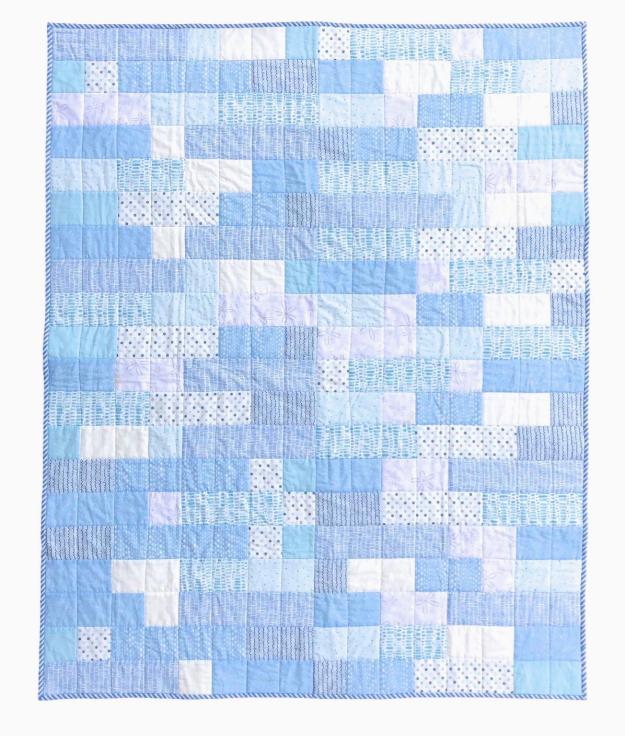
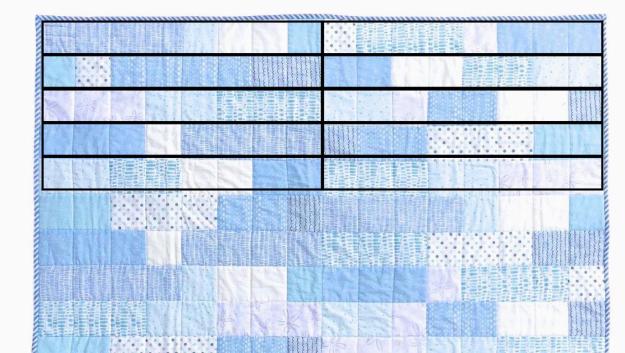
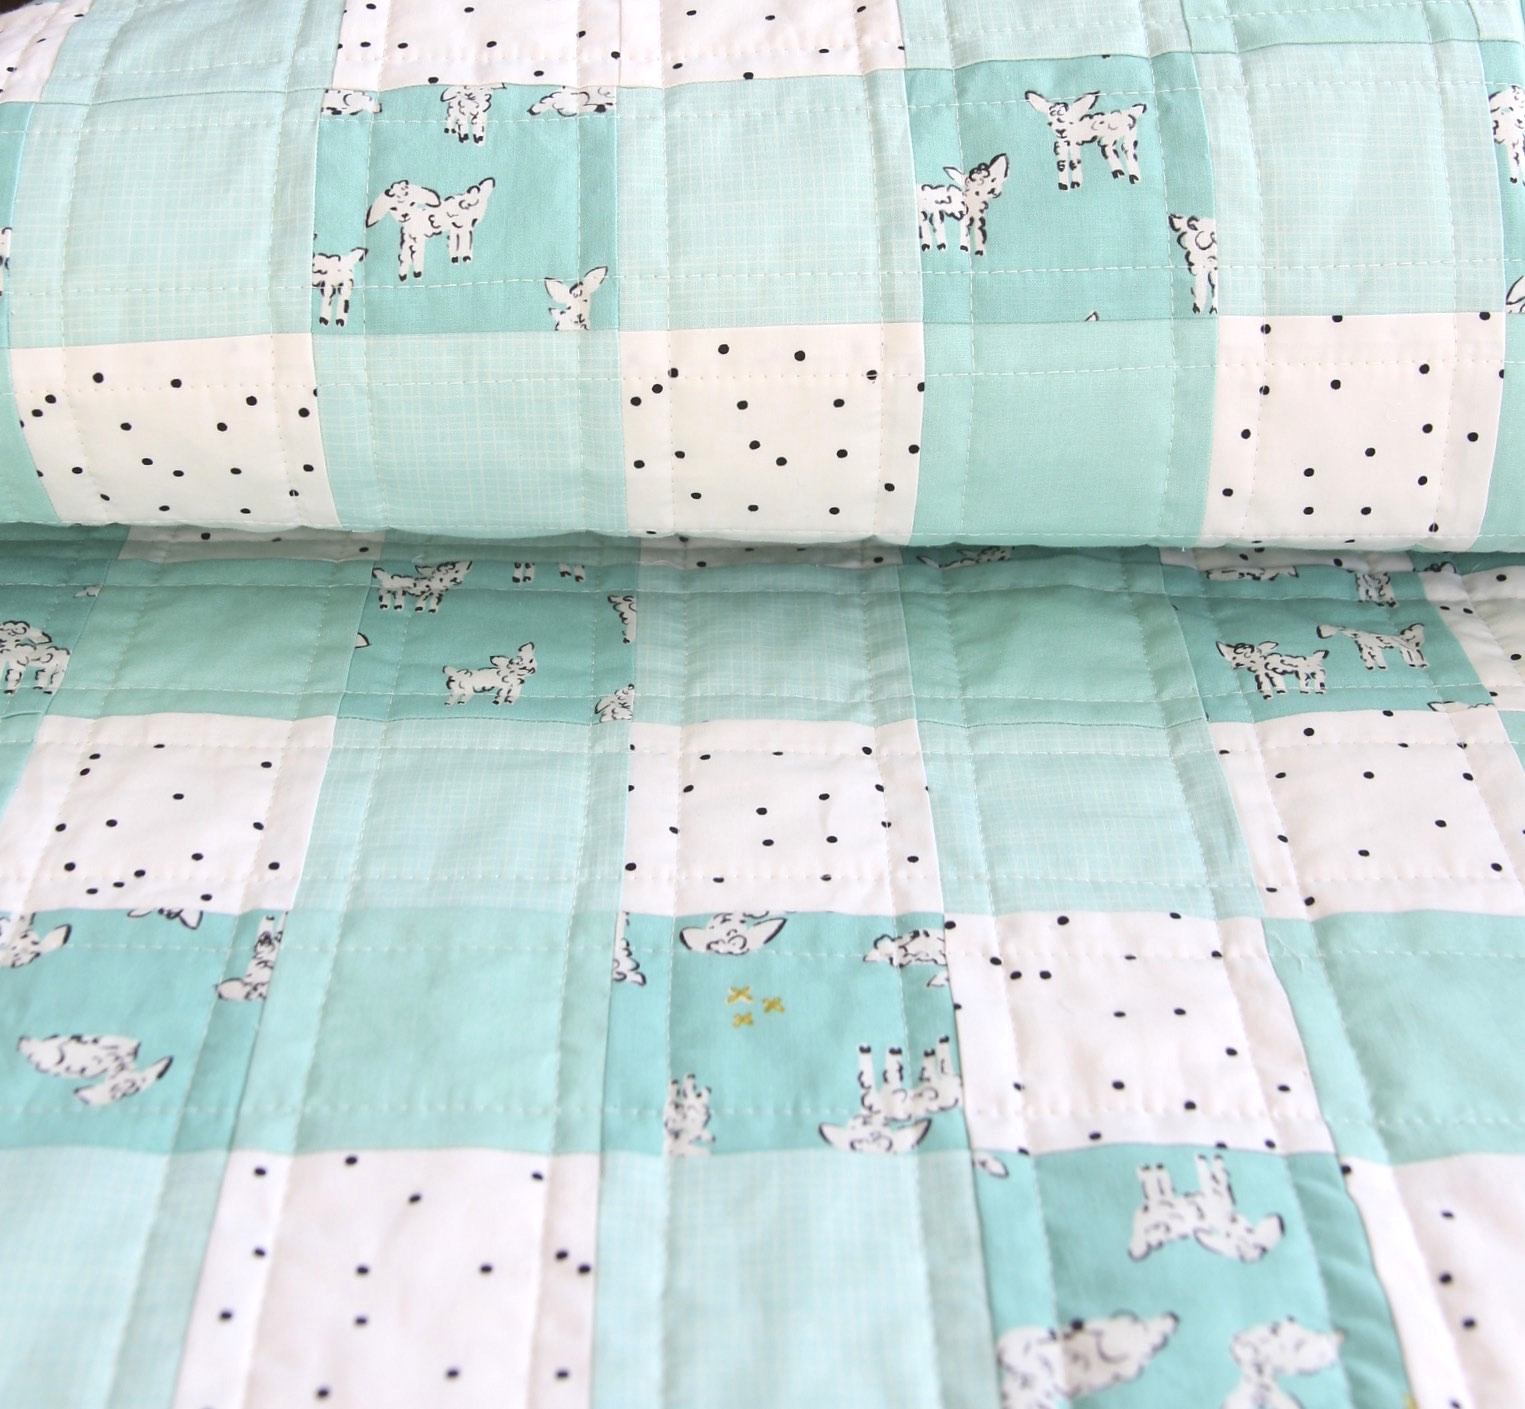
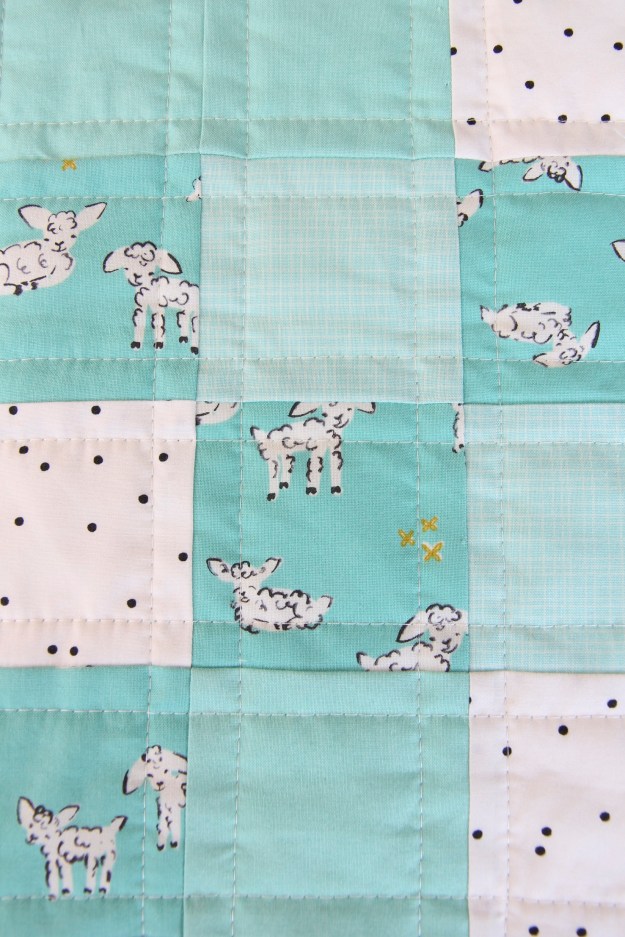
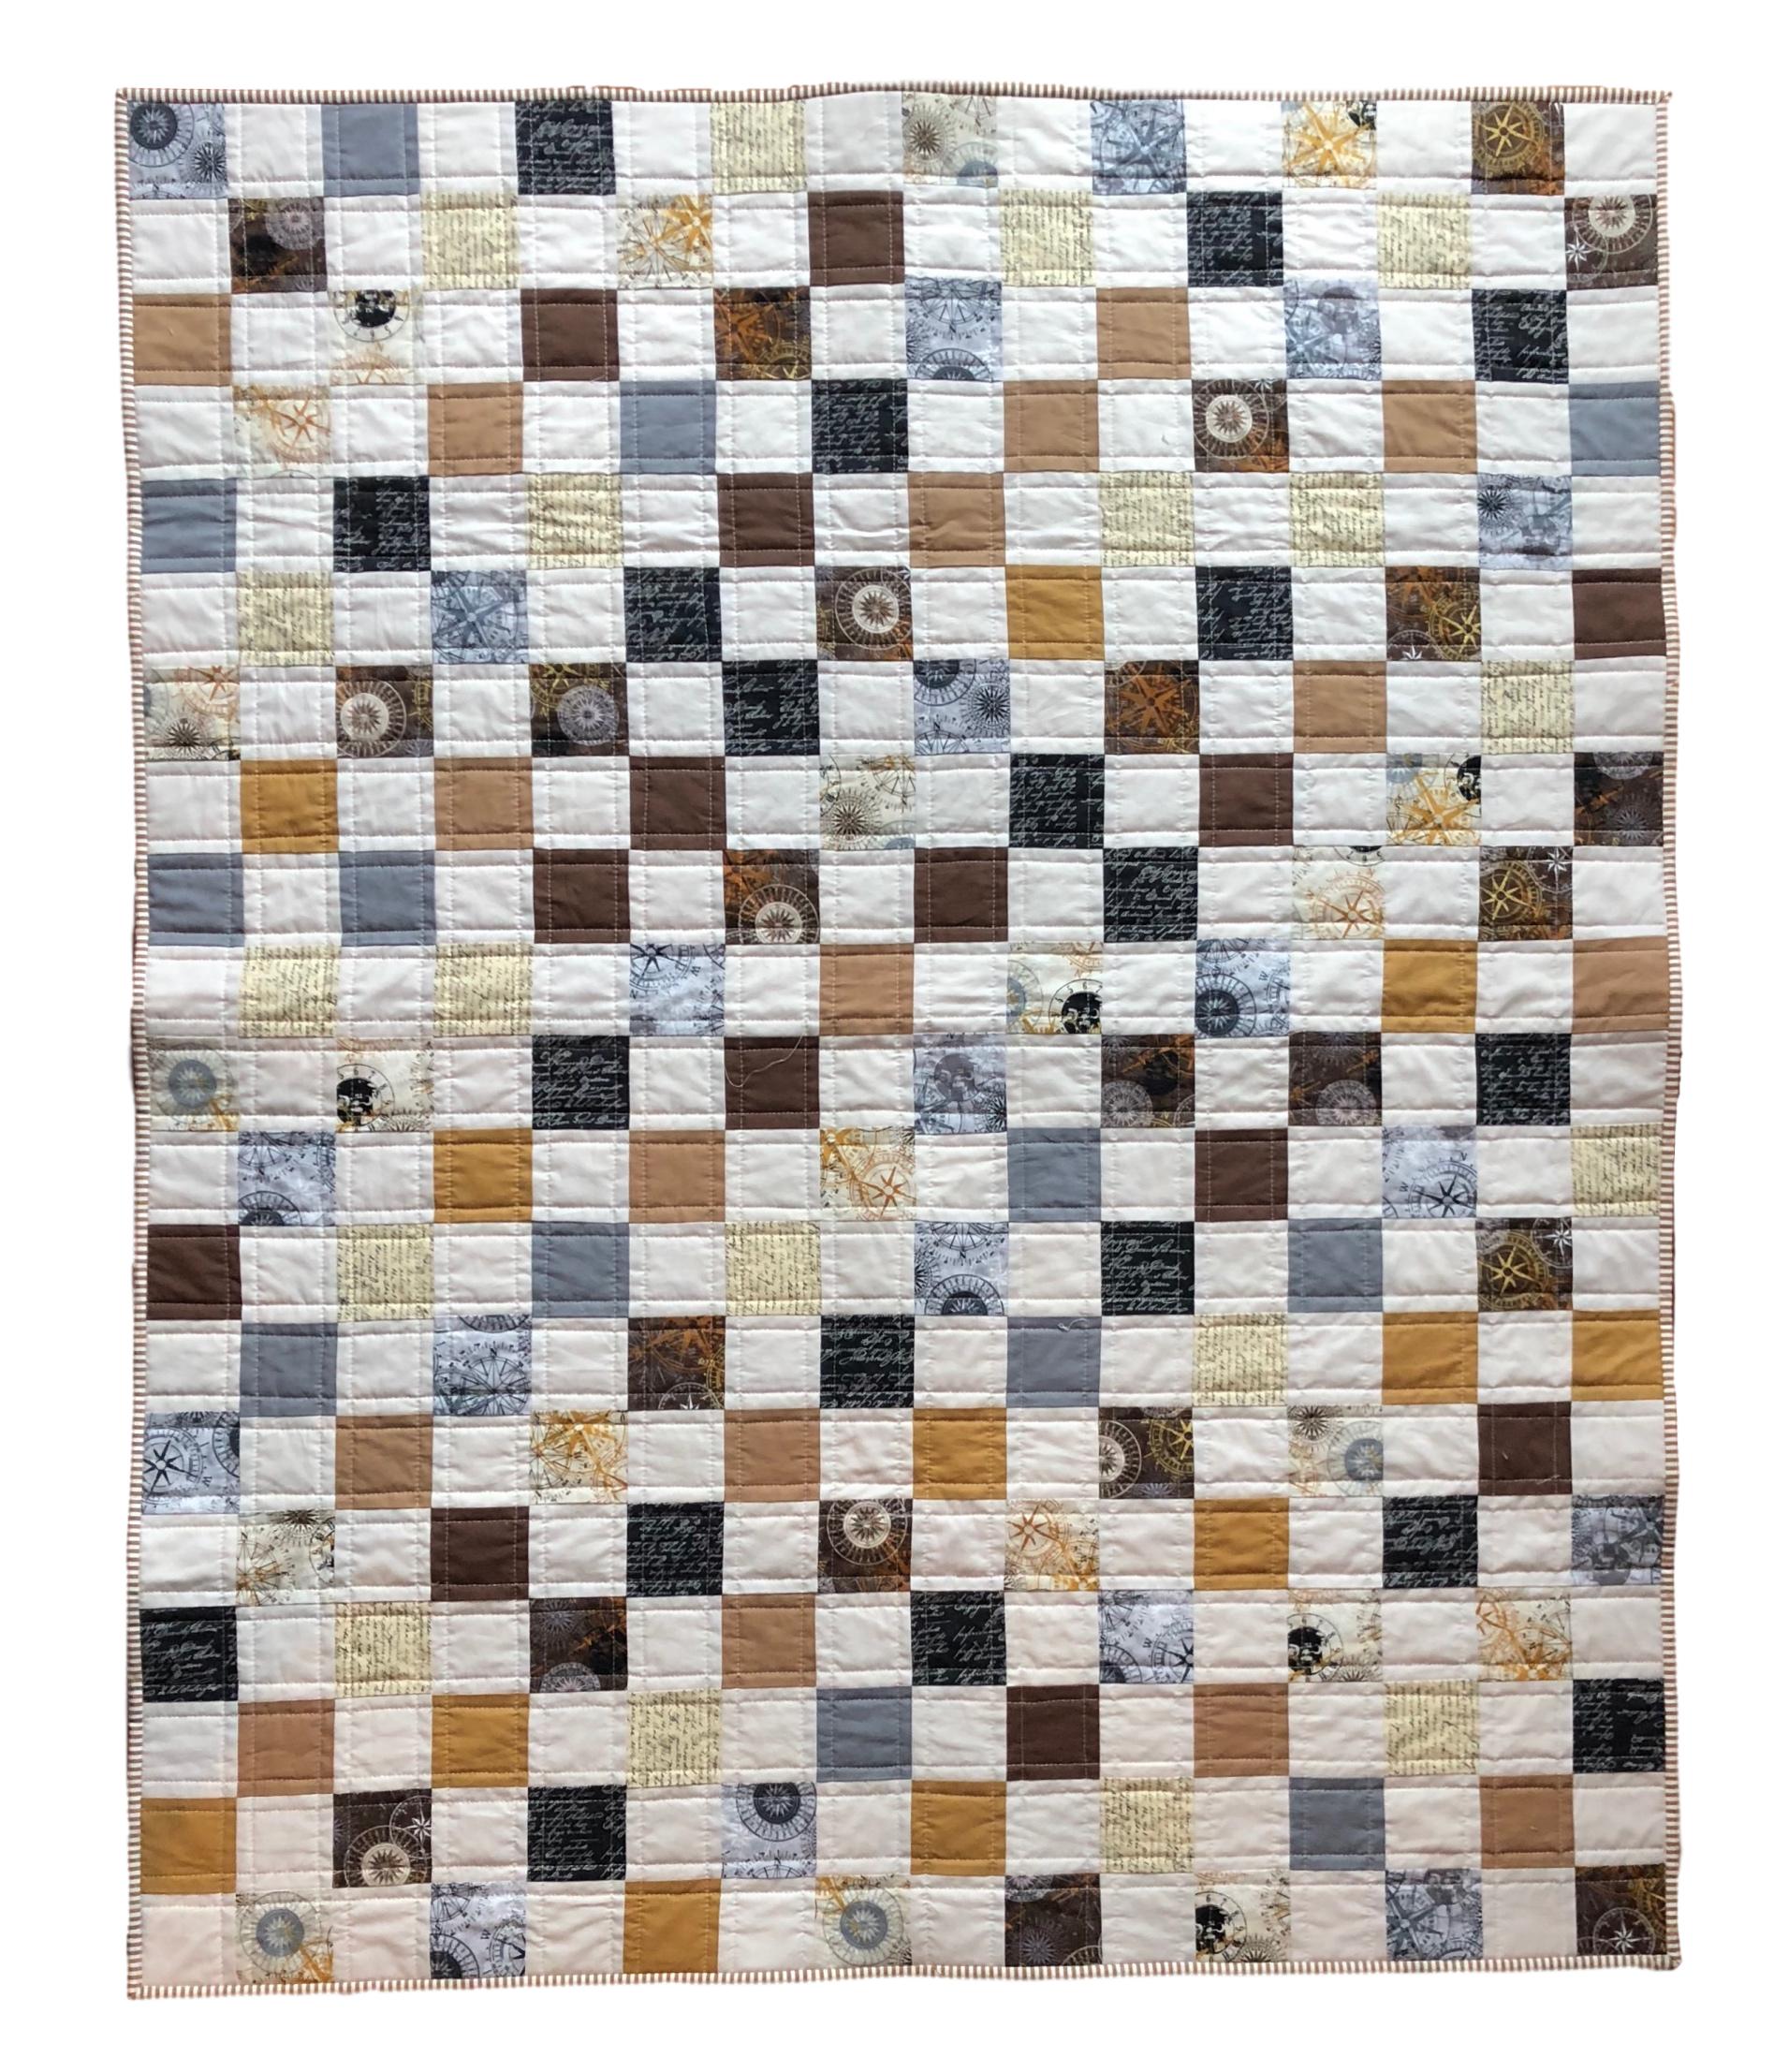
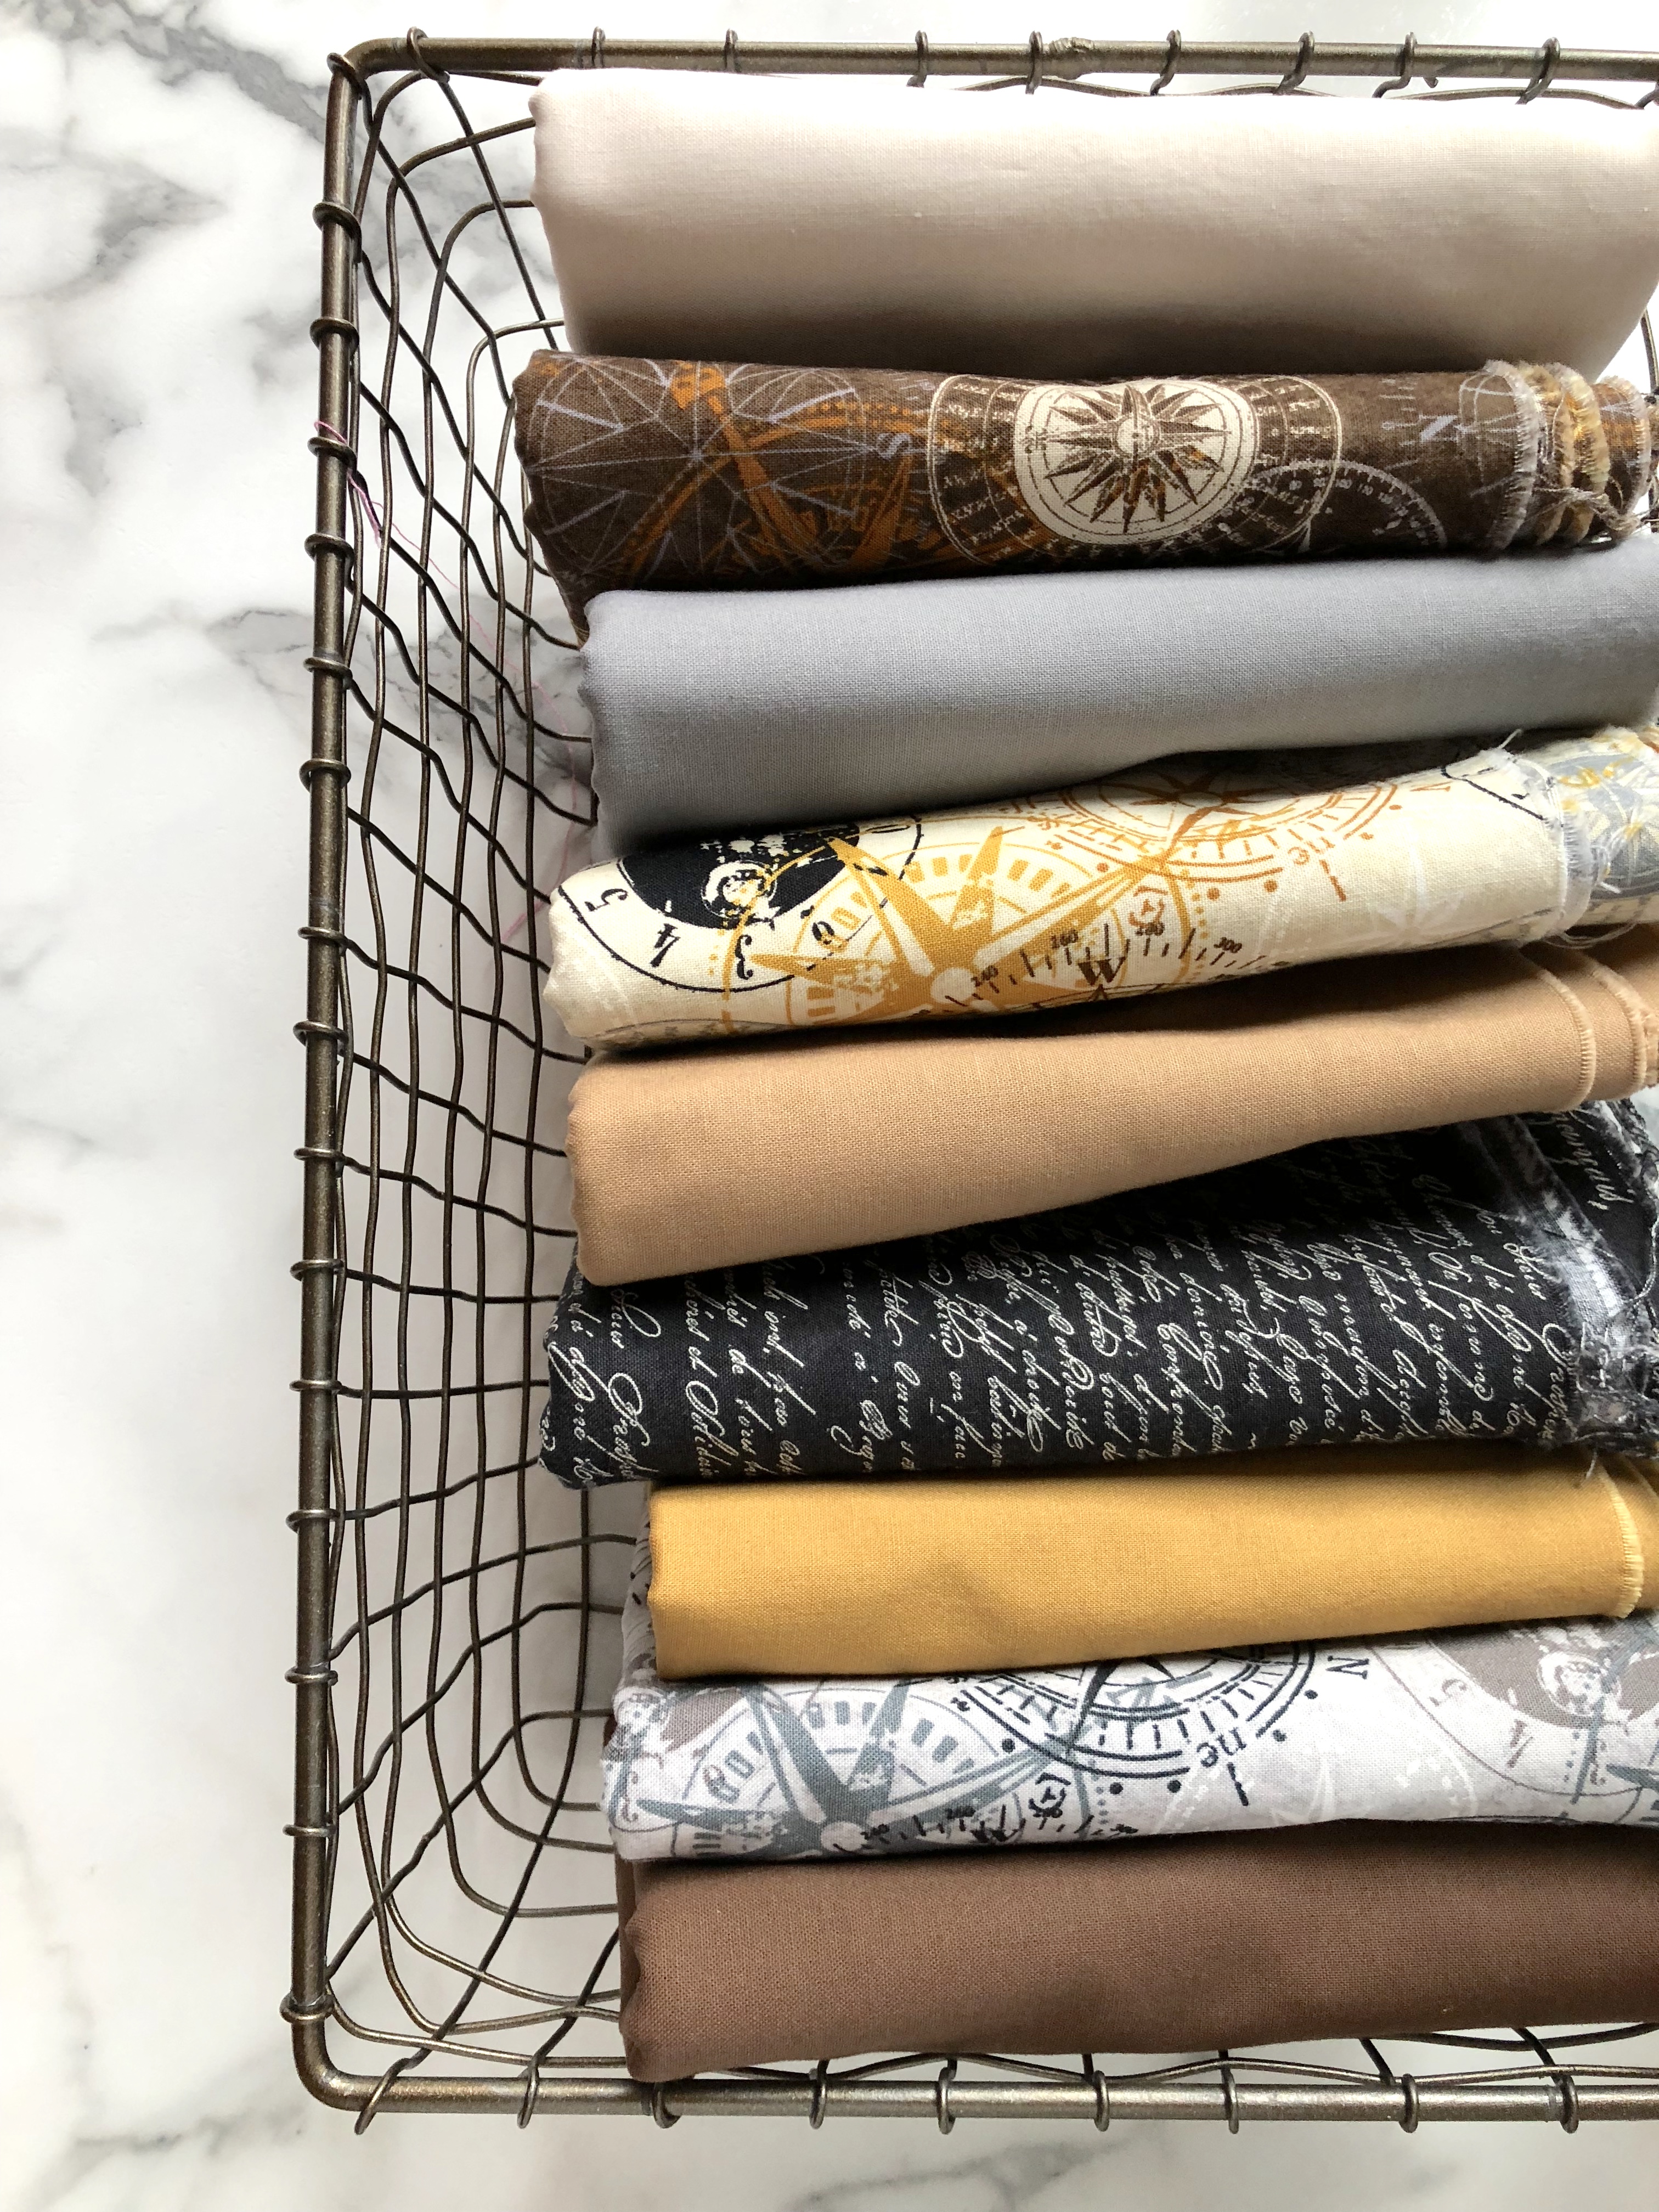
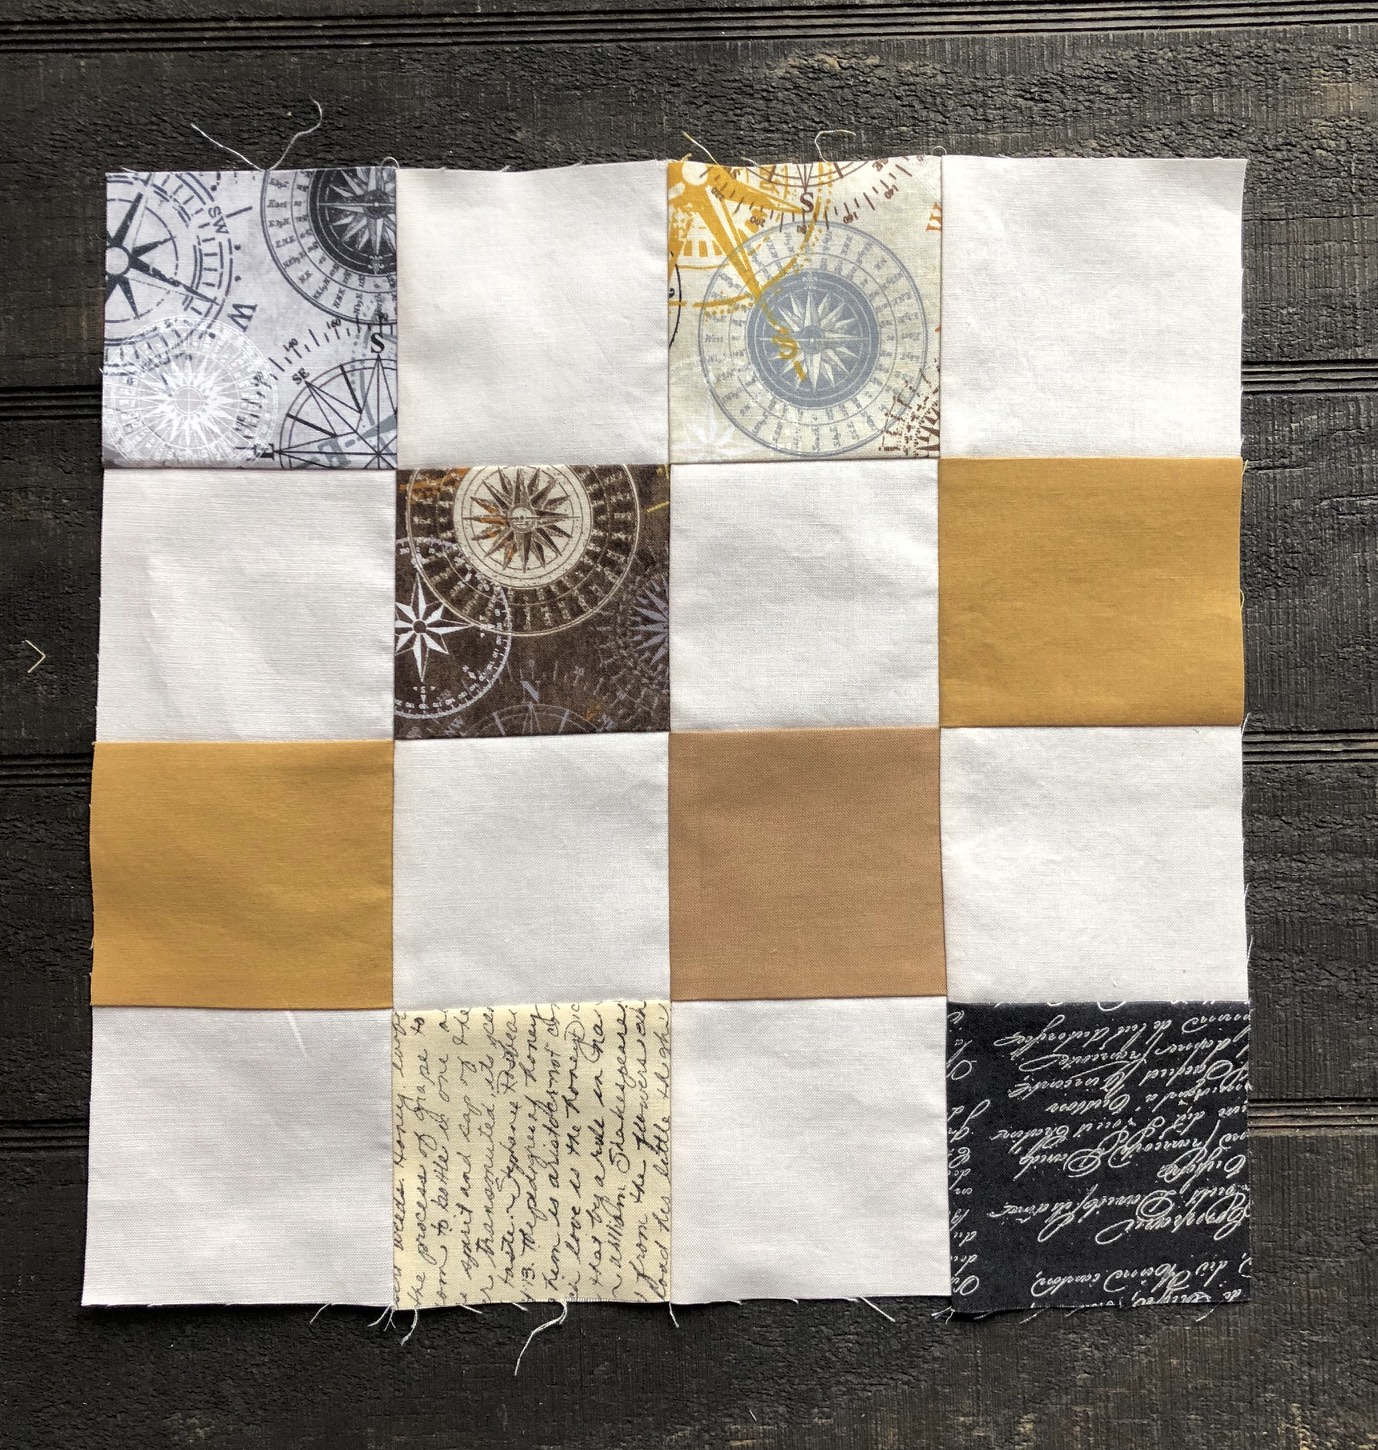
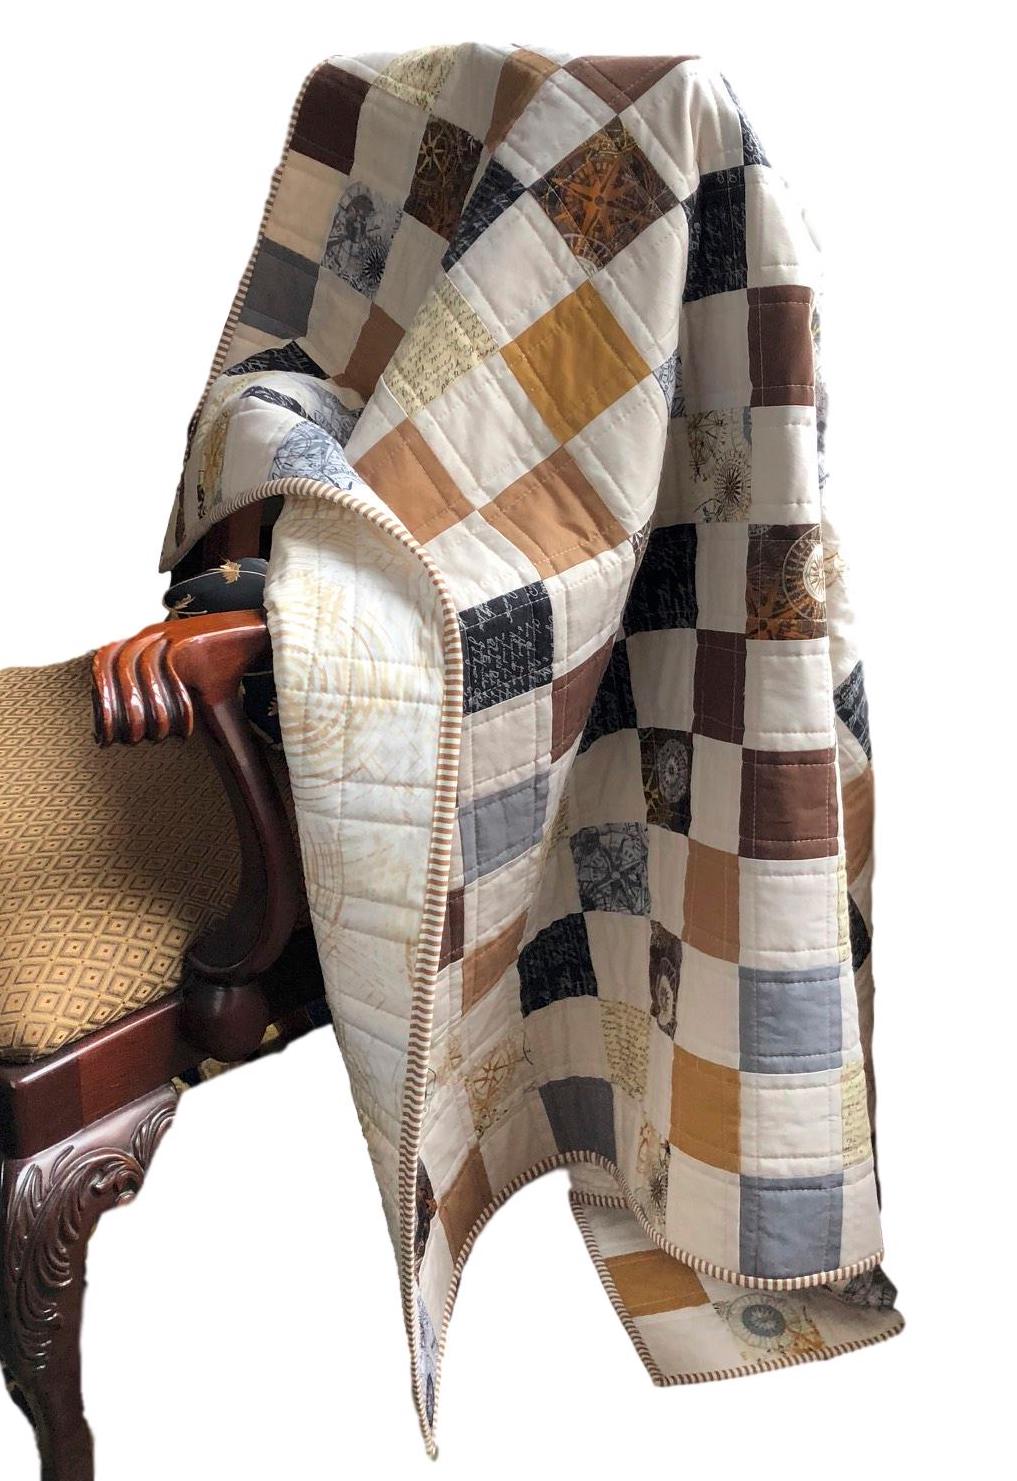
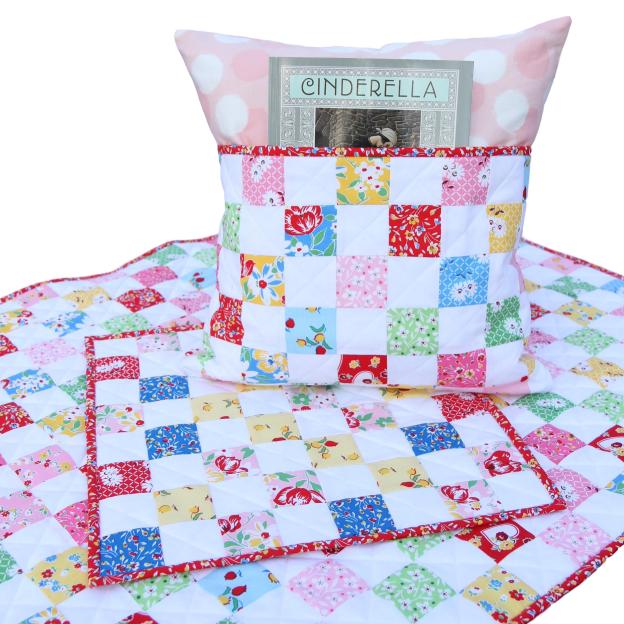
What fun I’ve been having sewing with these cute 1930’s reproductions fabrics from Windham called “Sugar Sack II”.  I love these old fashioned fabrics so much and I think they make cute children’s items.  I sewed up a 16-patch checkerboard quilt with them and loved it so much I sewed a matching Cuddle Blankie and a Reading Pillow.  (Patterns for all these items are going to be released after the holidays!)

Sugar Sack Blankie With Toy

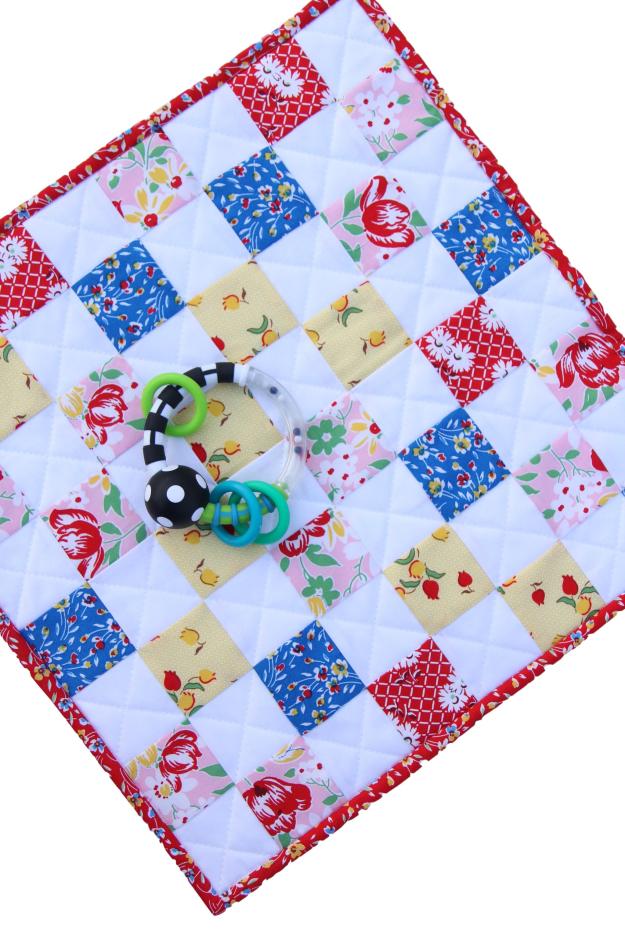
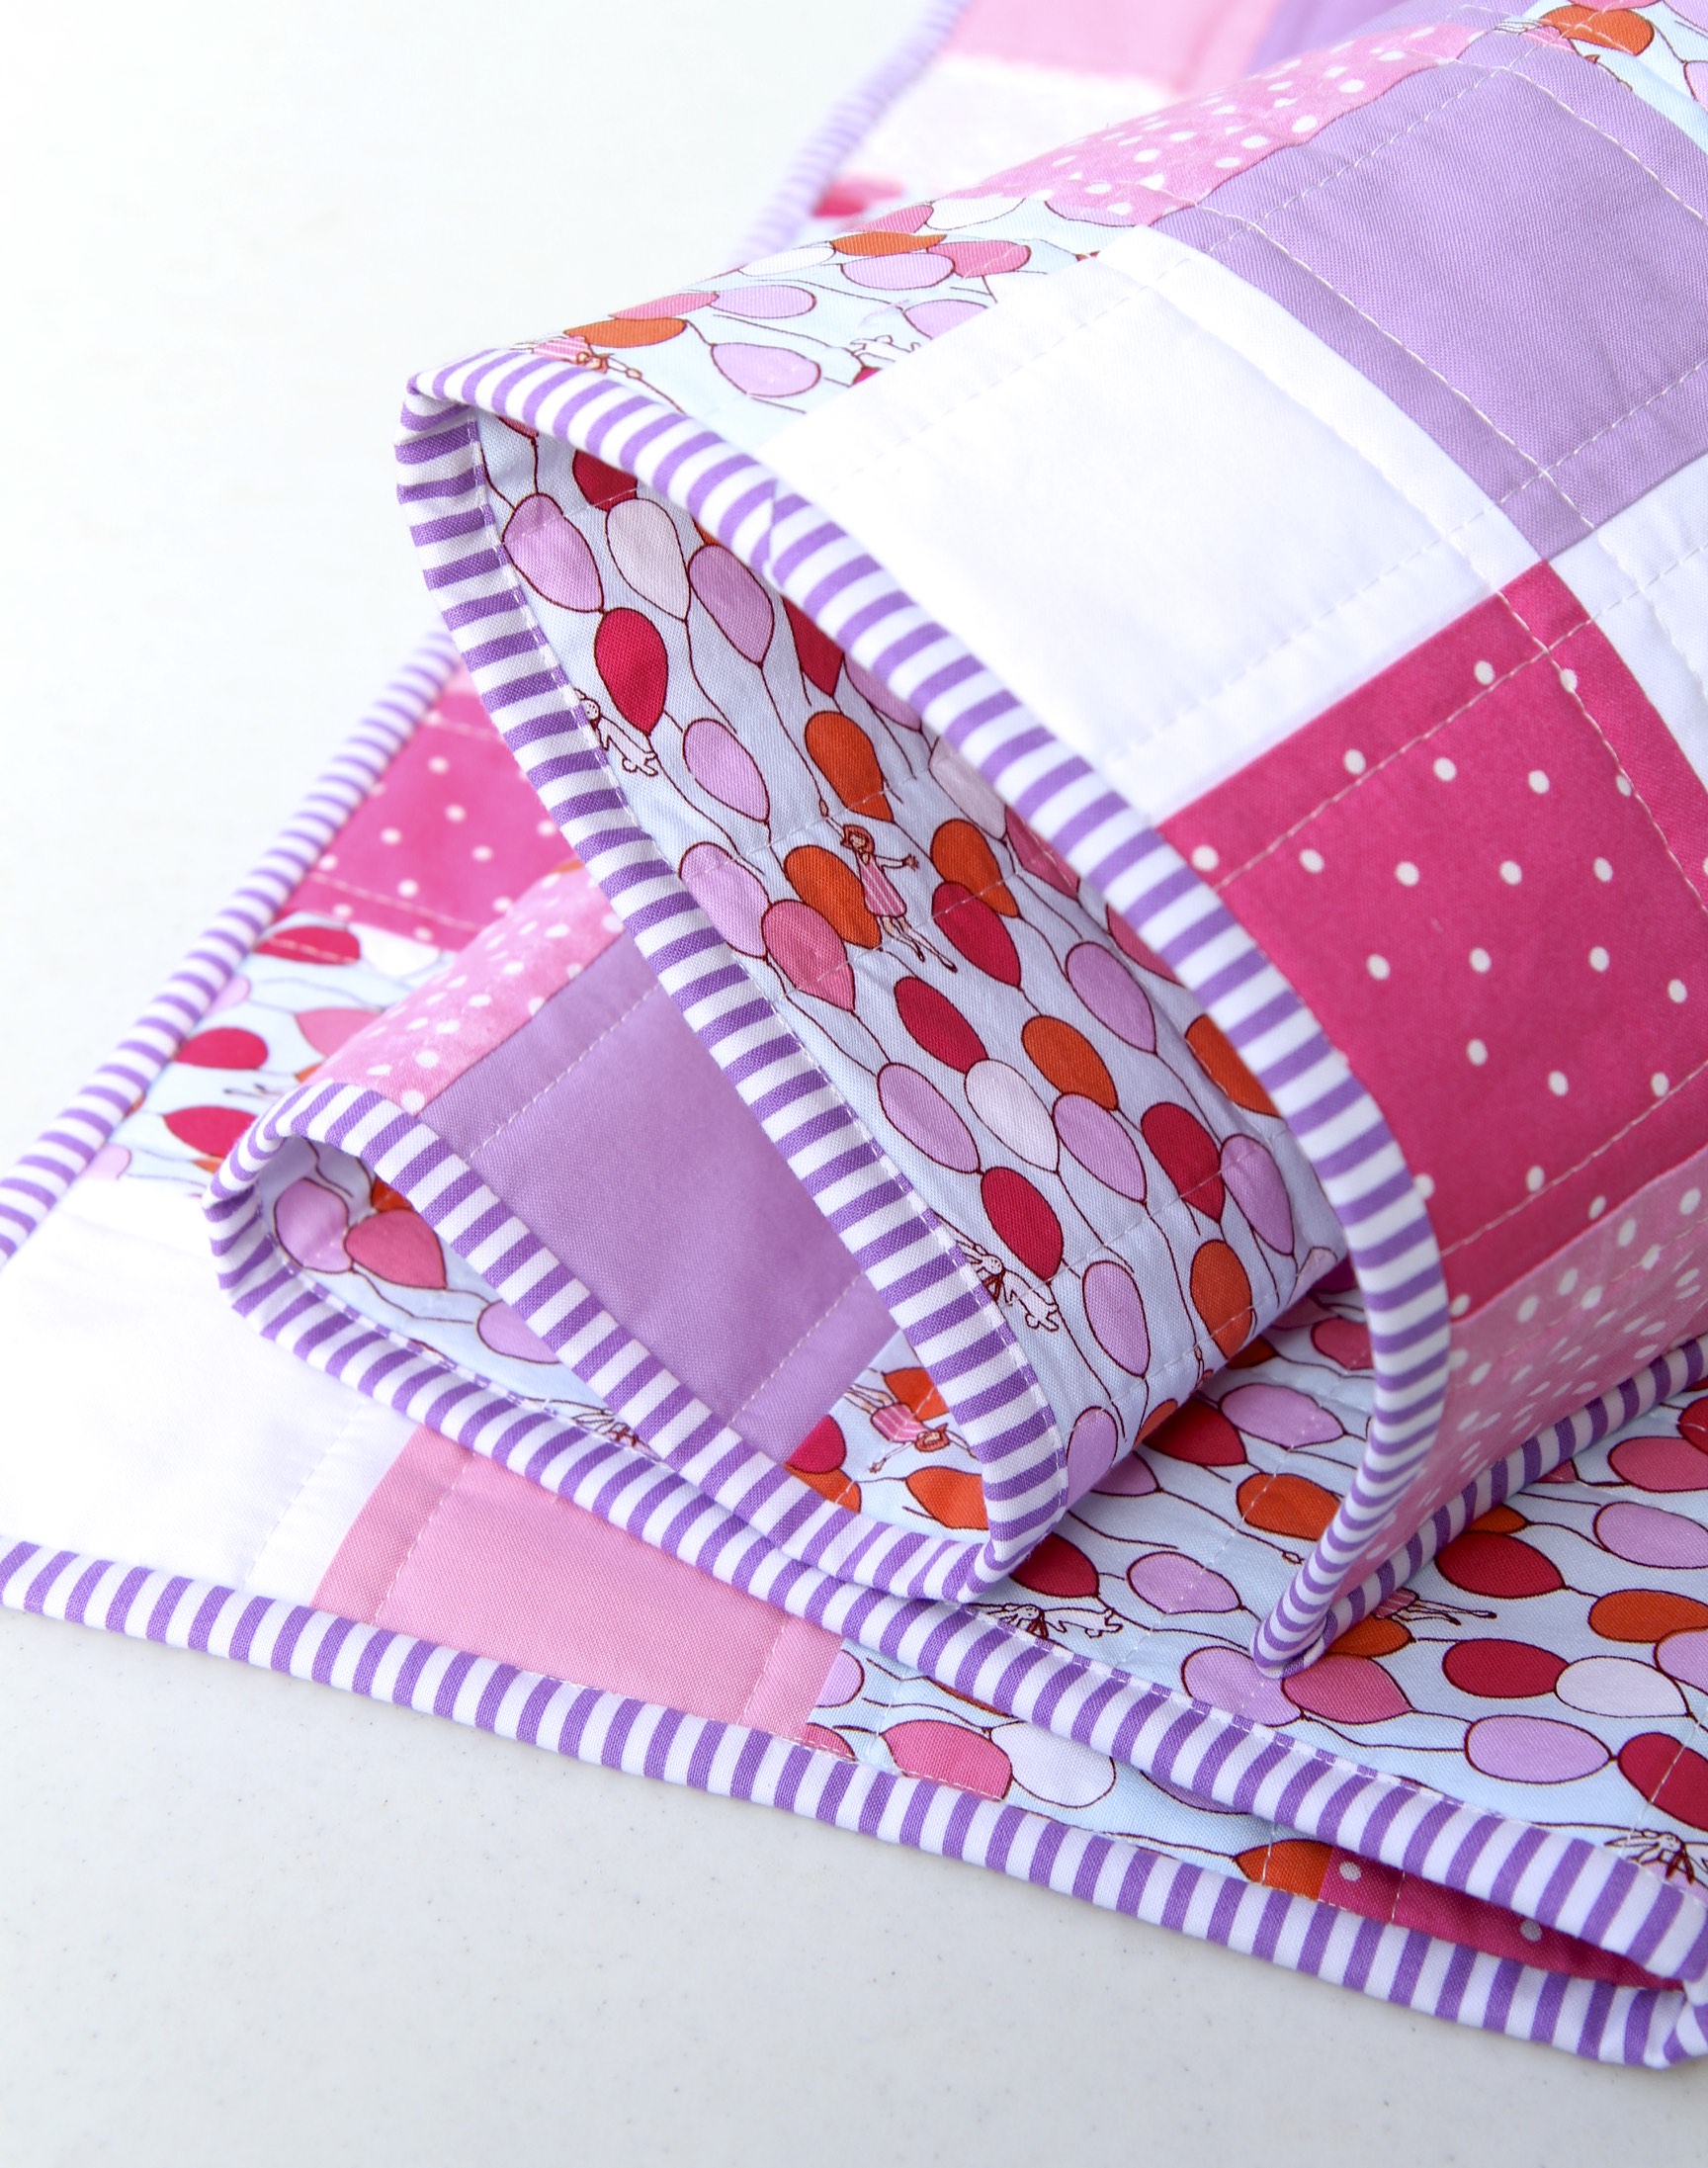
What’s a Cuddle Blankie?  It’s a much smaller version of the quilt that a baby/toddler can clutch and cuddle with – which is what they love to do.  This one is 16″ x 16″.   And it’s so easy to whip one up to match the baby blanket.

Sugar Sack PIllow with quilt and Hippo

The Reading Pillow is a fun thing to give as a gift for a child – it can hold a couple of books or small toys and is nice for children to curl up with, along with their quilt.  I have gotten so many requests for a pattern for this item, that I am excited about putting it in the shop after Christmas!

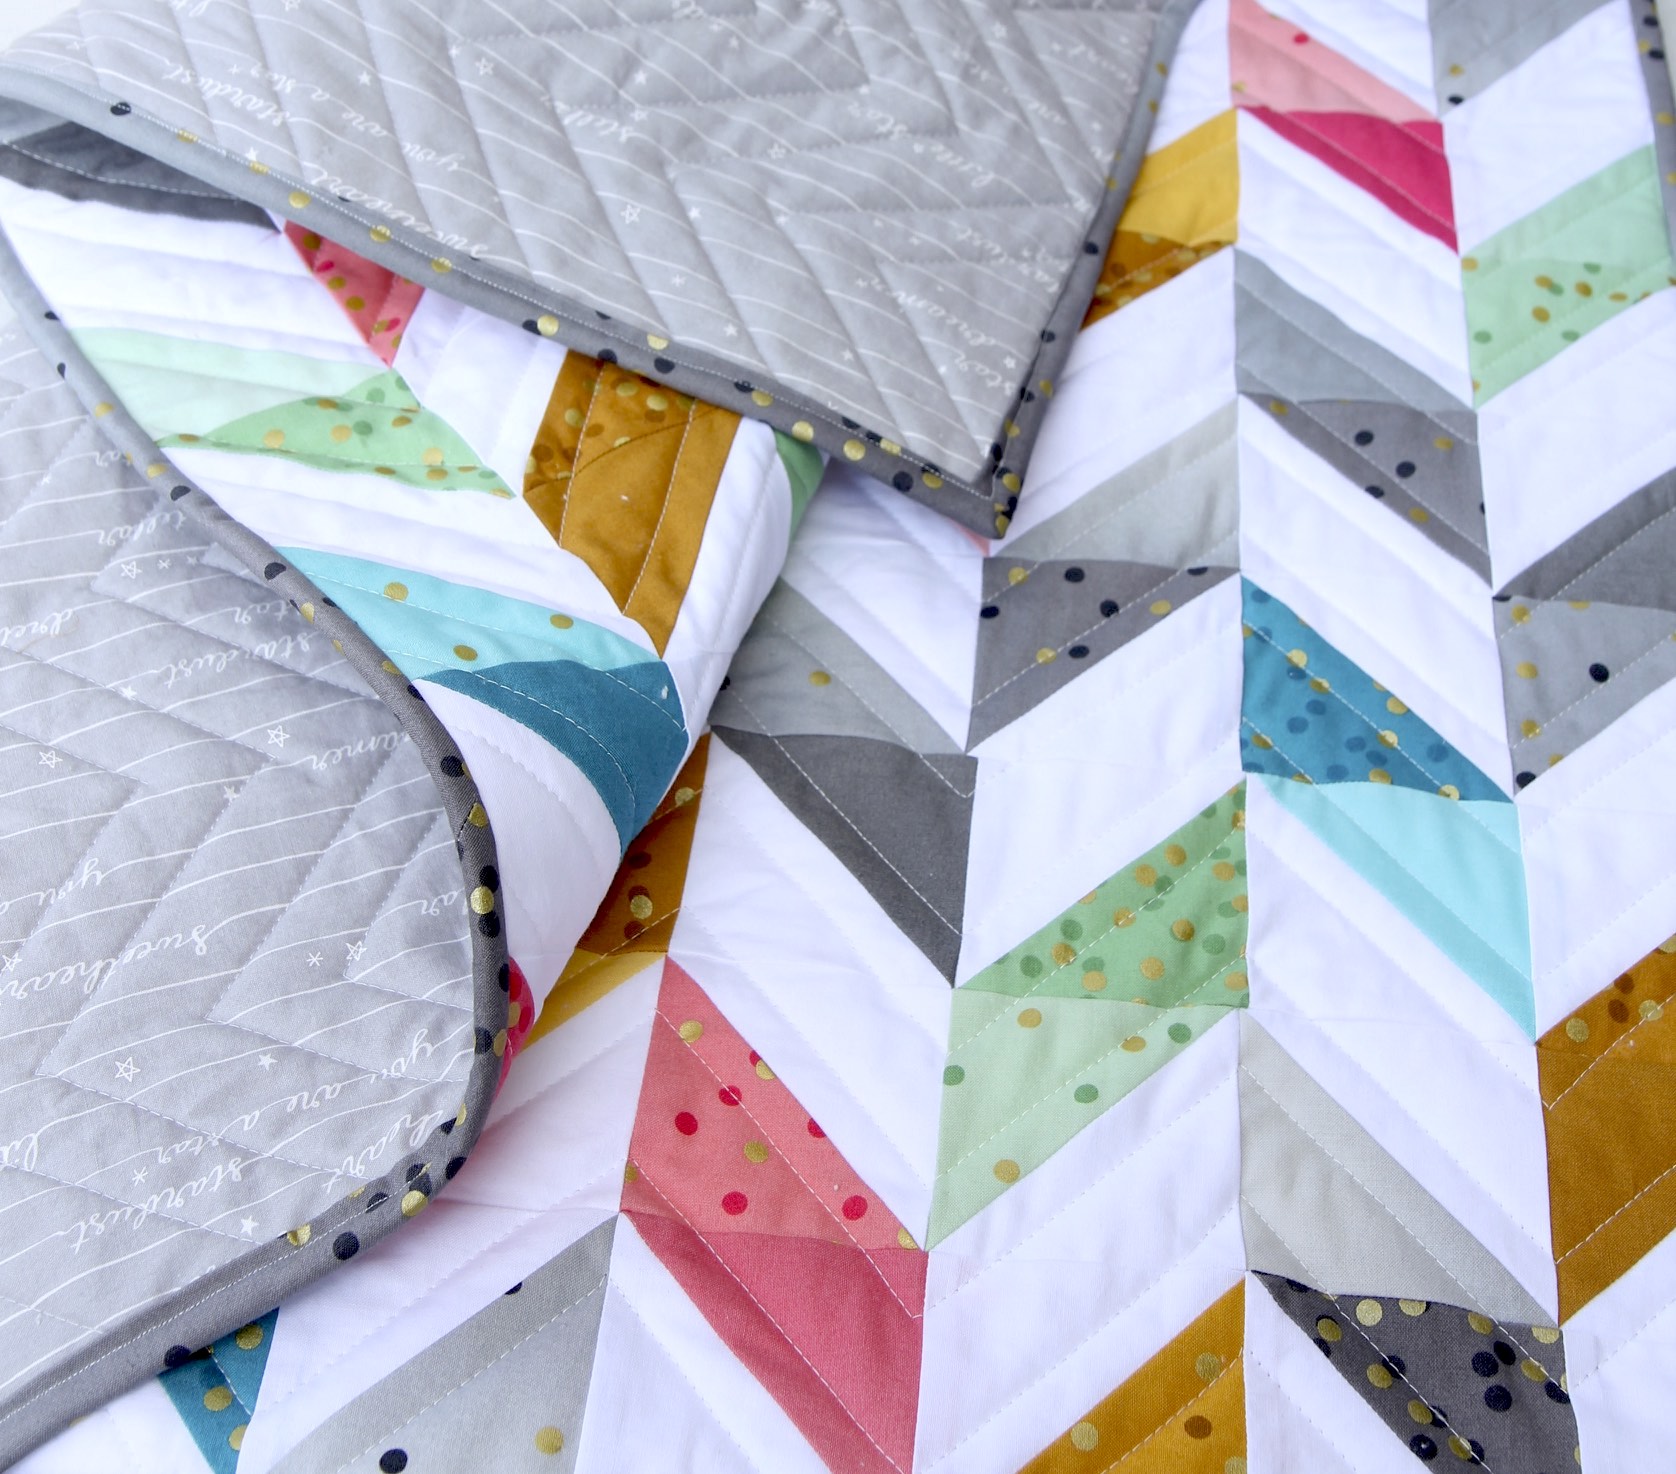
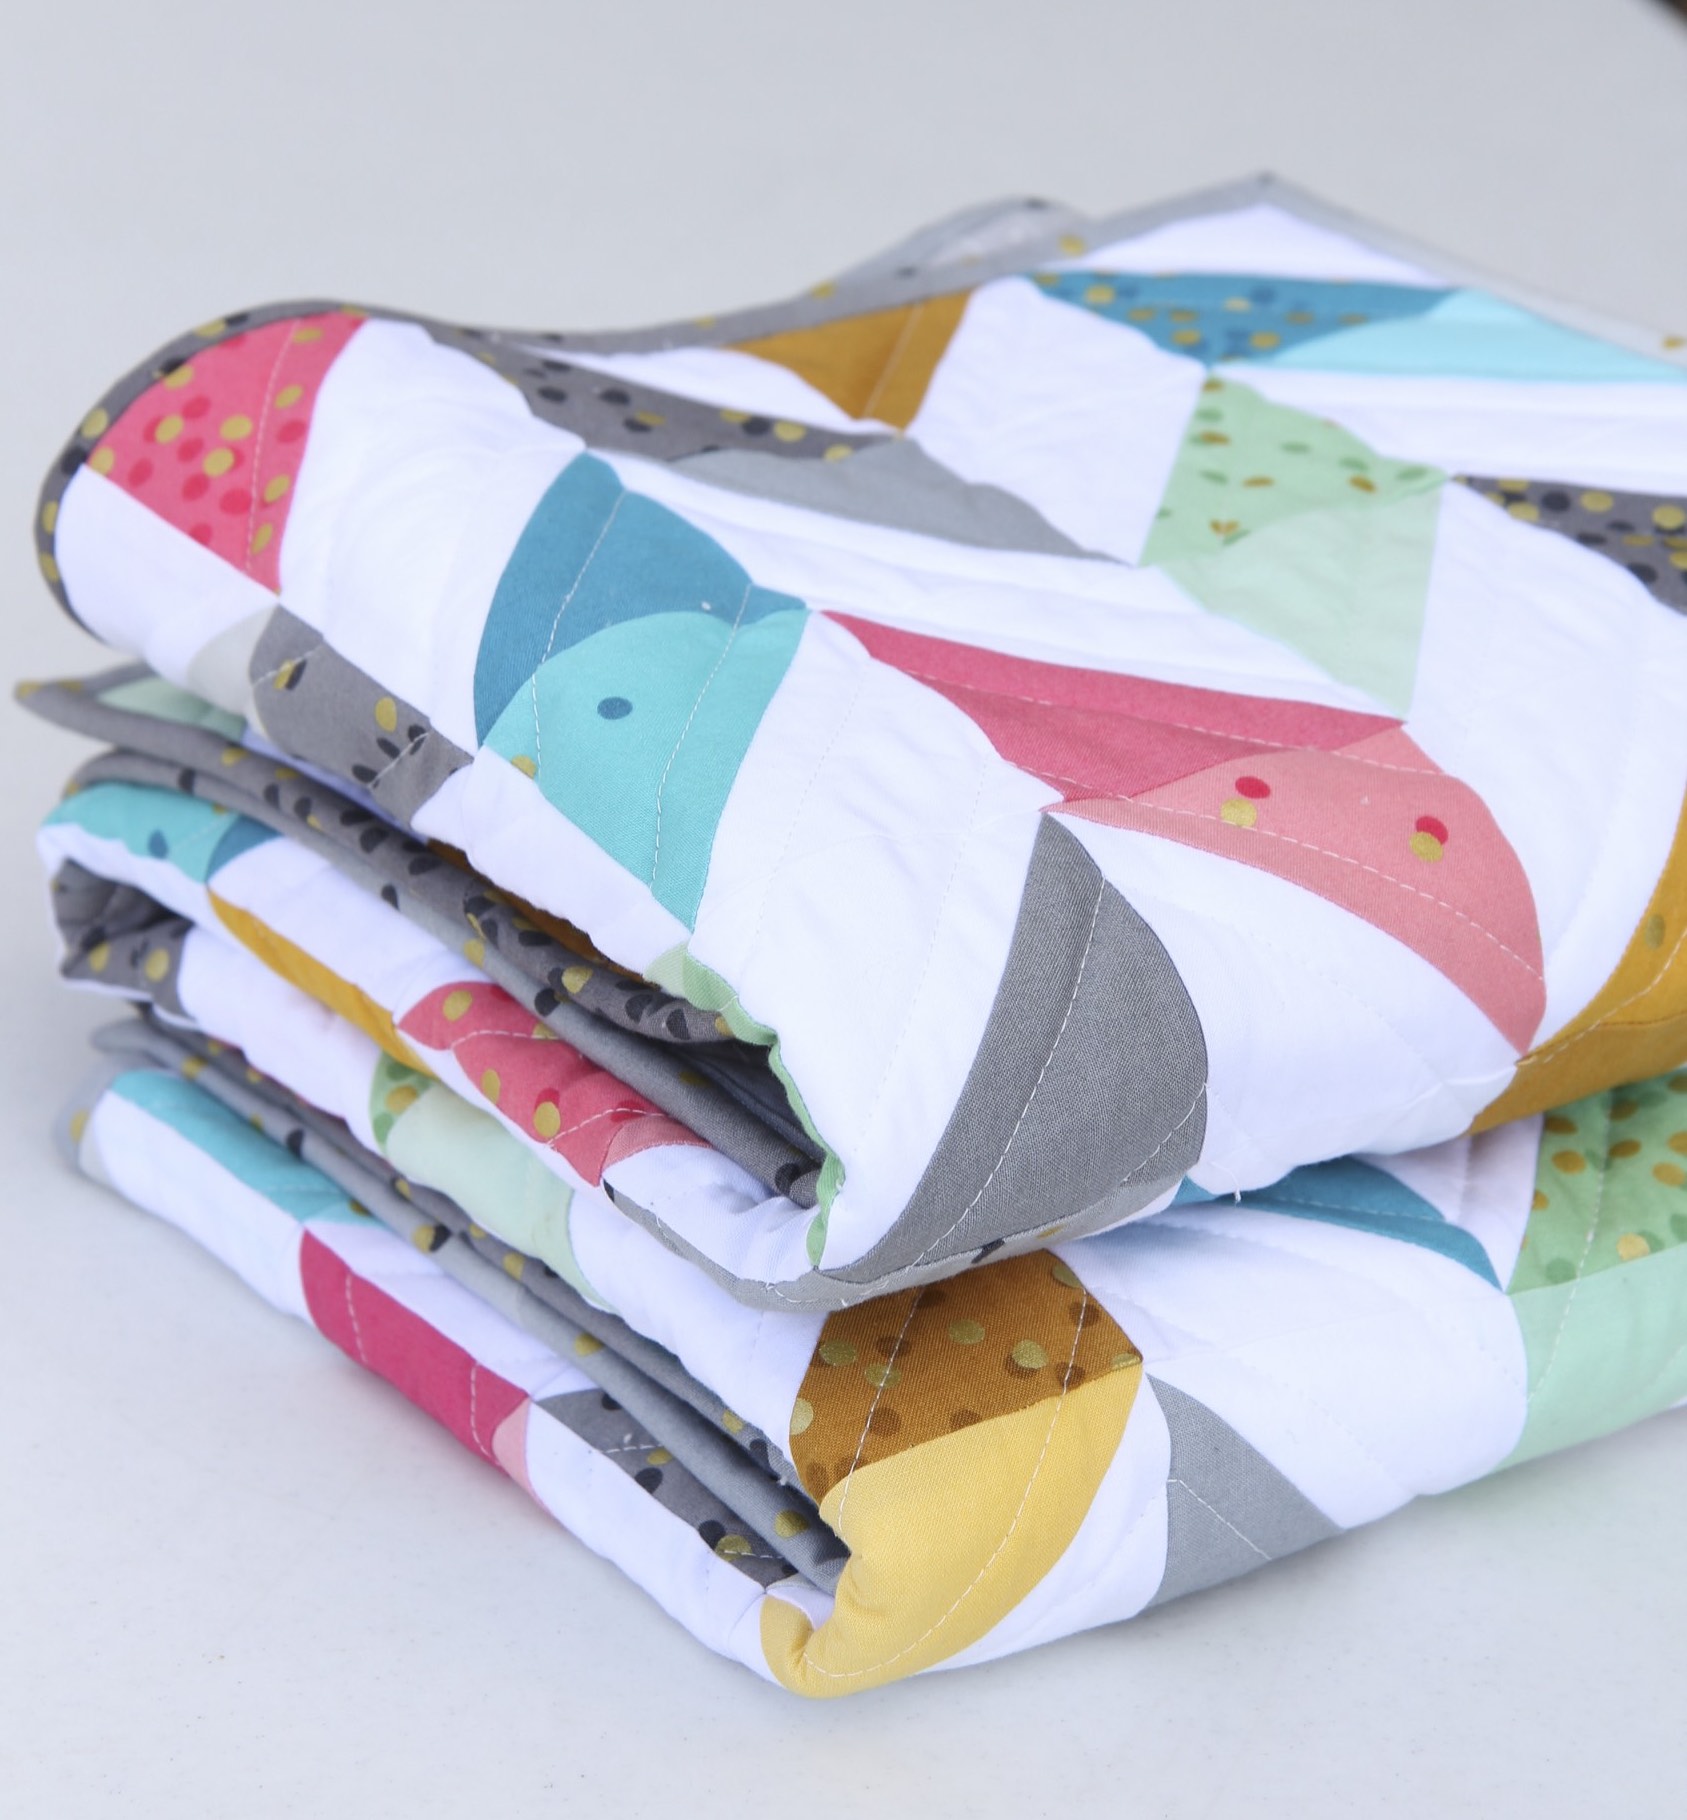
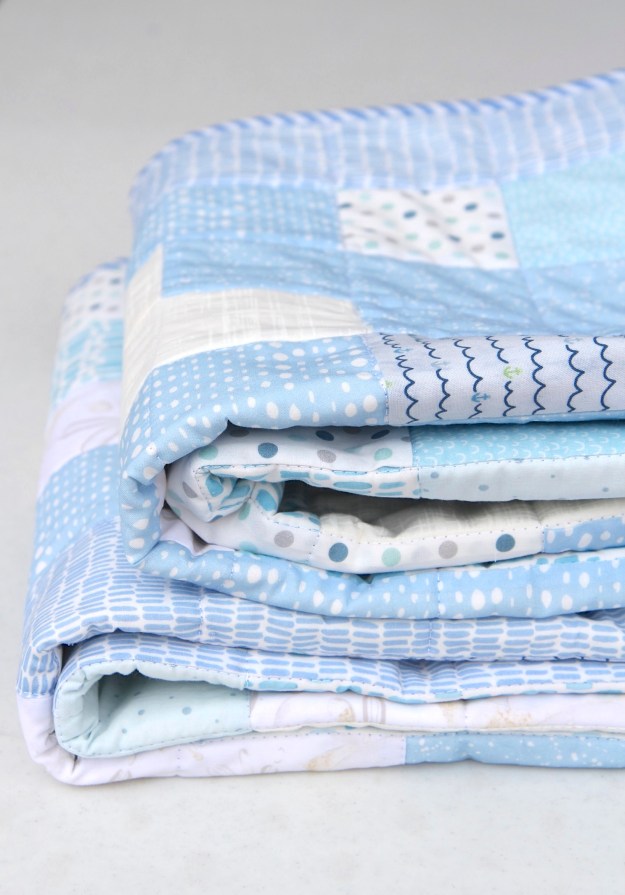
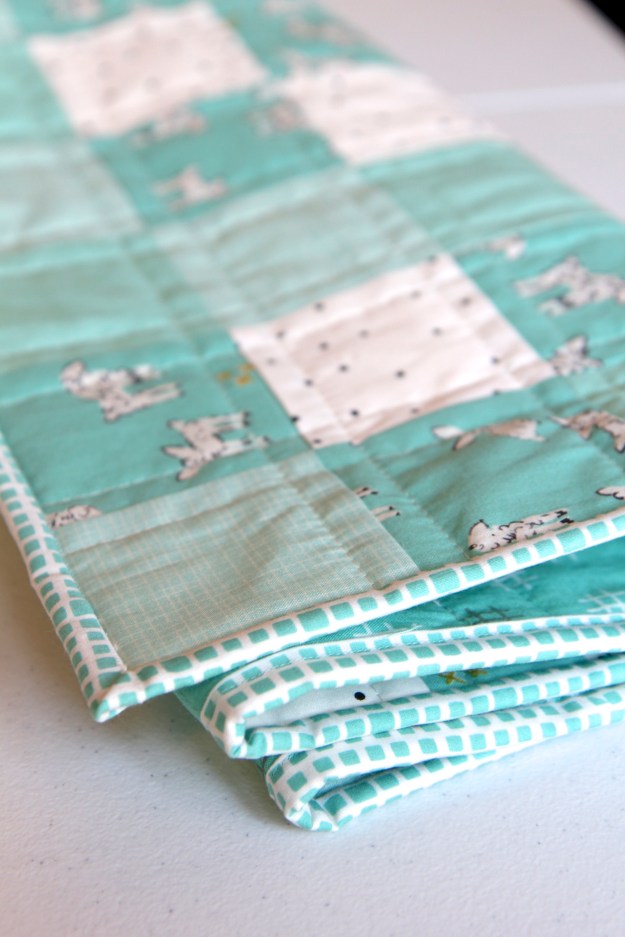
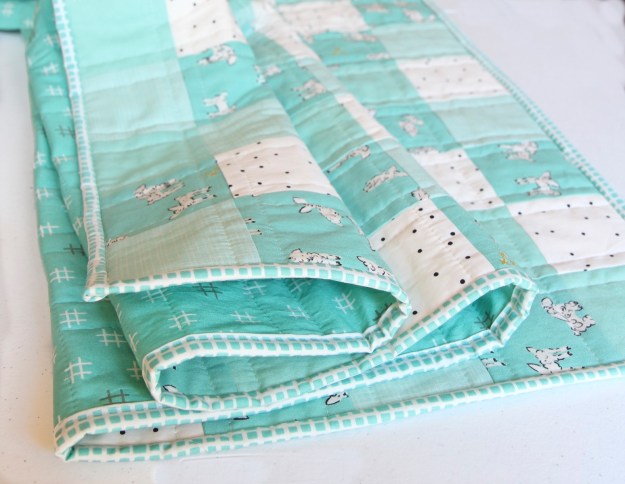
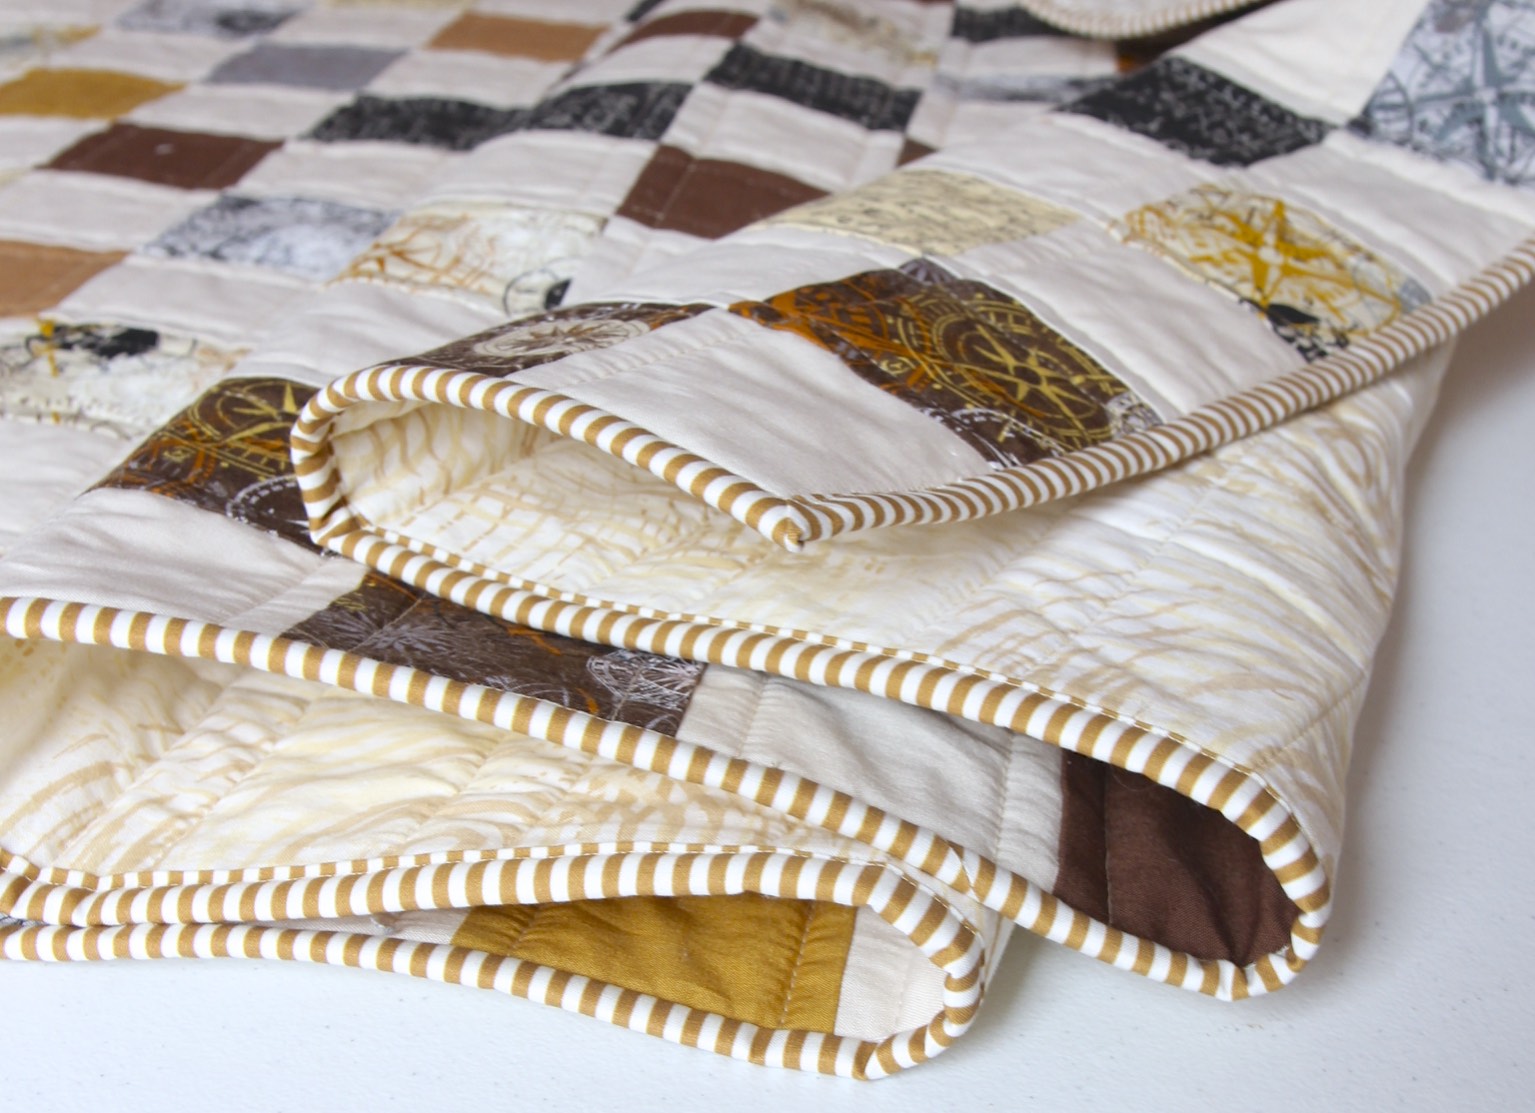
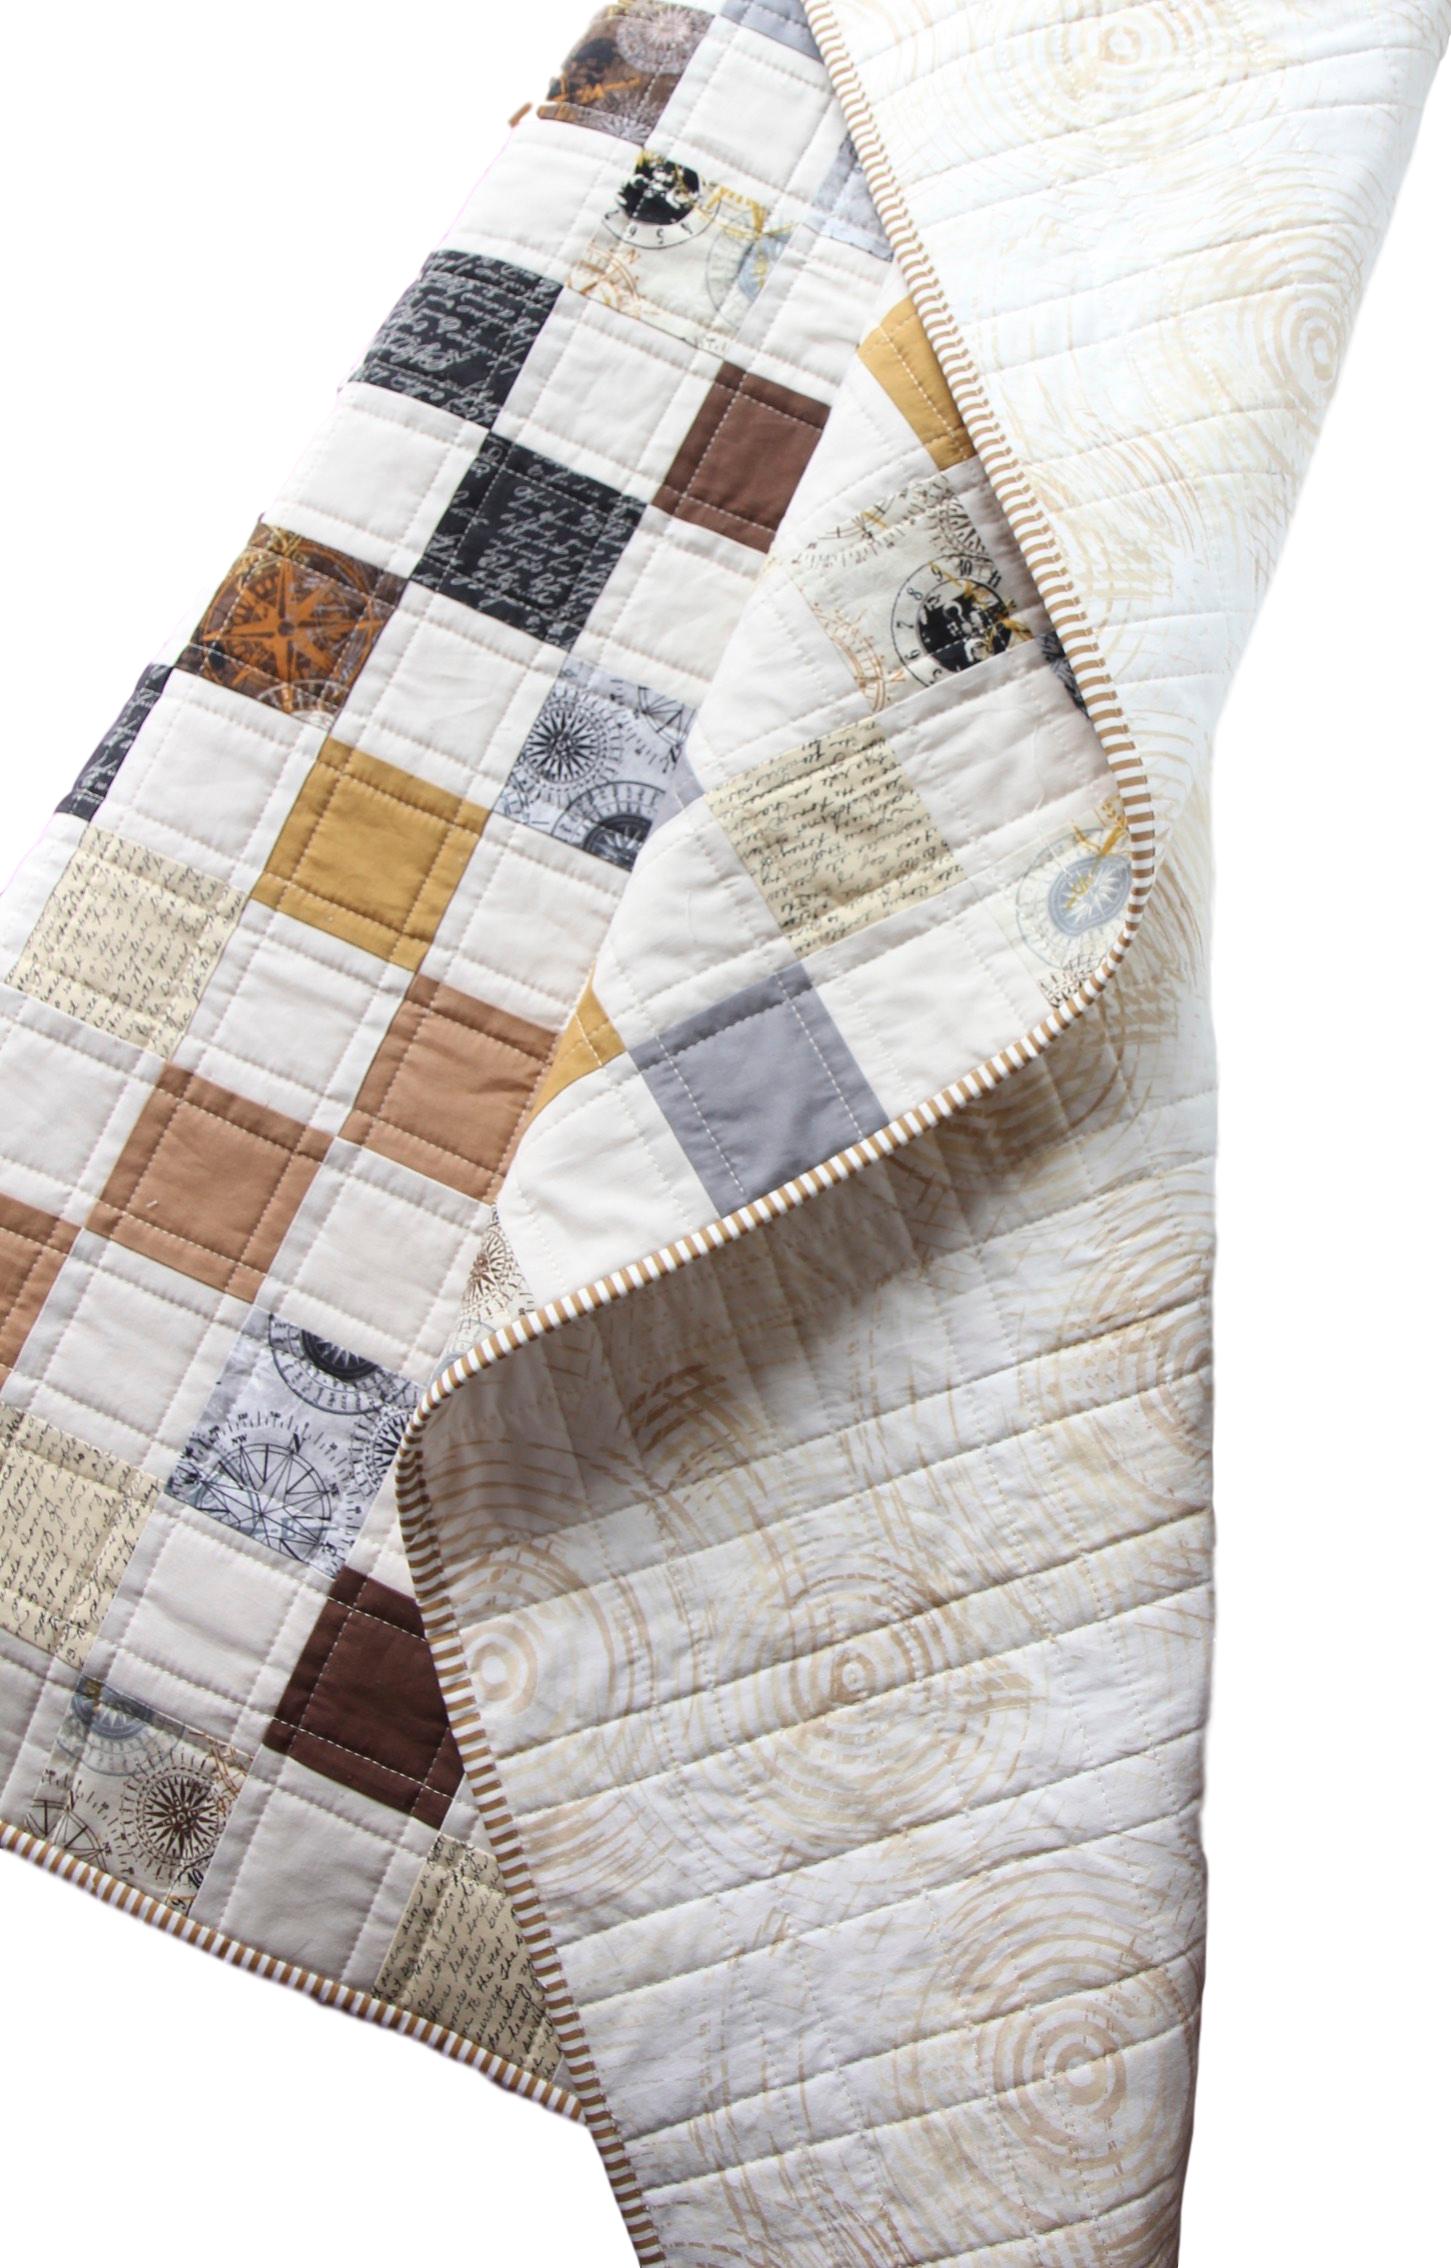
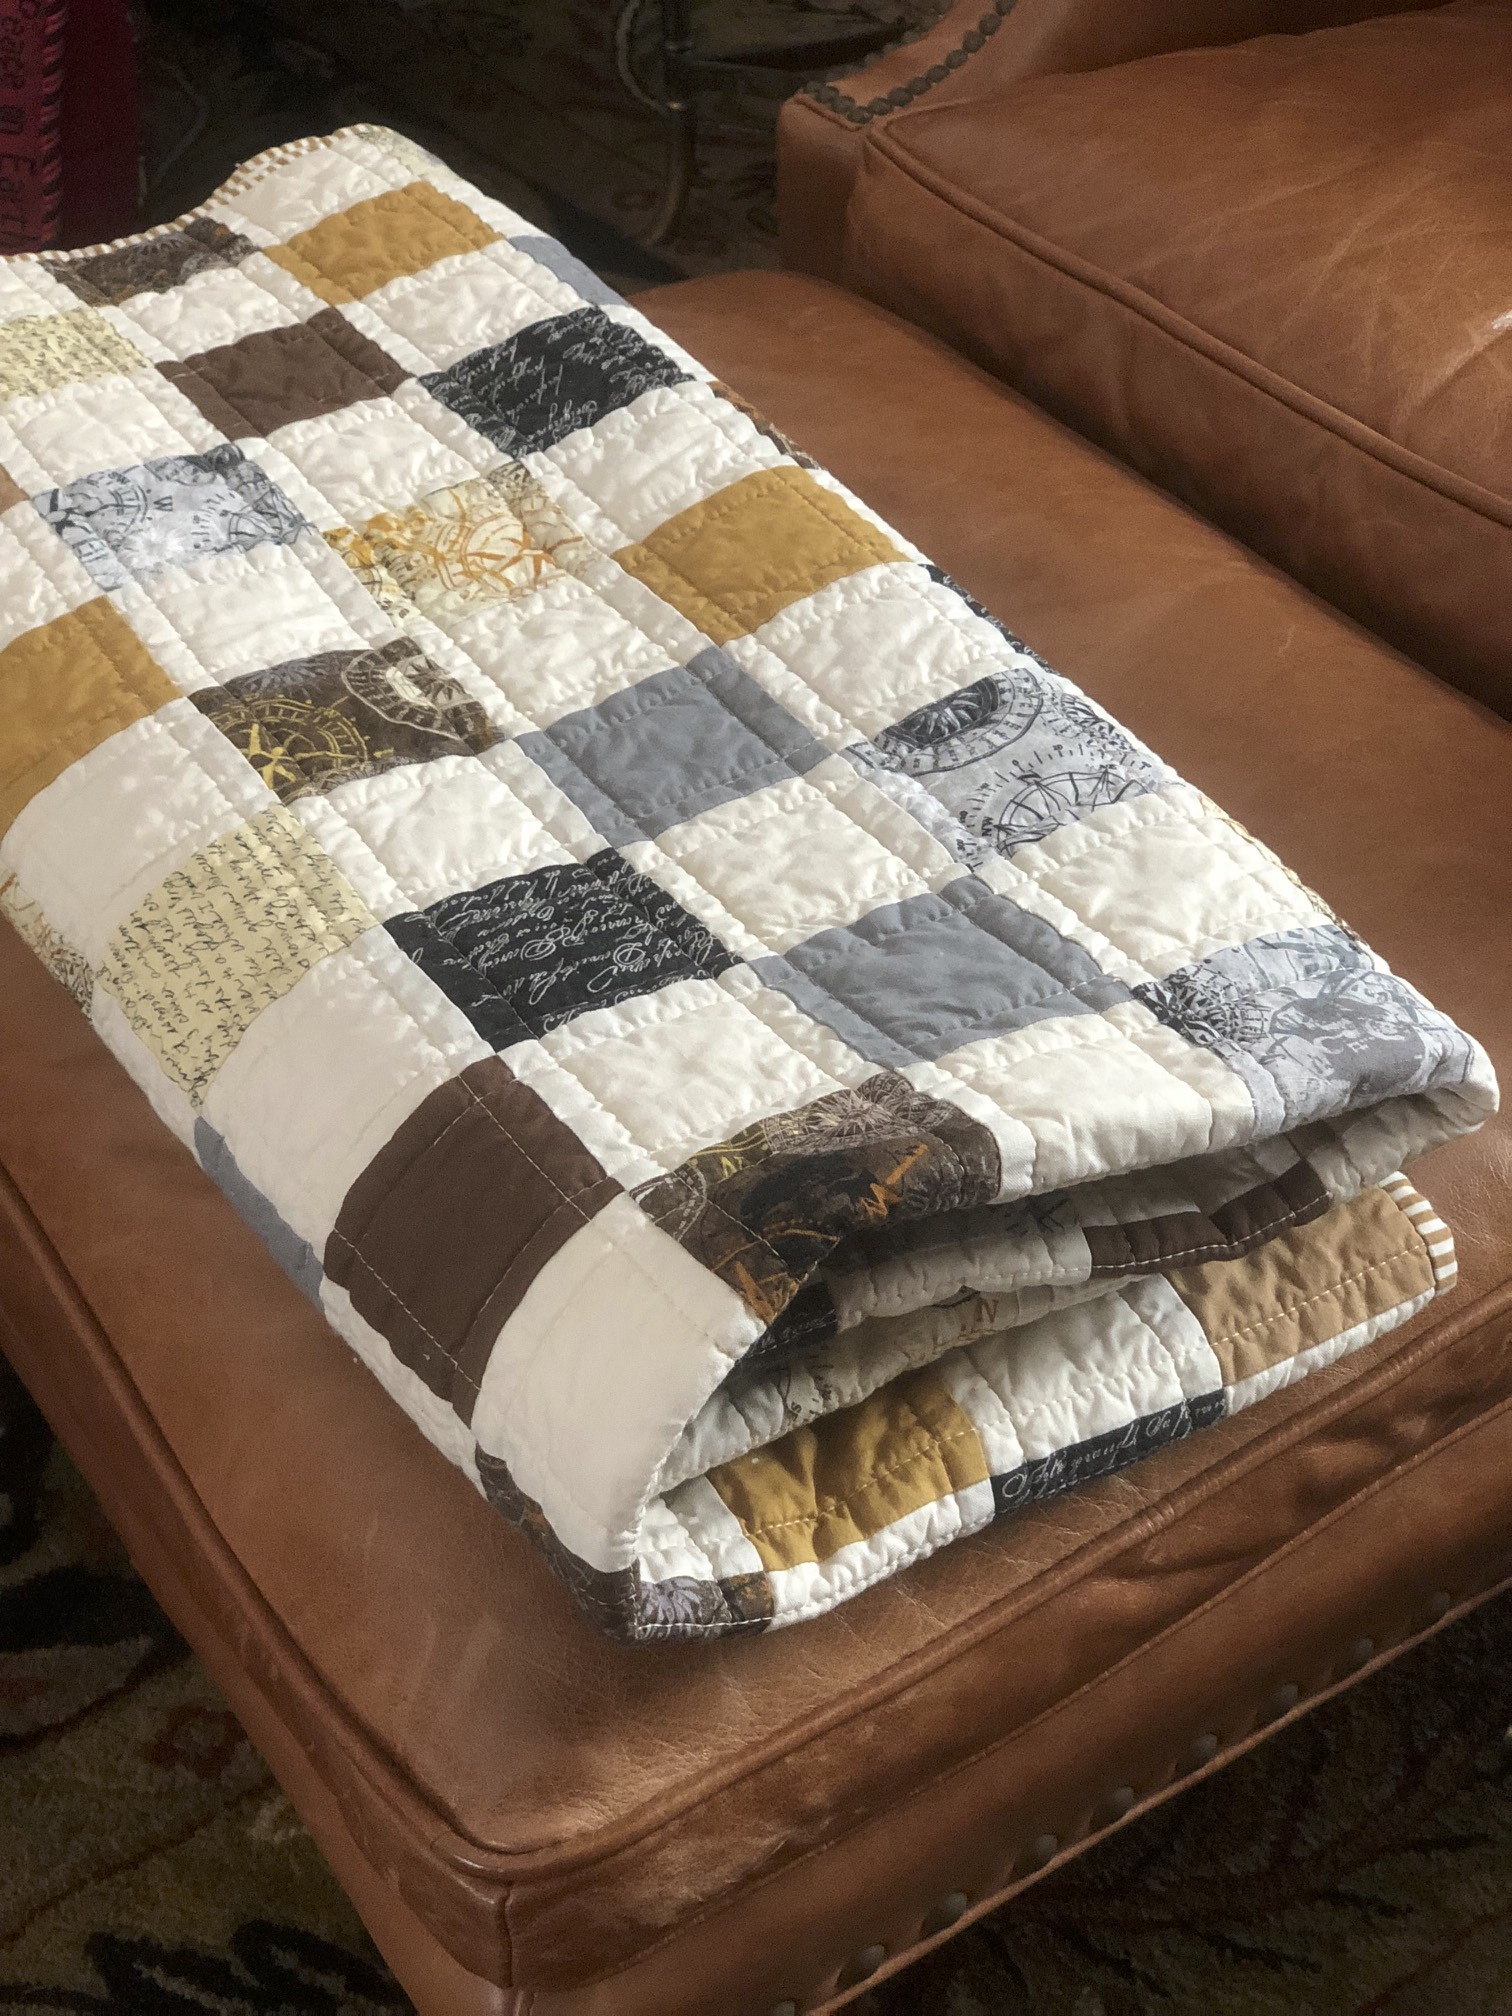
I actually doubled the batting on this quilt. I used Warm and White 100% cotton batting.  The double thickness makes the quilt especially warm and snuggly.  I love the weight of it. Because the background fabric I used for the checkerboard design is white, it is important to use a white batting so it doesn’t dull the white fabric.

sugar Sack Quilt Front Detail

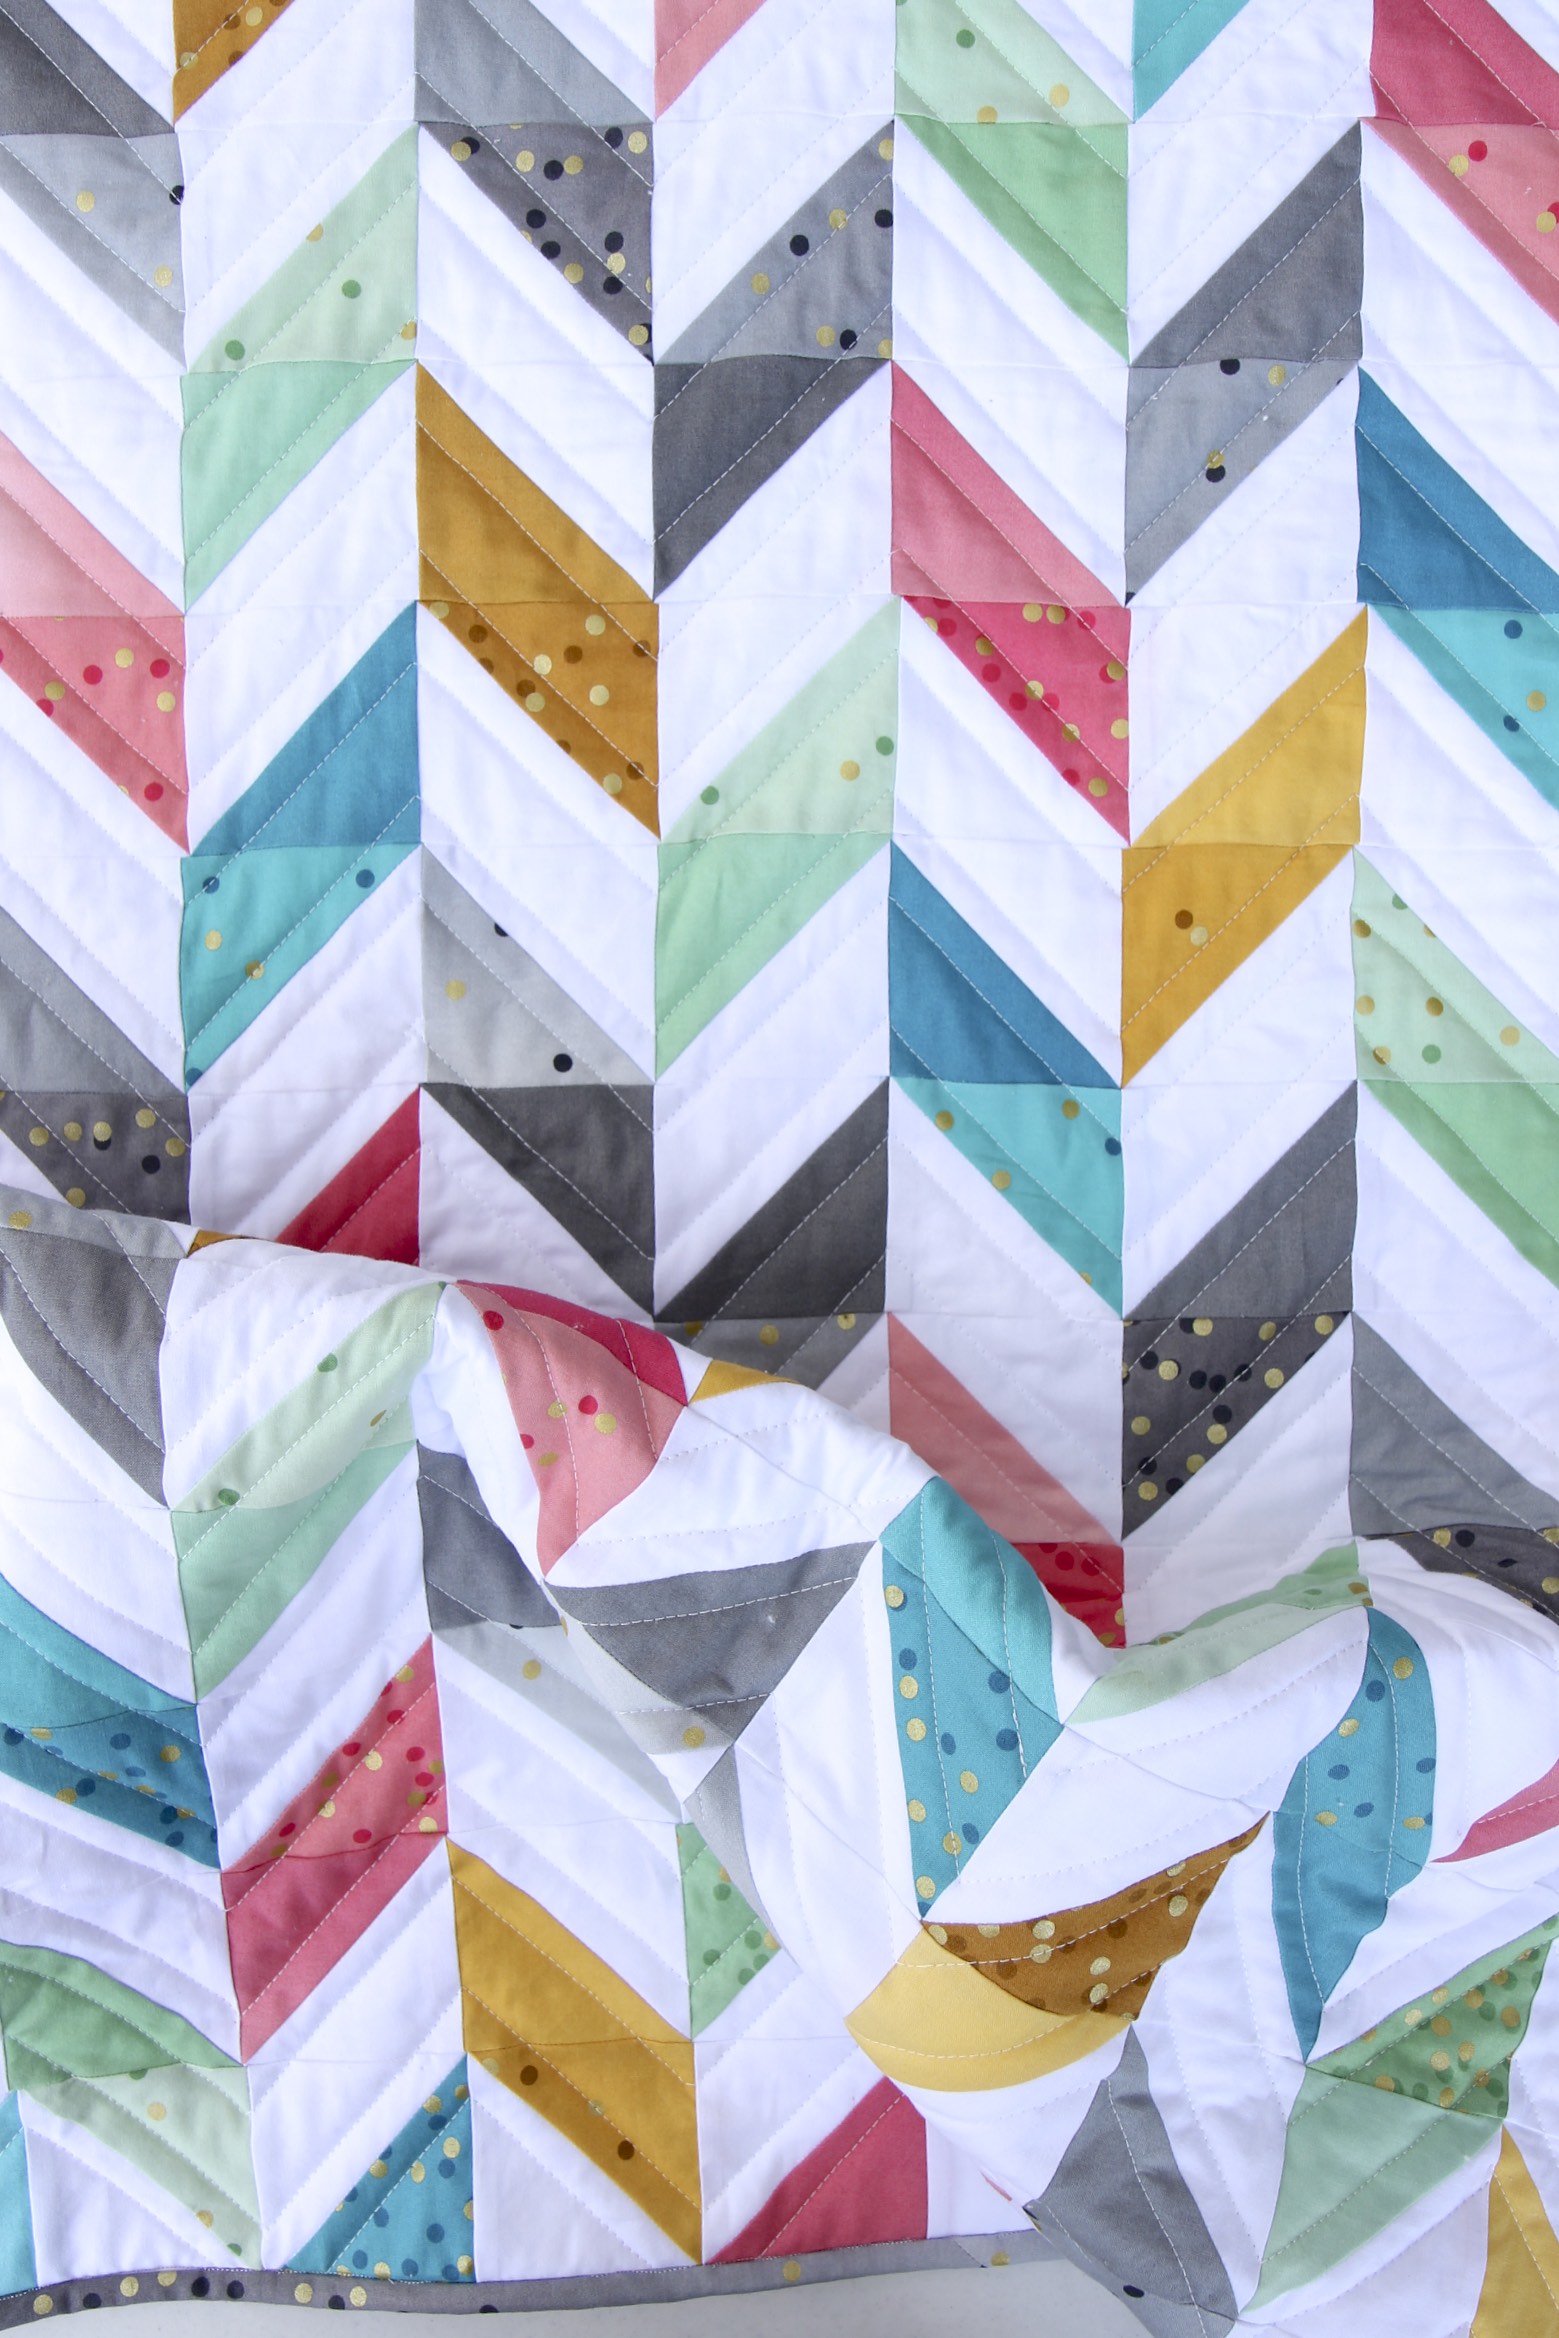
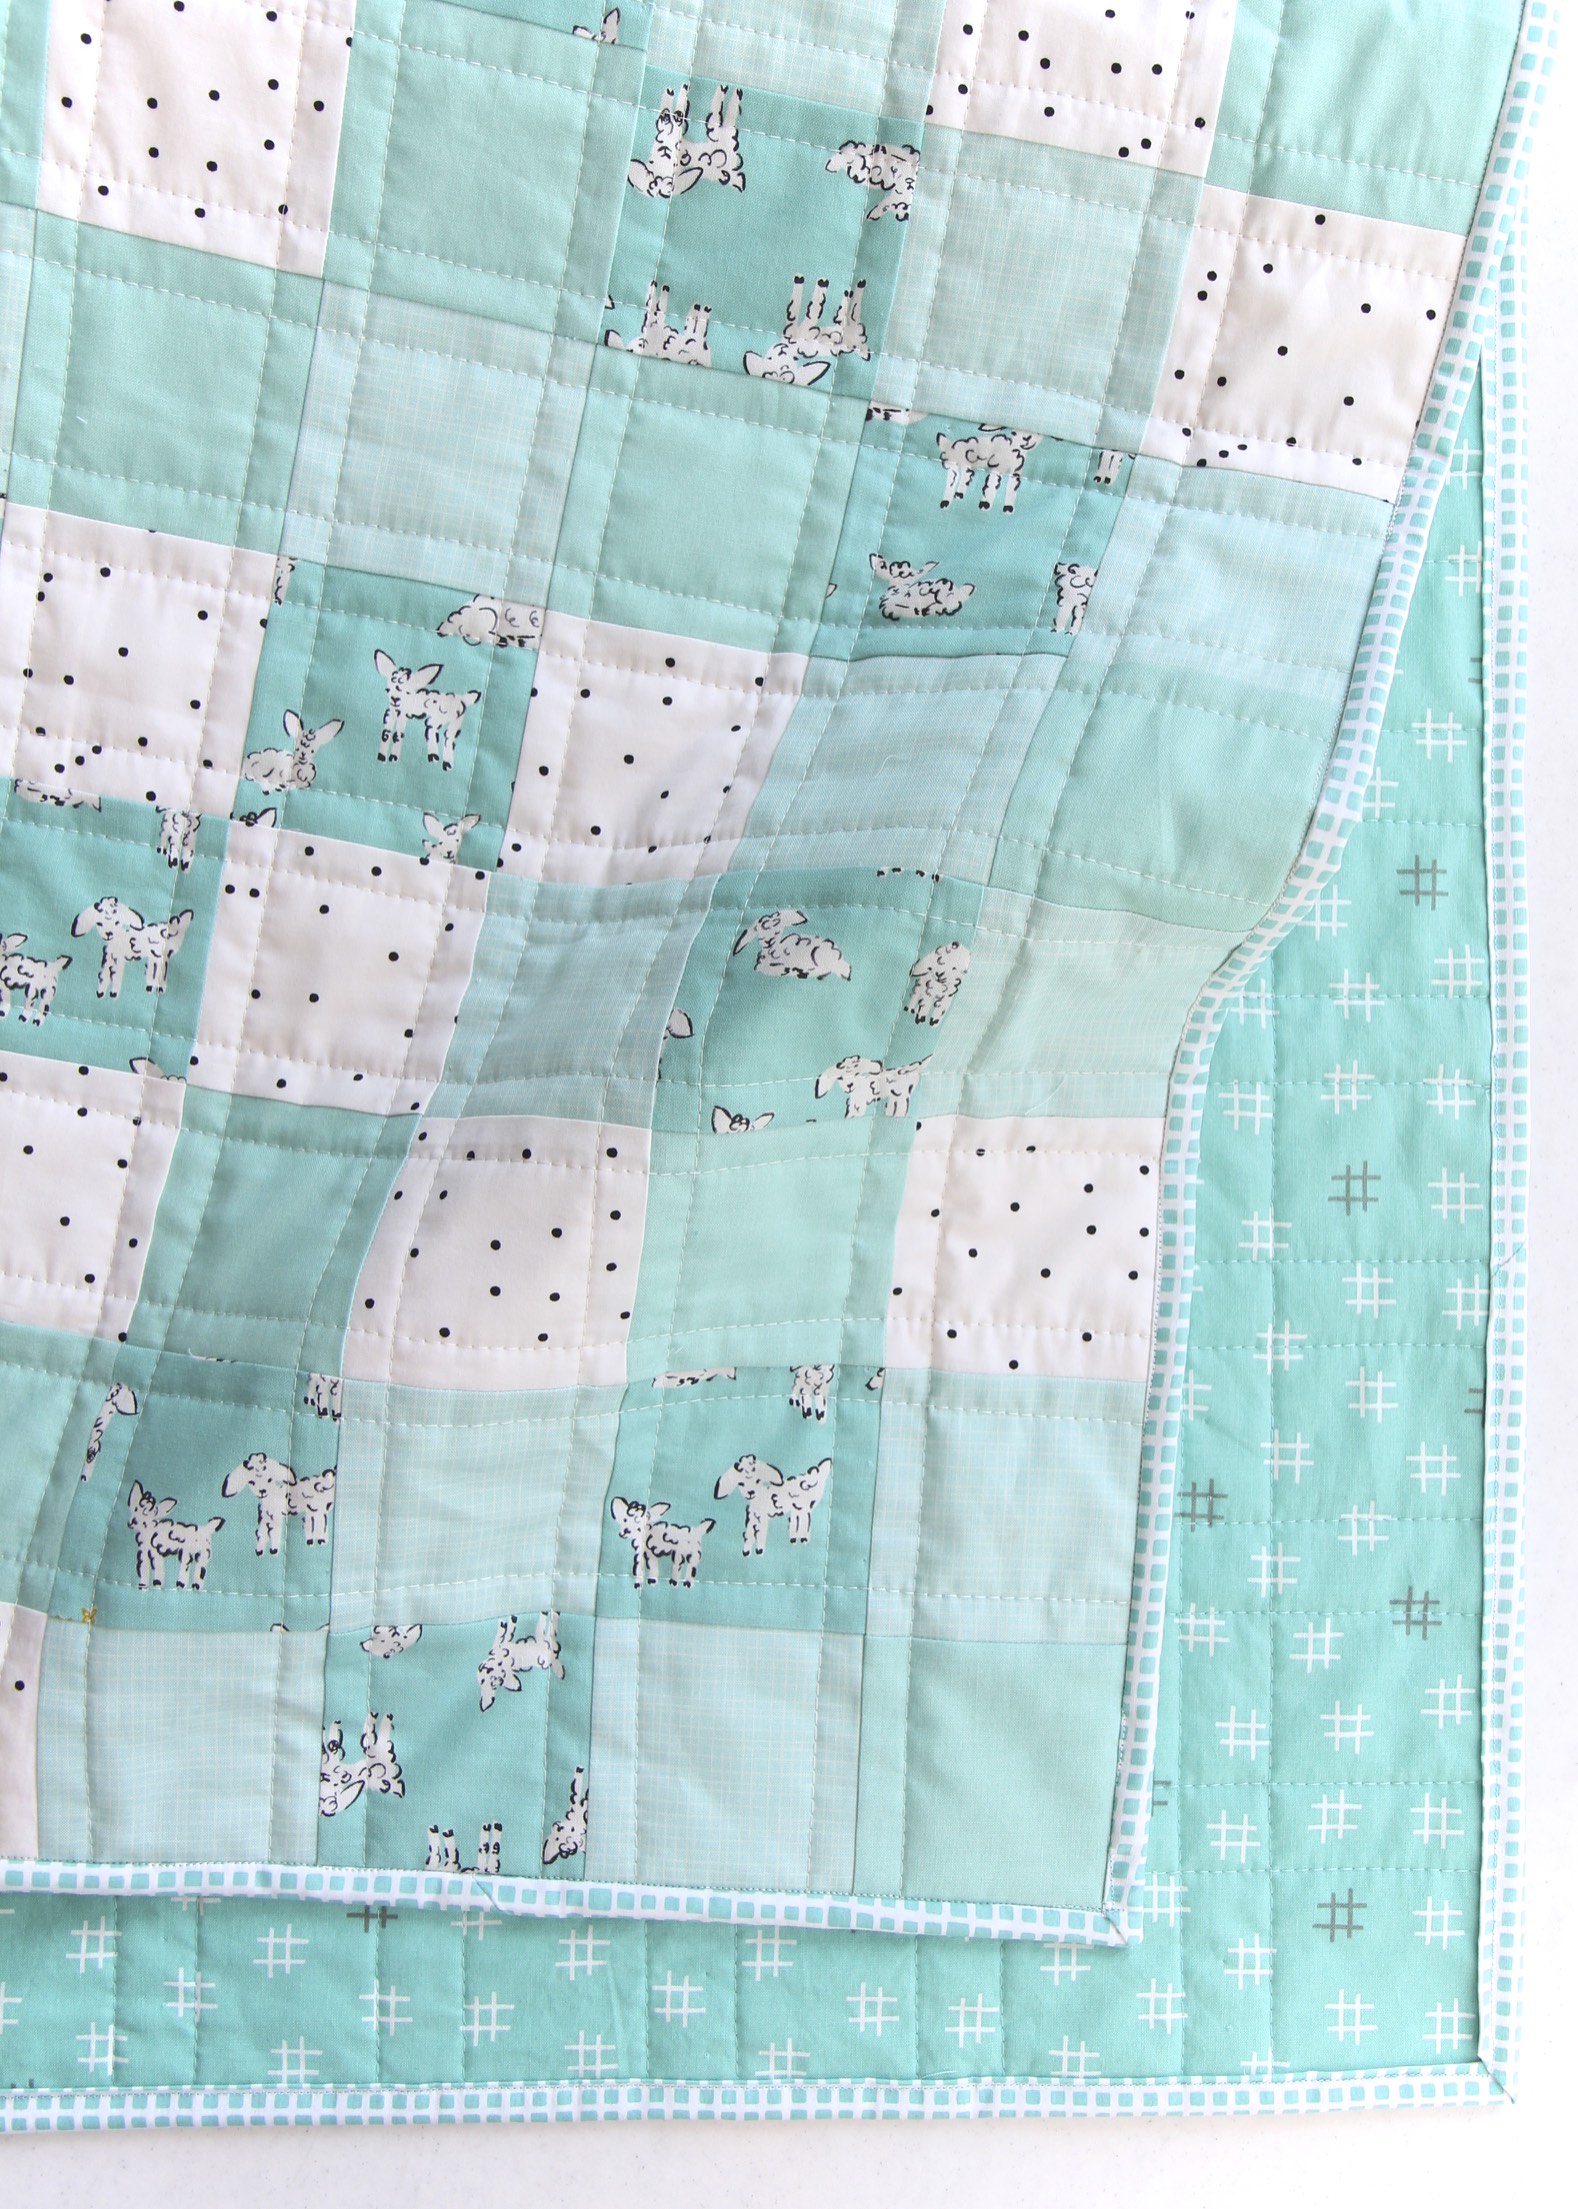
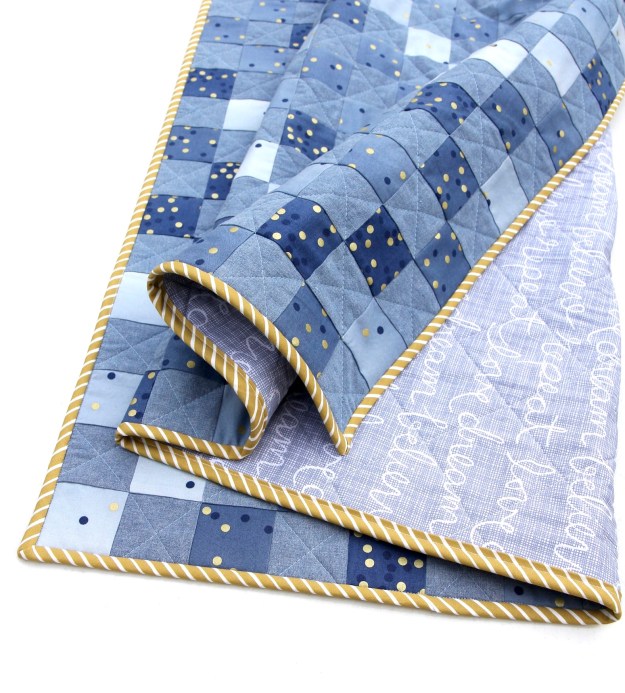
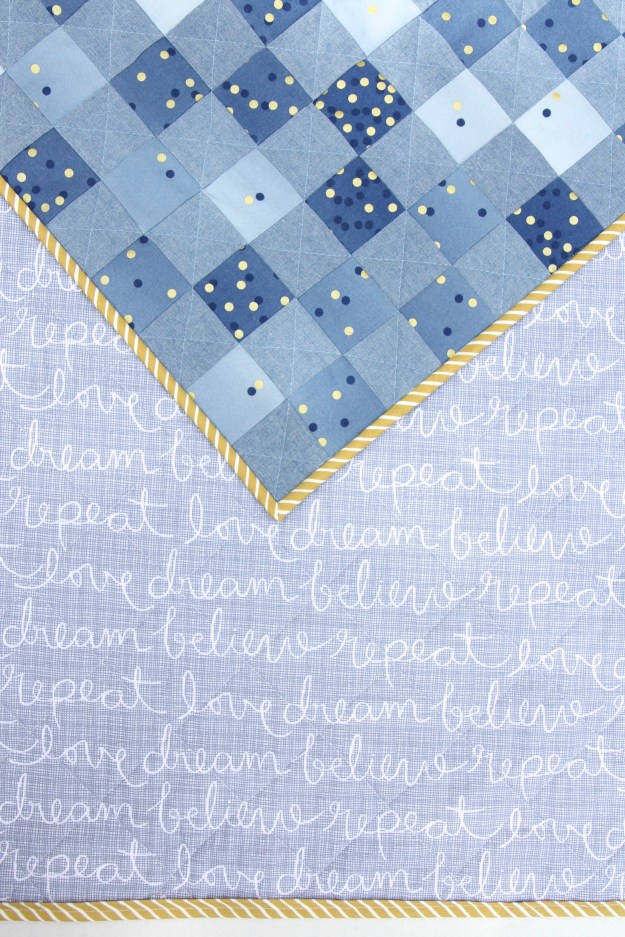
I machine quilted using a 4 inch stitch length – kind of long, but I love how distinctive it looks.  I used 50mm thread for both the piecing and the quilting.  I switched to a #14 quilting needle to the actual quilting.

Sugar Sack FOlds

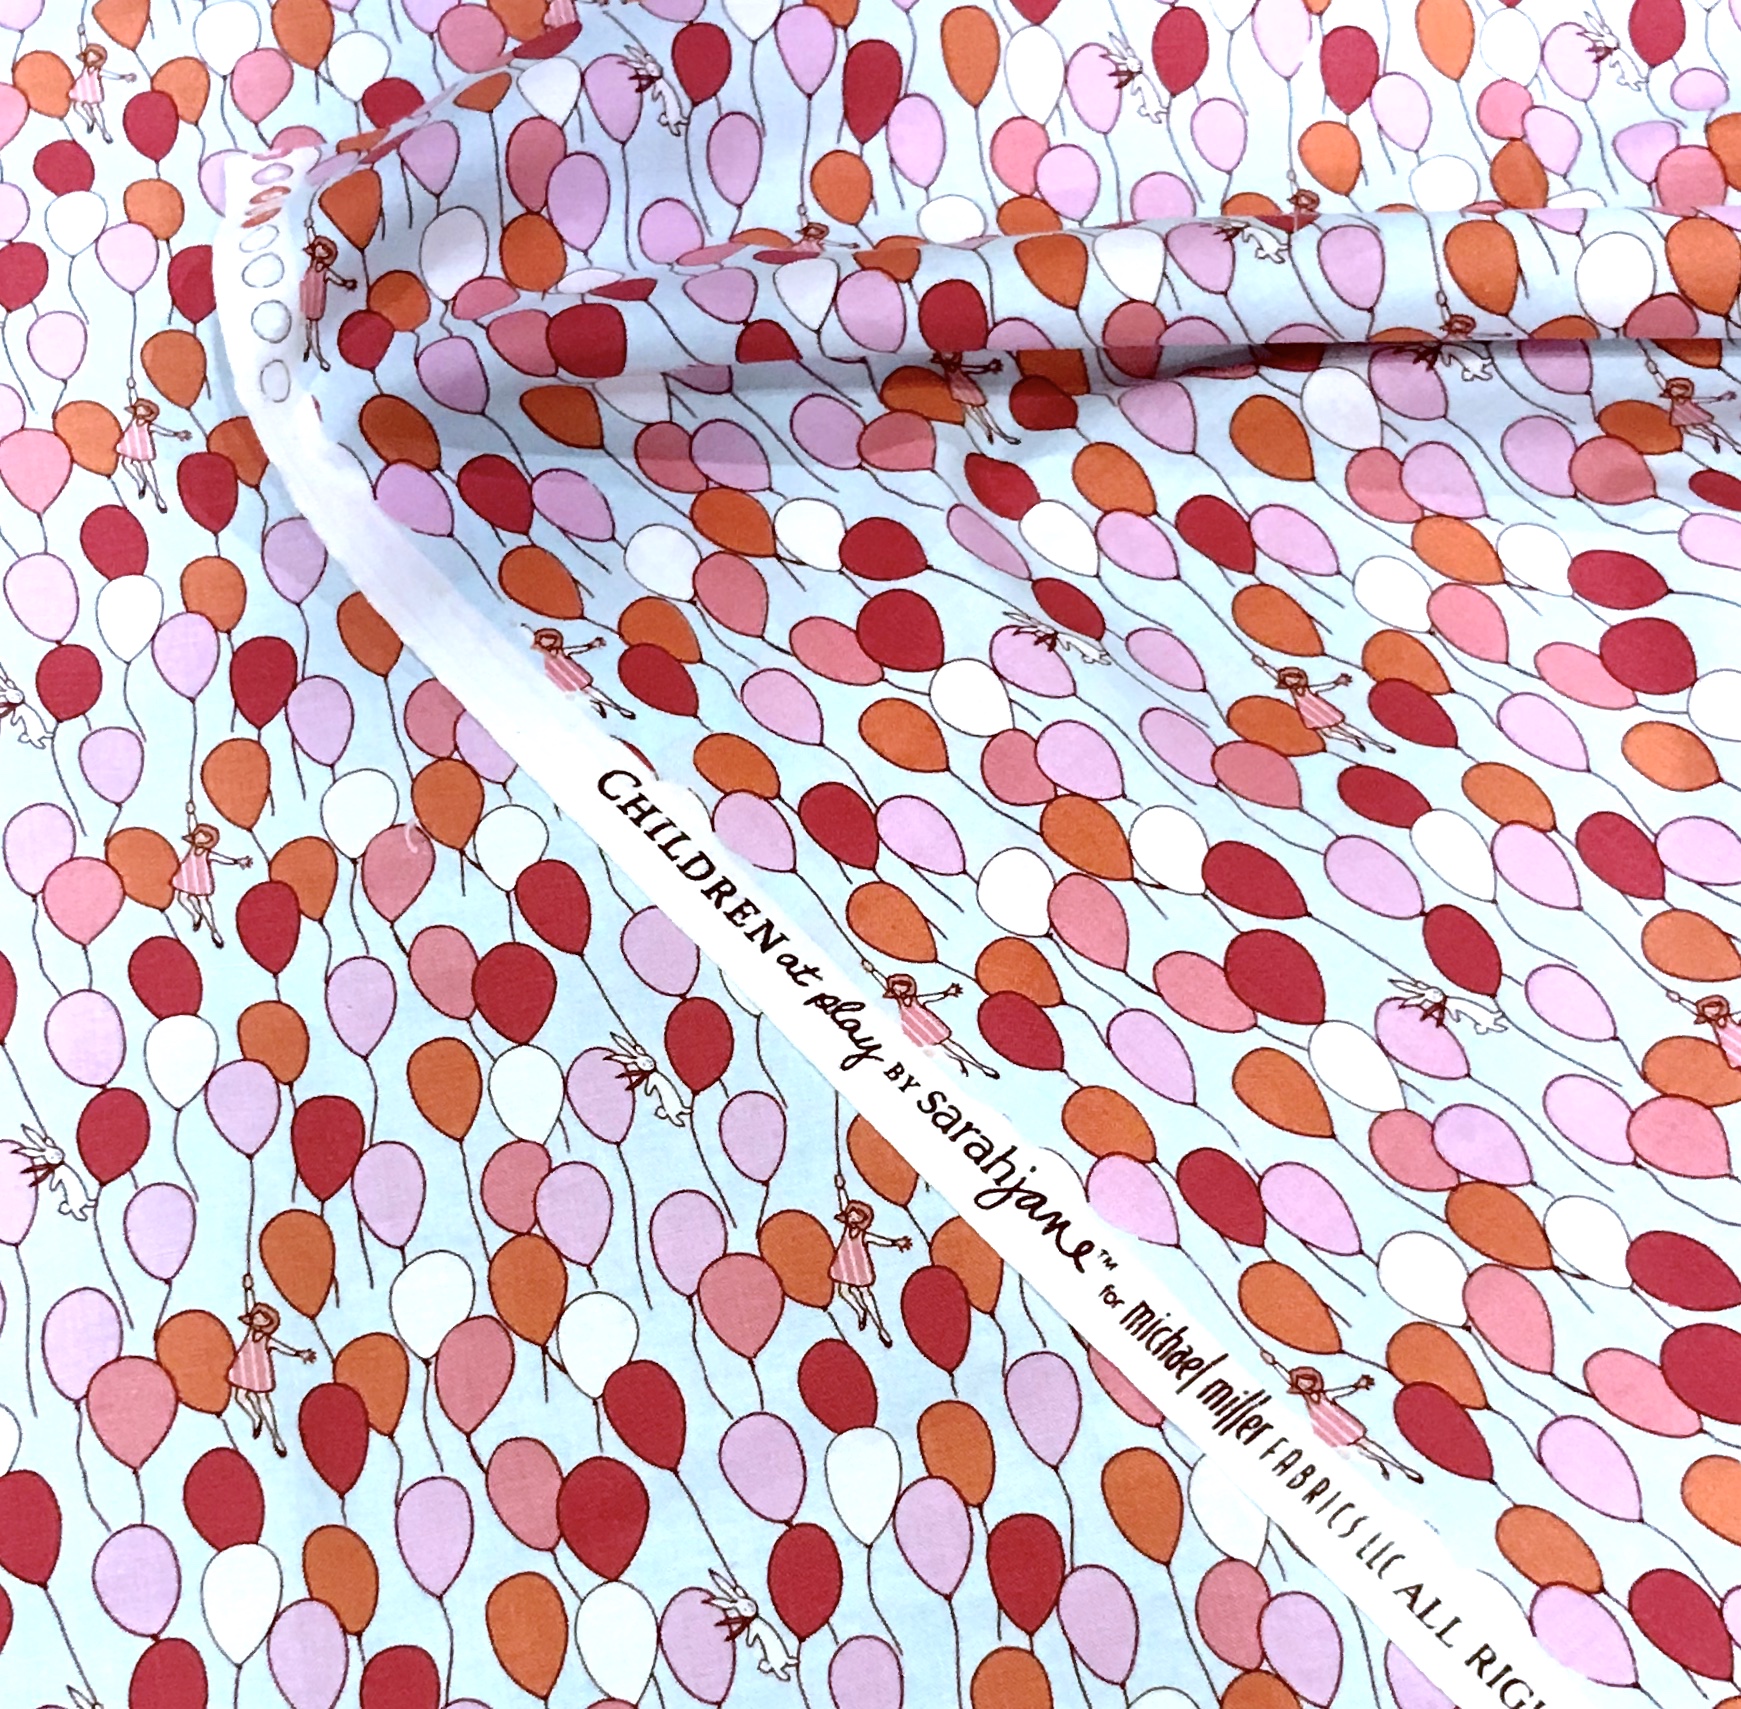
The backing fabric is a cute dot fabric from Riley Blake called “Blush Puffs Pink”.

Sugar Sack Quilt Binding Detail

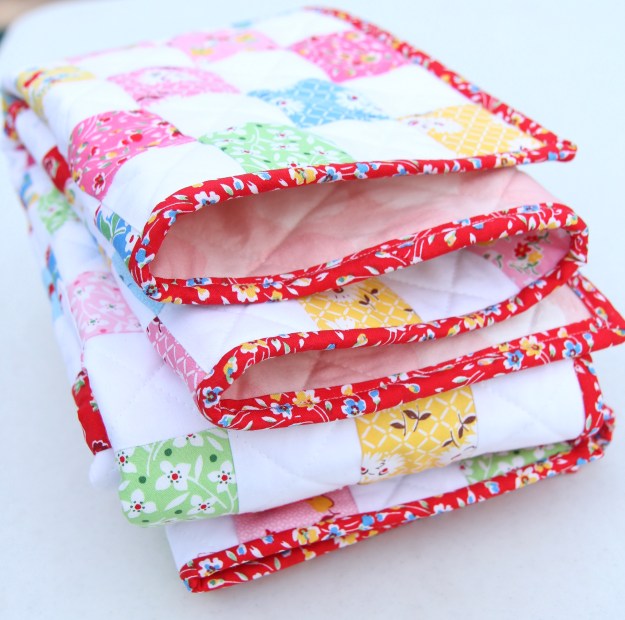
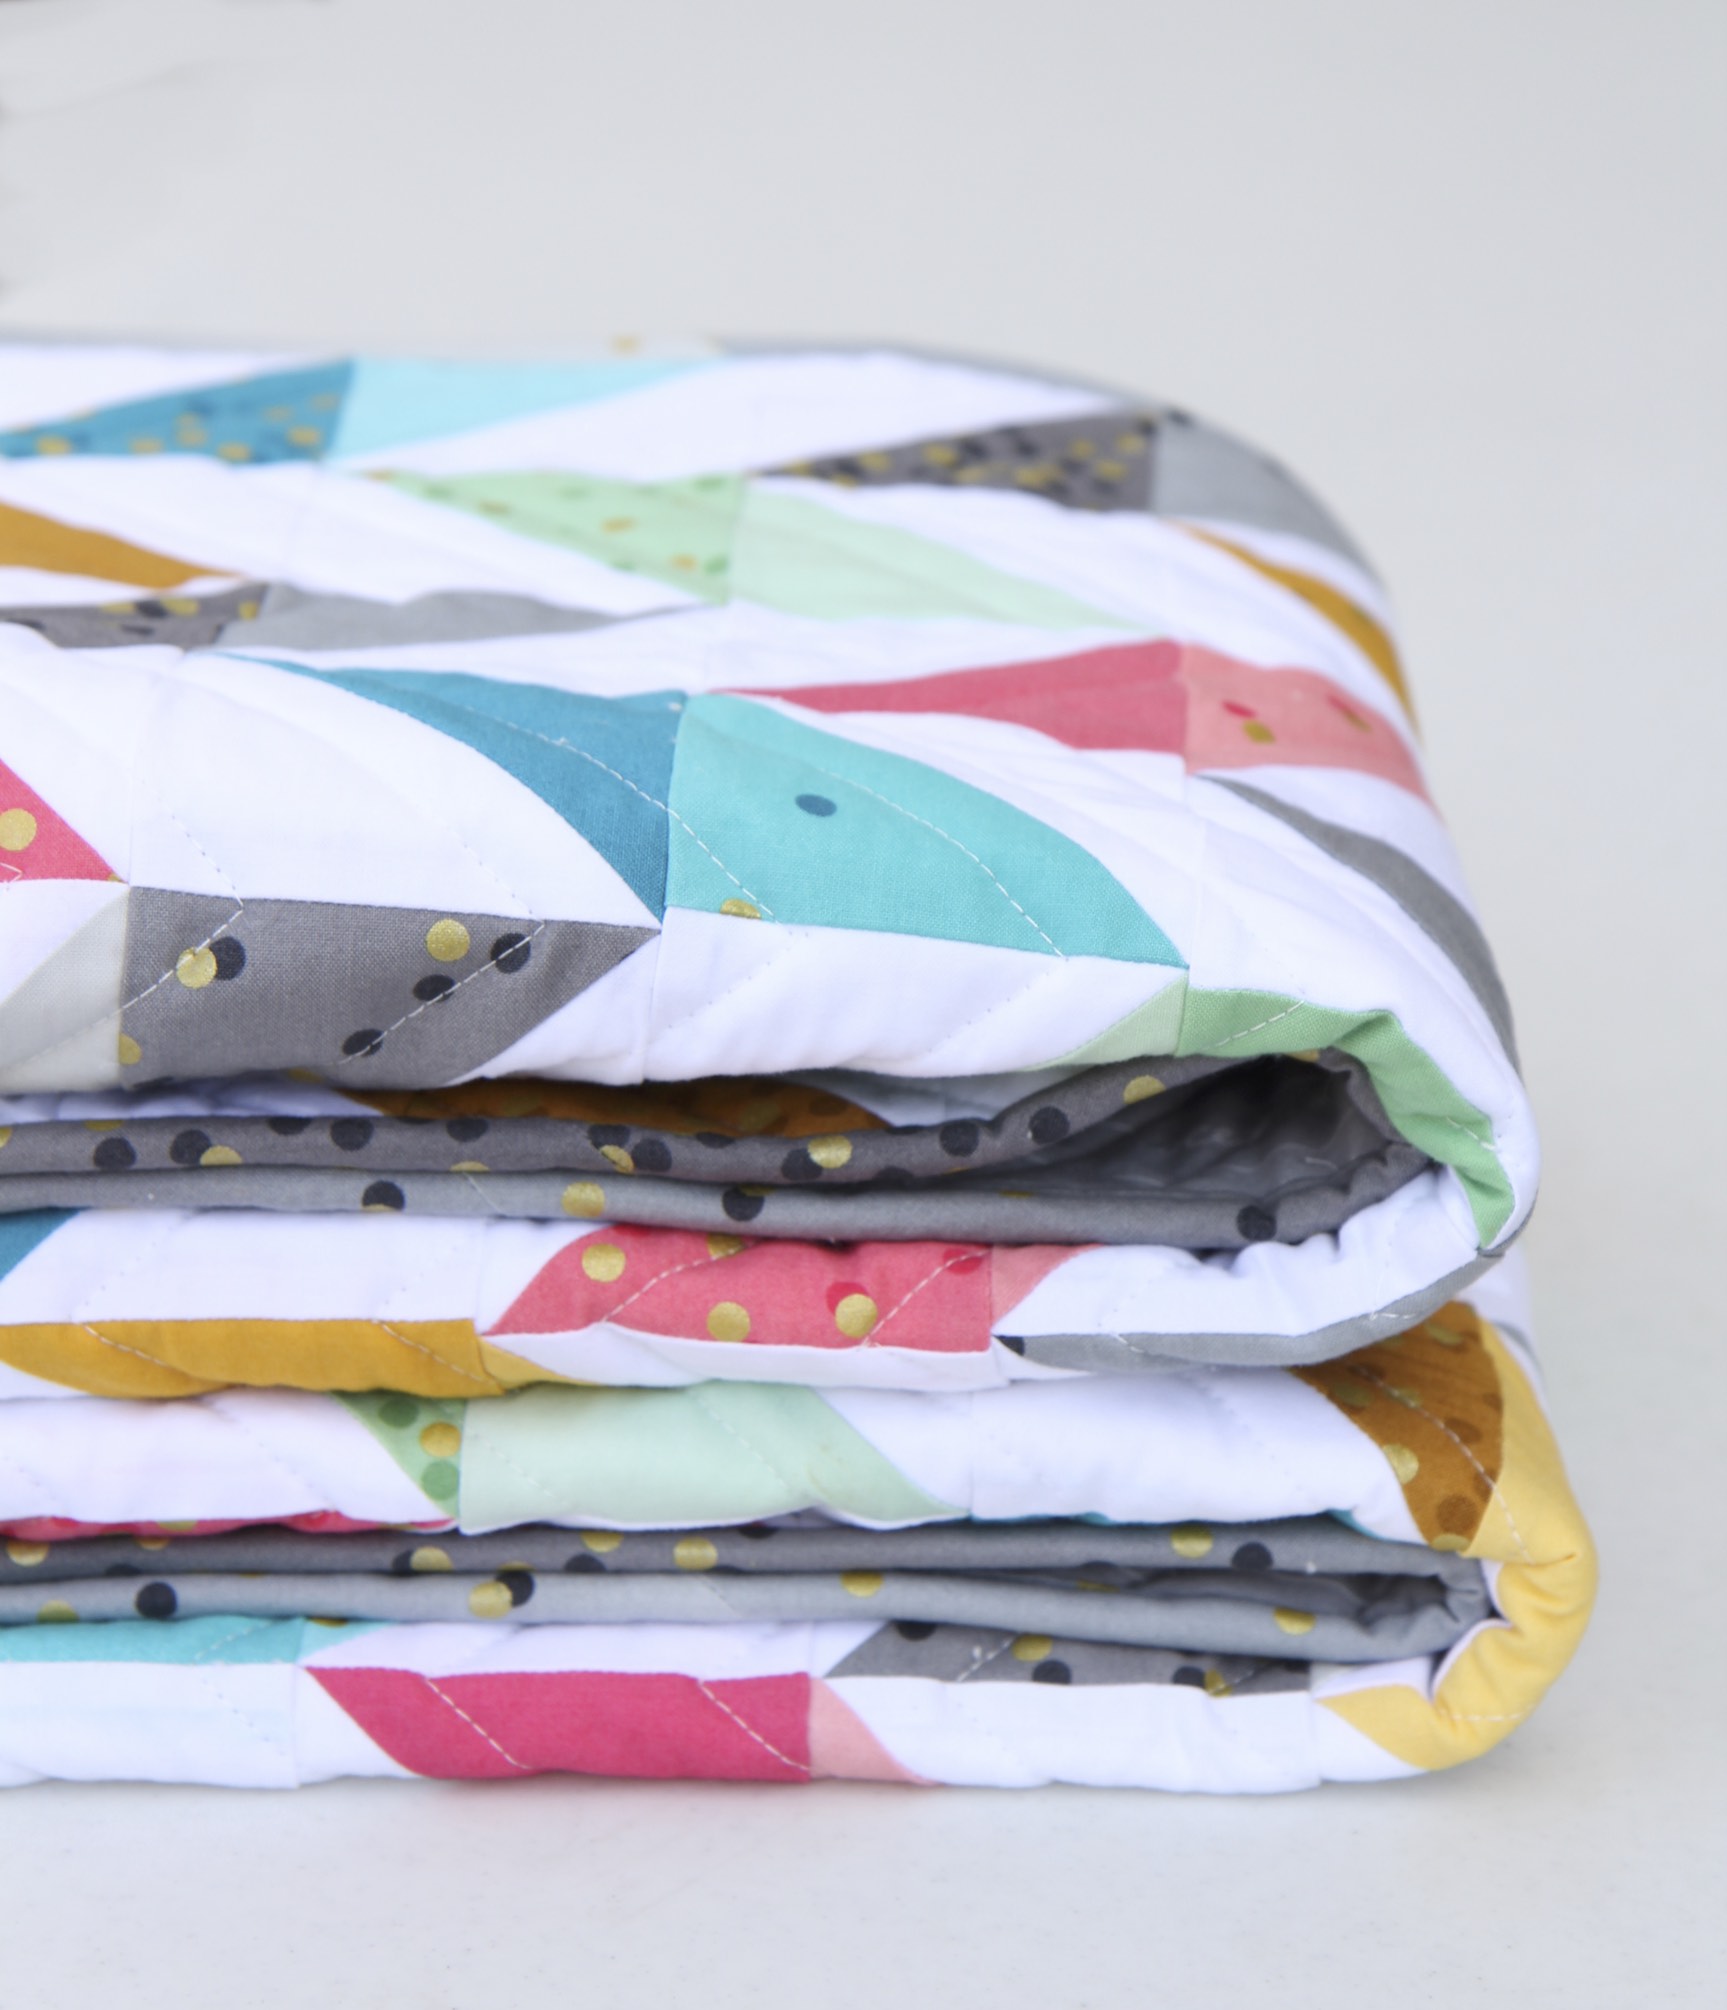
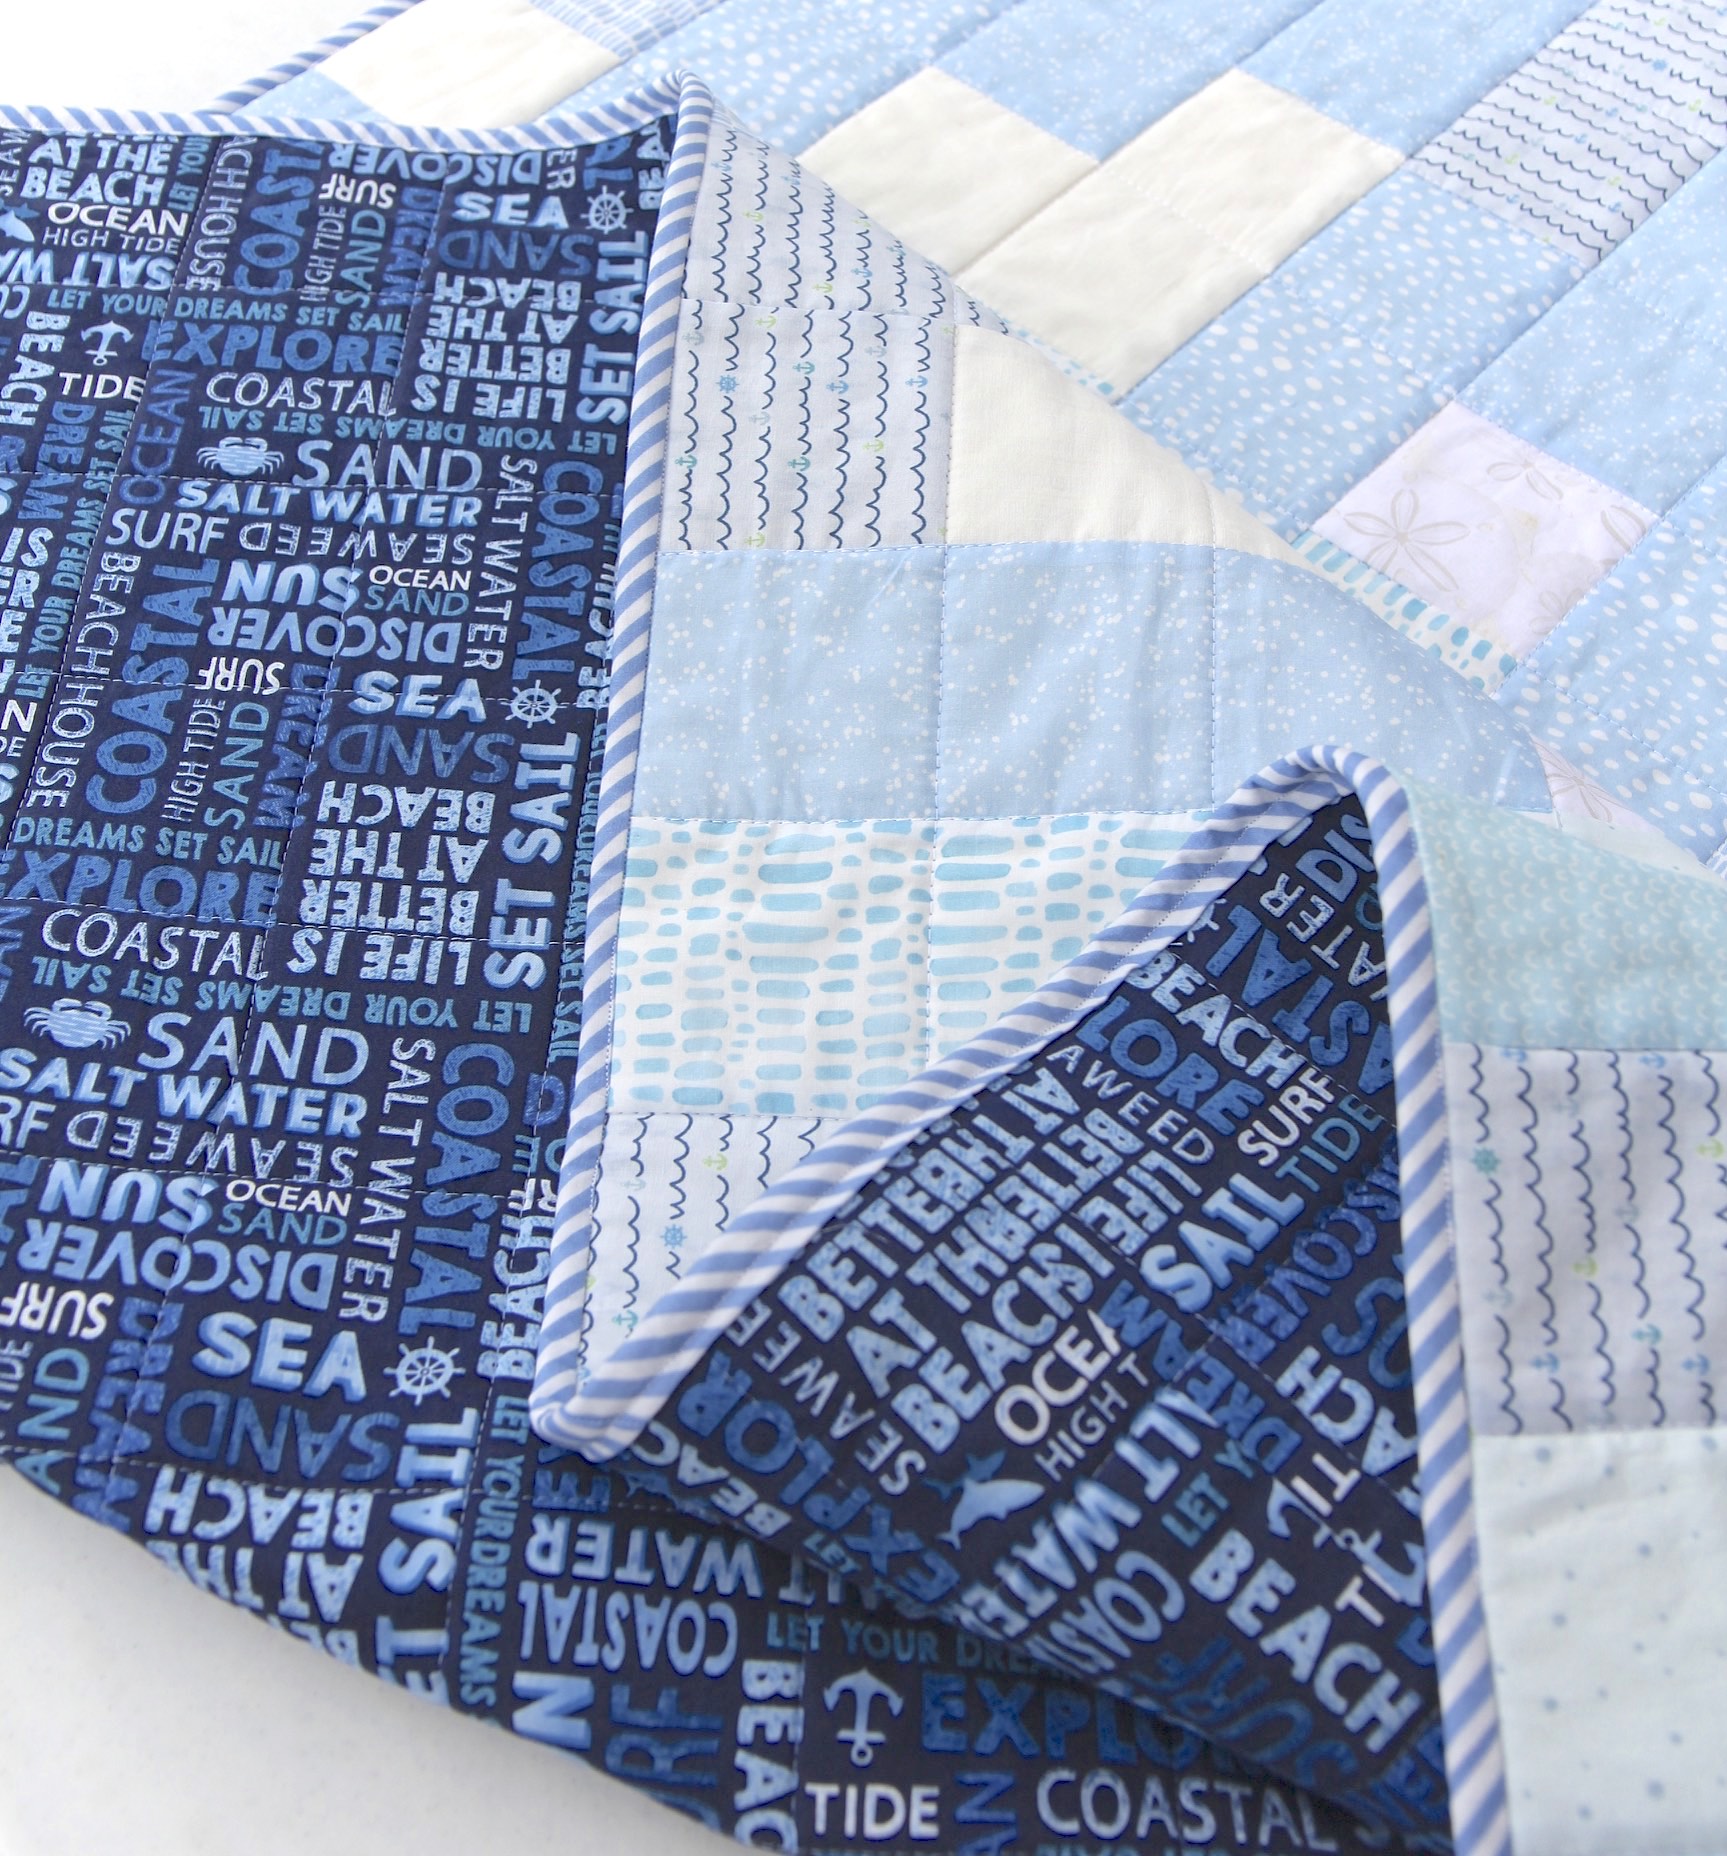
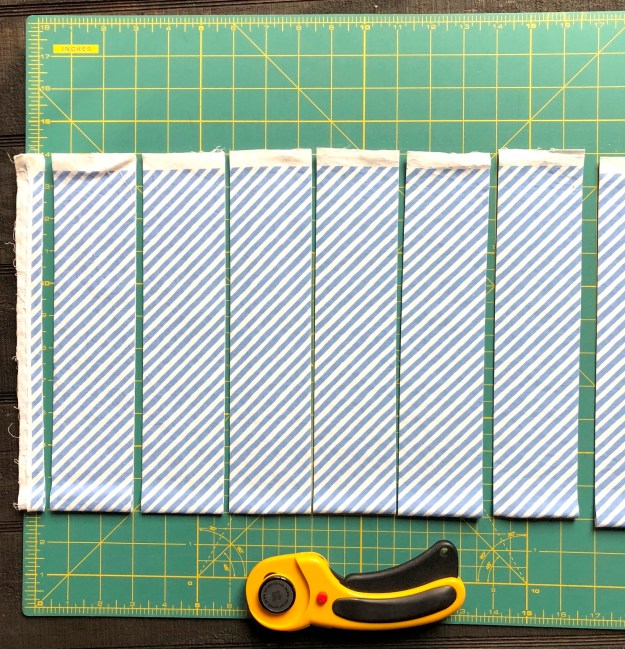
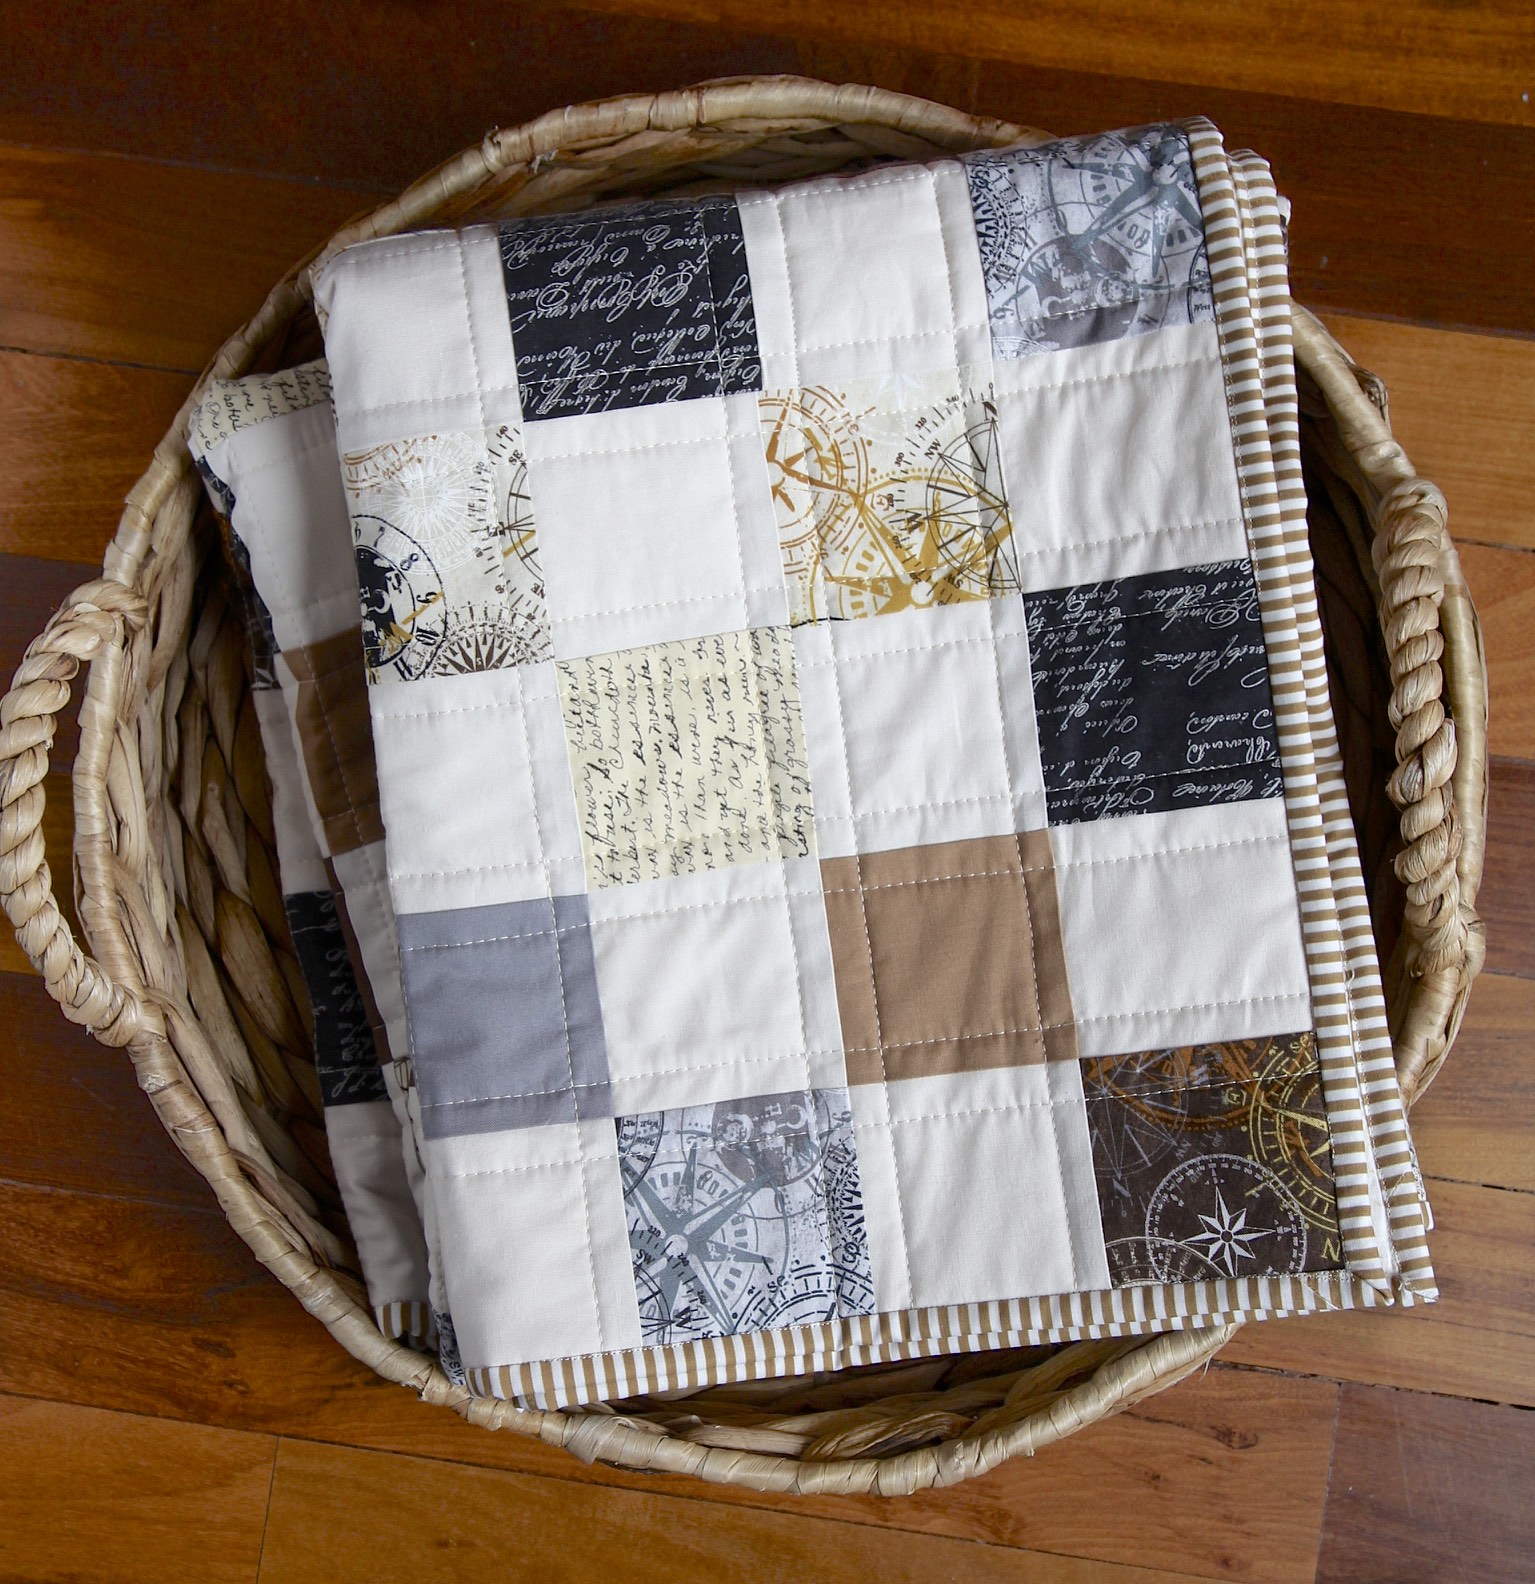
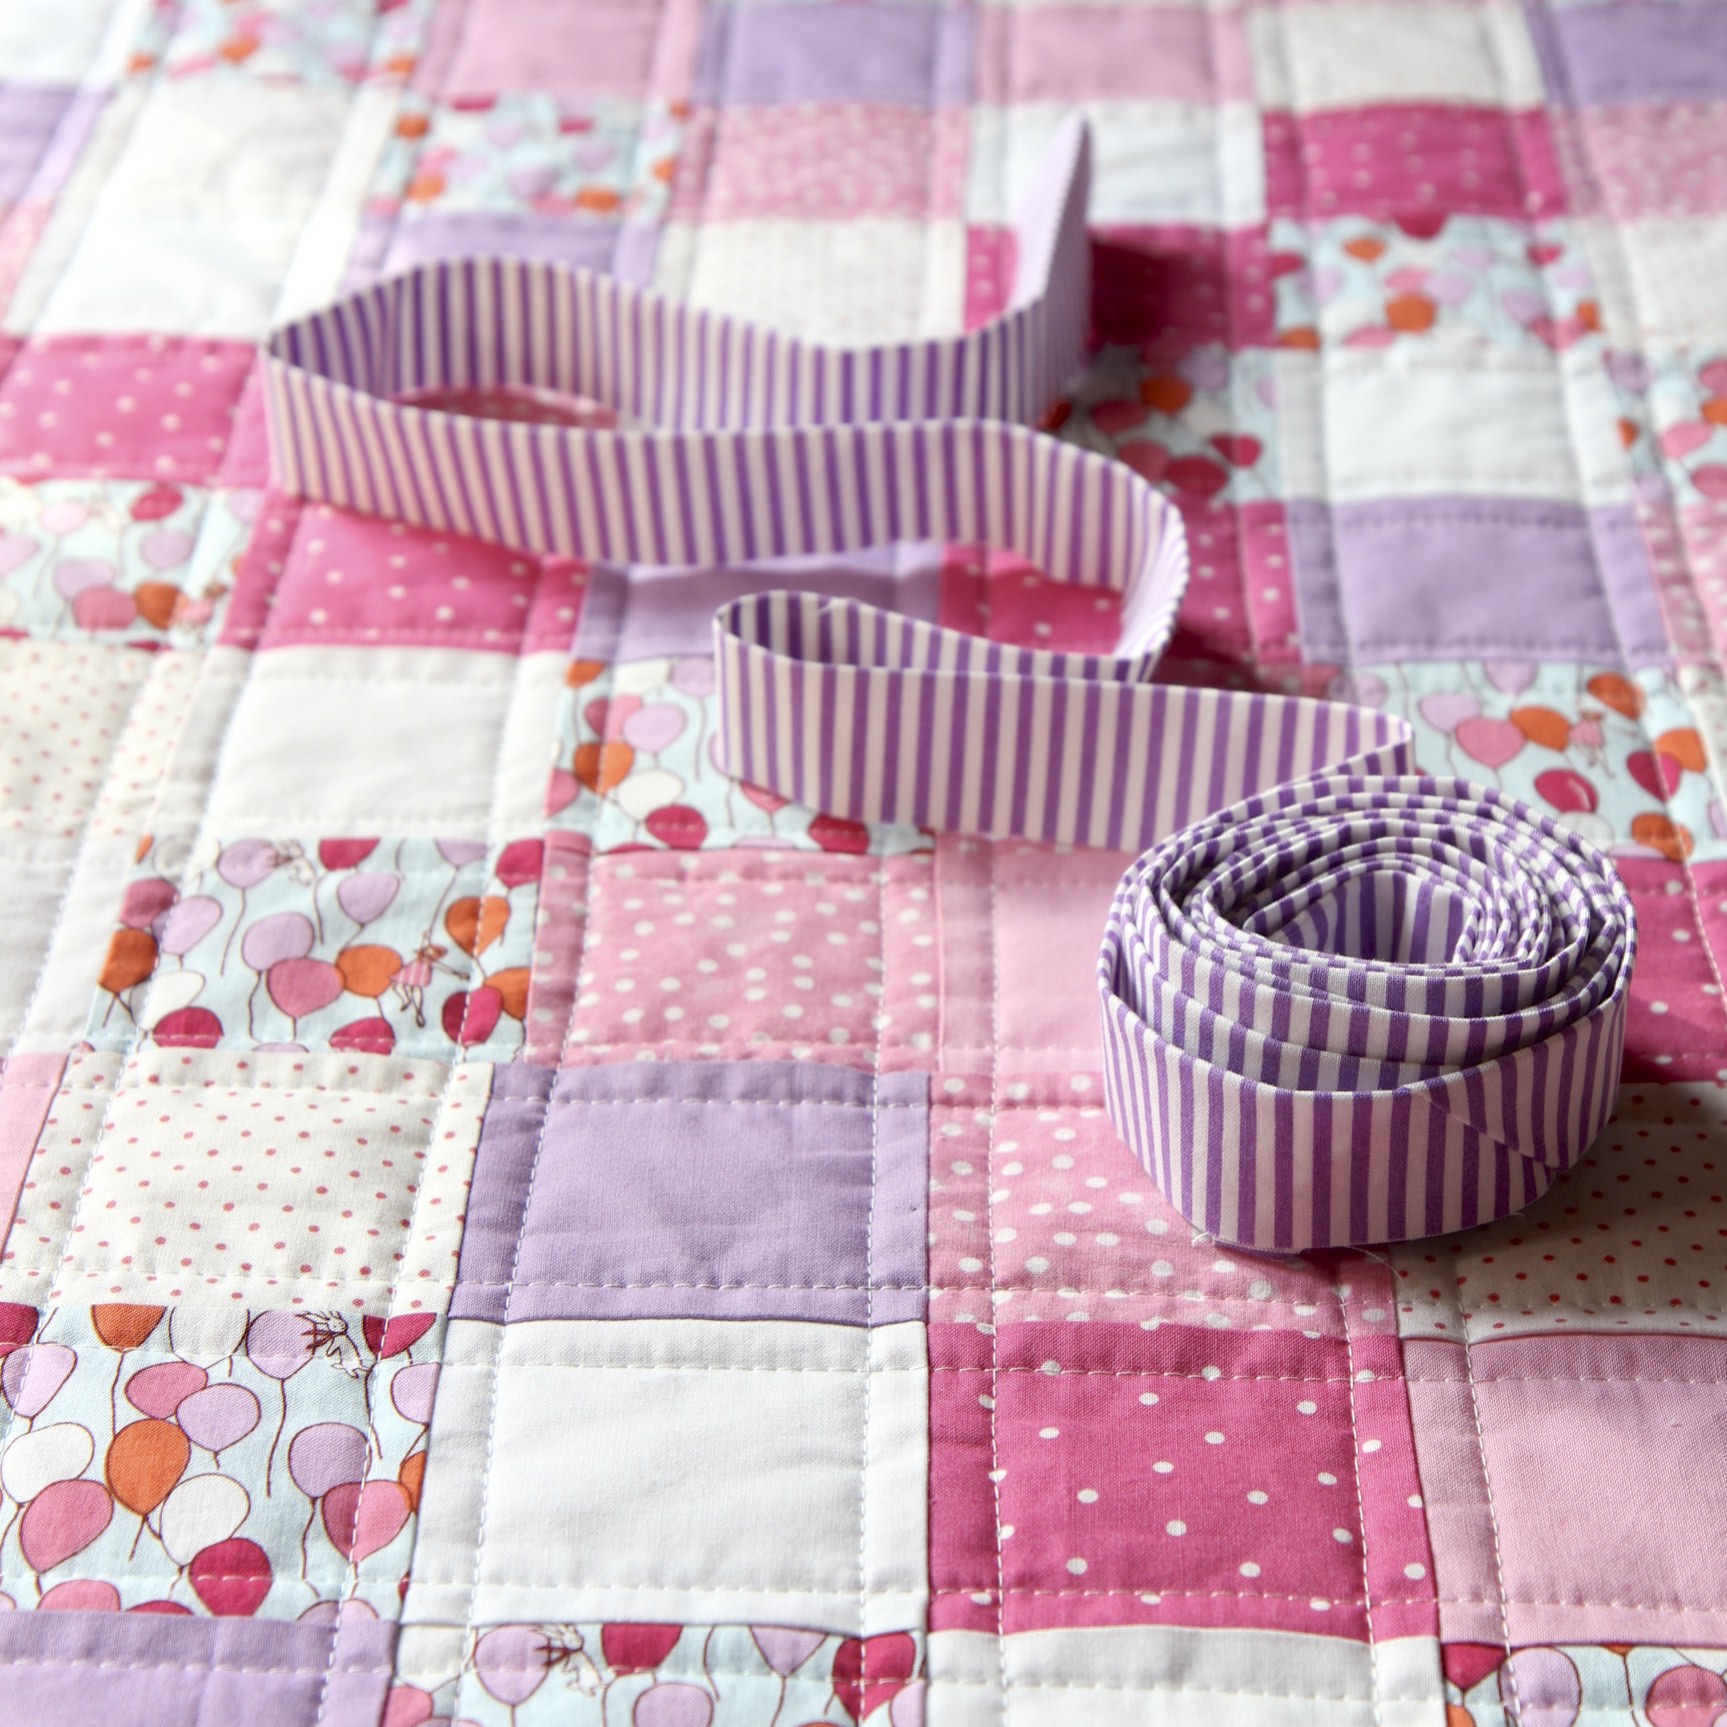
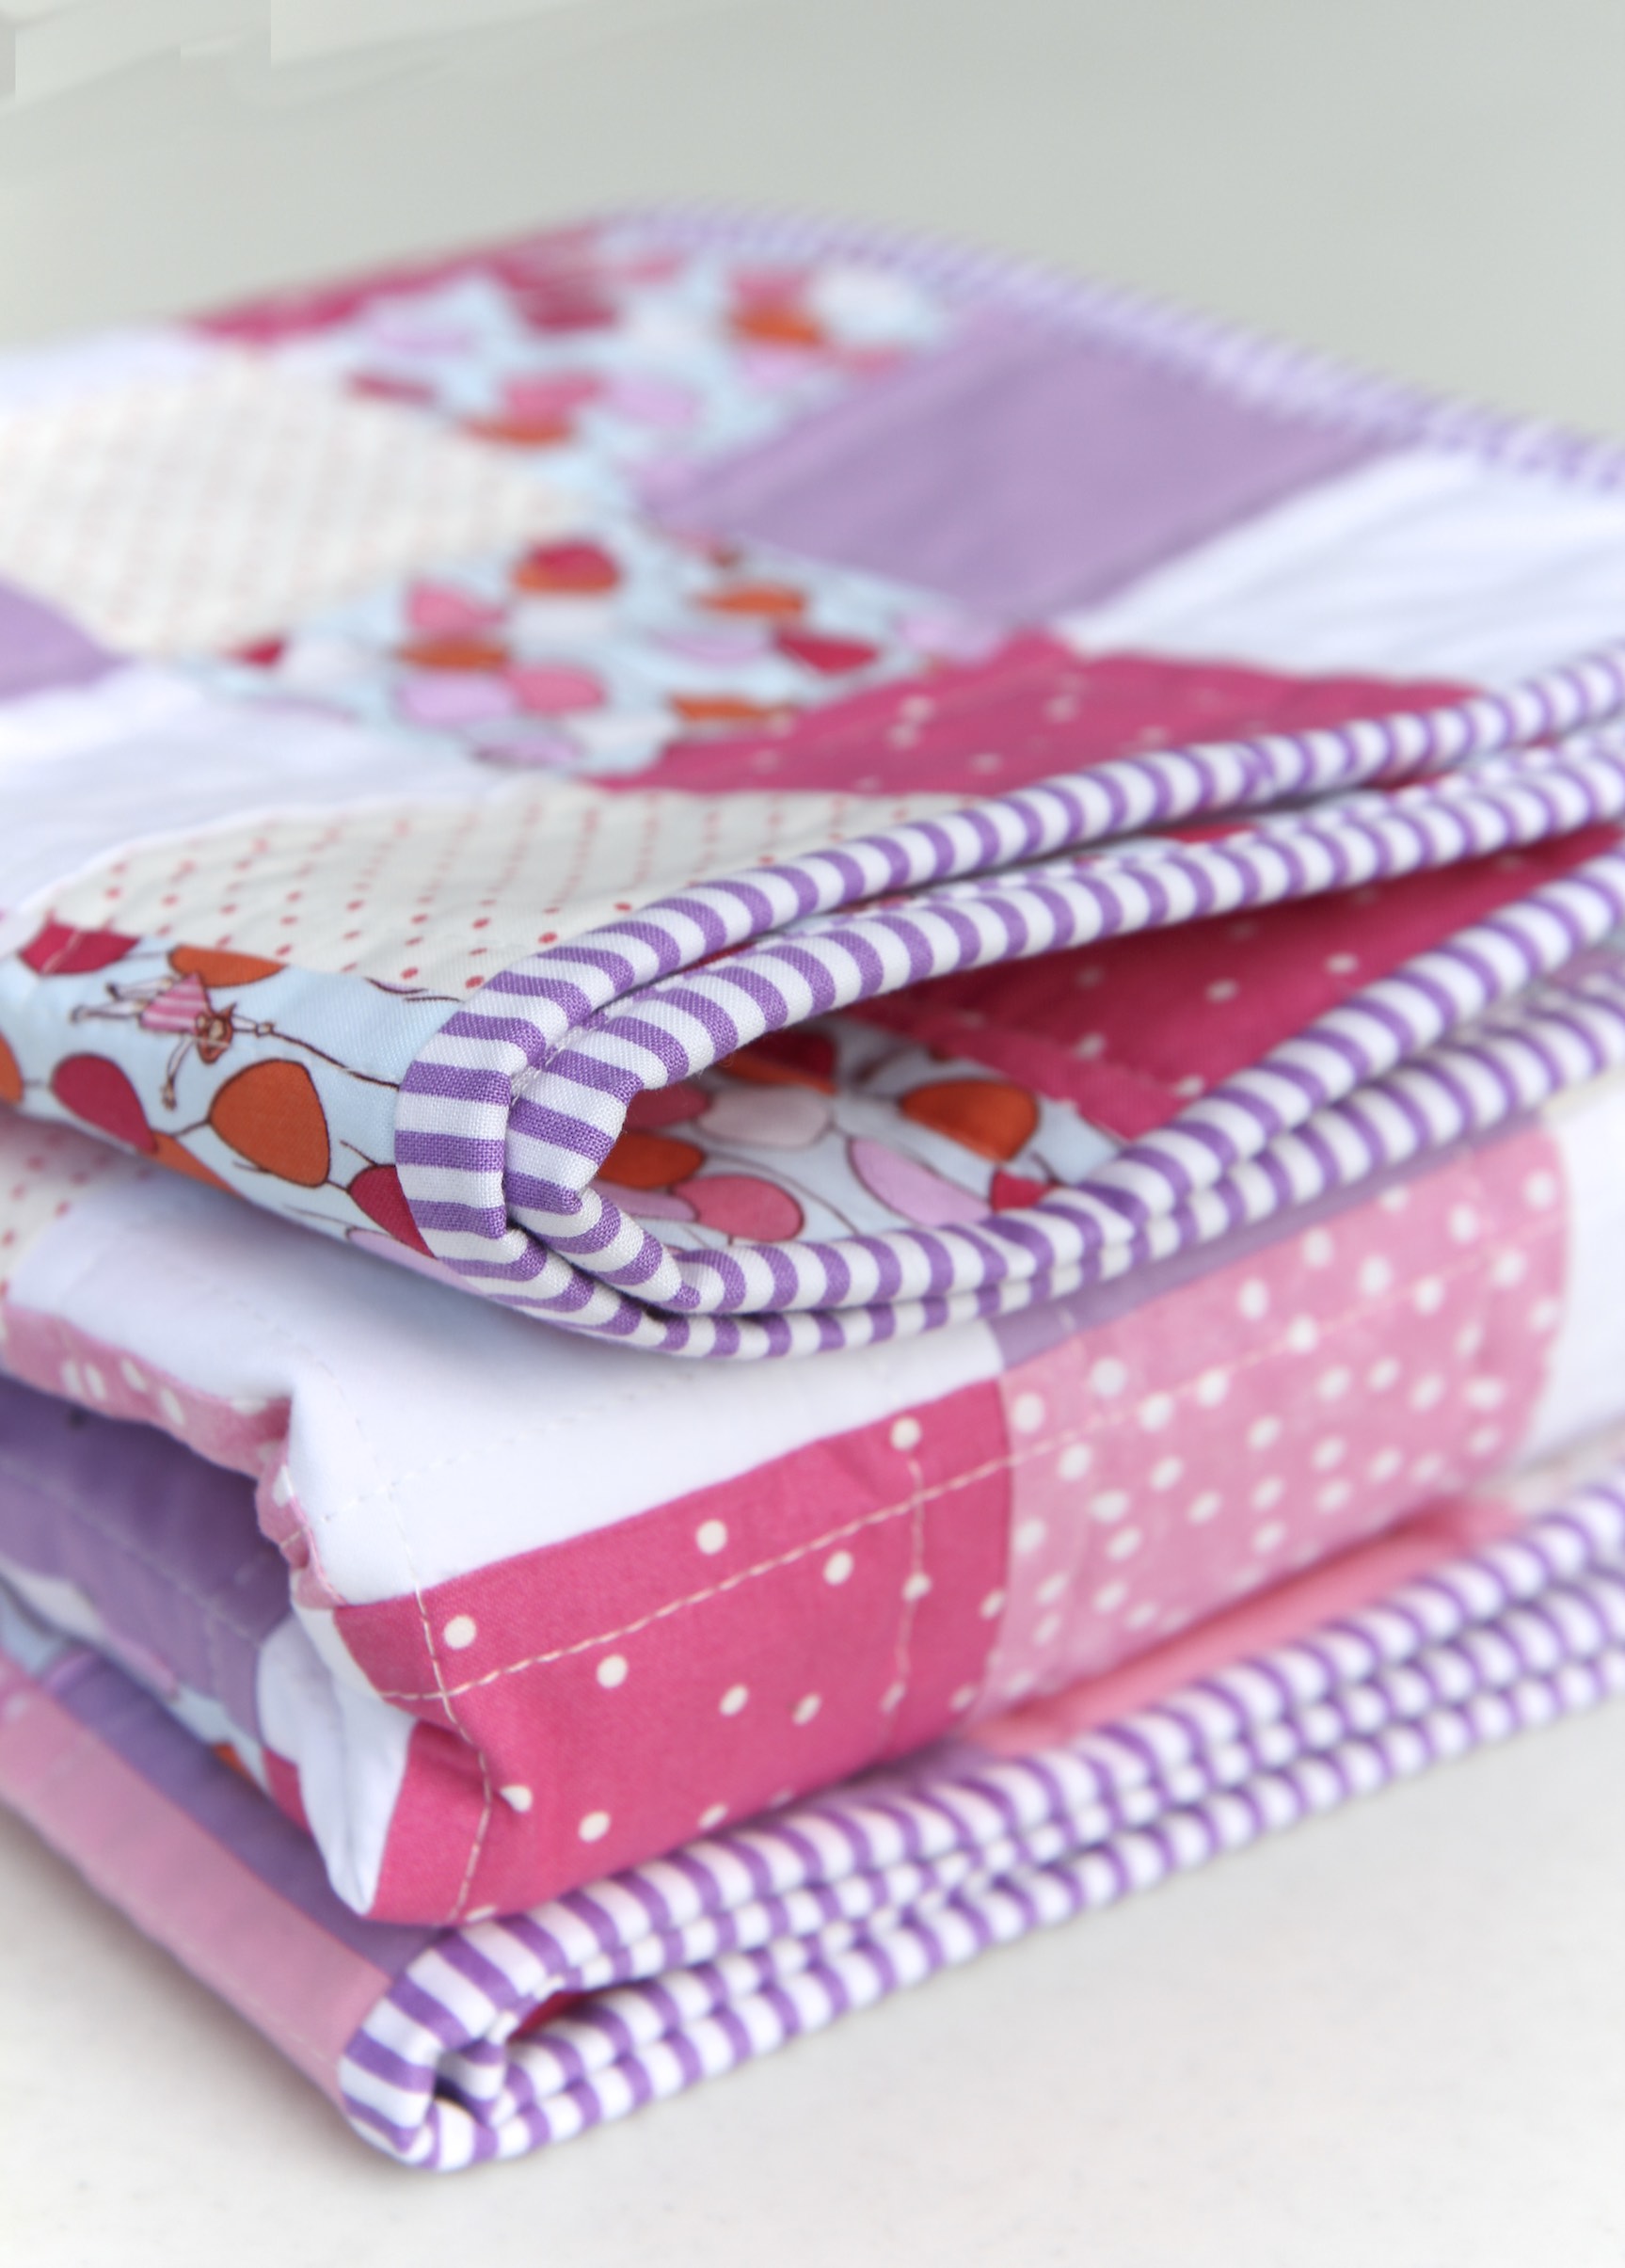
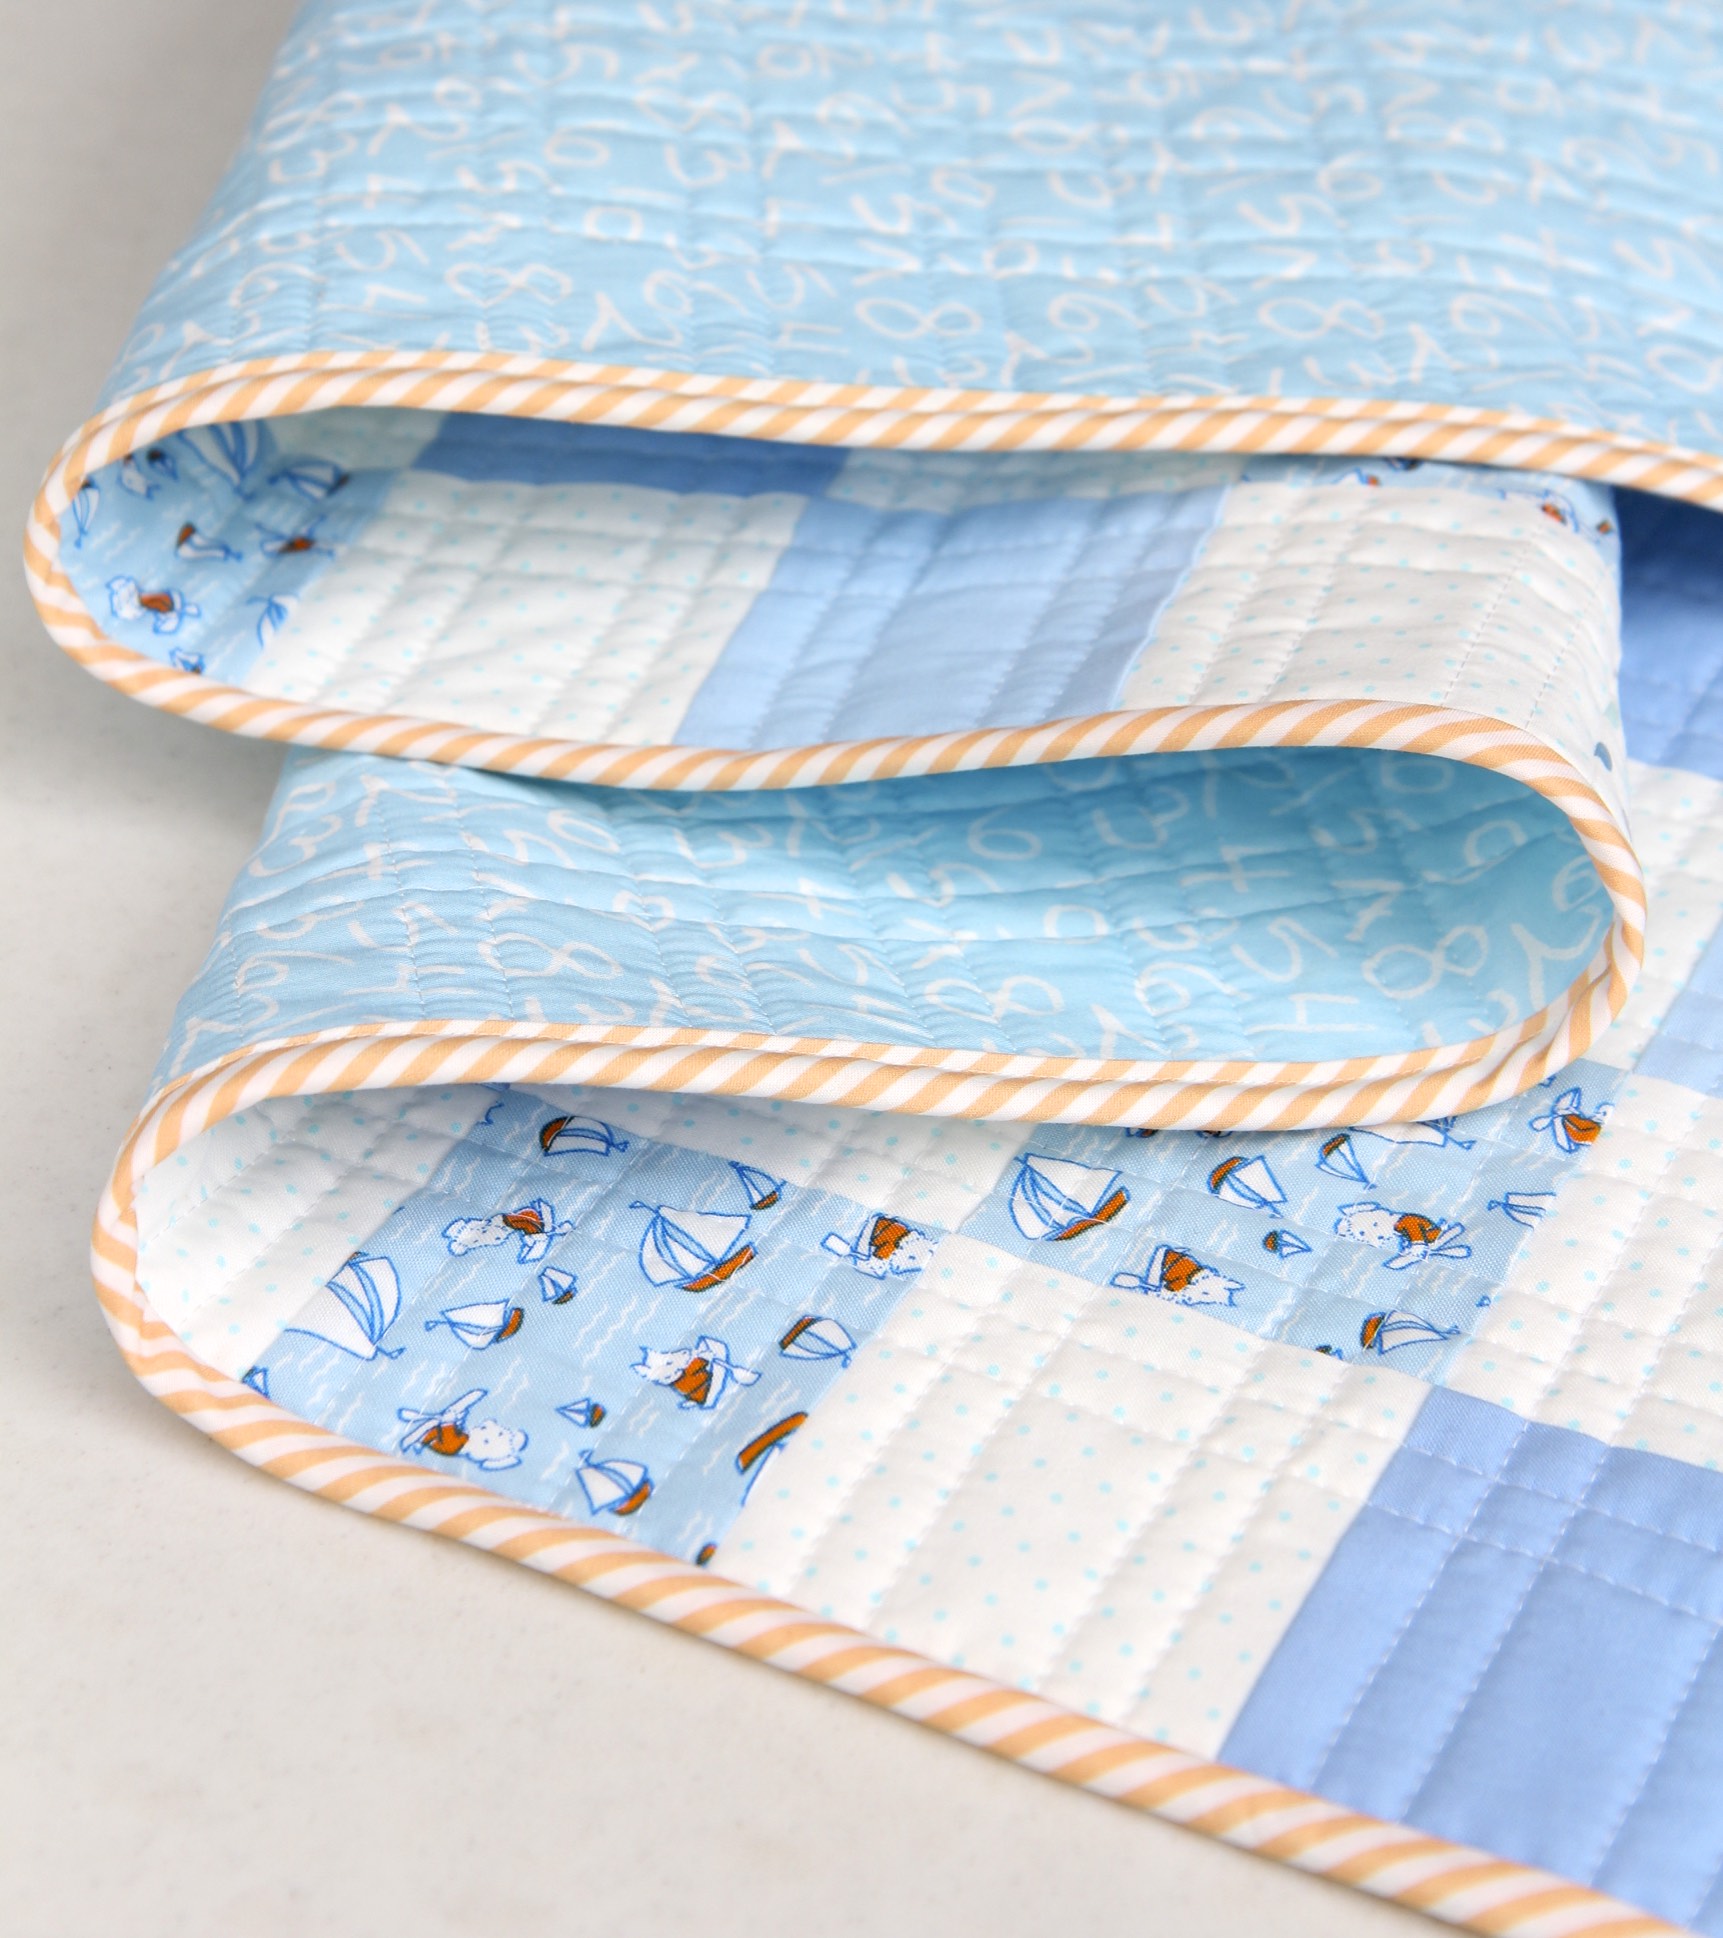
For the binding, I used one of the Sugar Sack fabrics, Pretty Petals in Red.  I thought it gave it a great pop!  I cut 2.5″ strips to make the binding and used this method to machine stitch it.

The quilt measures 31″ x 48″.  The Cuddle Blankie is 16″ x 16″ and the pillow is 18″ x 18″.

Sugar Sack Quilt FoldsSugar Sack Pillow with BOok

This quilt, cuddle blankie and matching pillow are listed in the Shop and are for sale.  Stay tuned for the patterns in January!

Happy Holidays and thanks for stopping by!
Elaine


Ombre Confetti Metallic Baby Quilt and Pillow


I’ve just finished a custom order baby quilt and pillow and wanted to share them with you.  I used V & Co’s Ombre Confetti Metallic fabric and it is just so darn cute in a baby quilt.  They came out with quite a few new colors recently and they are so fun to use in sewing. 


I did 16-patch blocks in a checkerboard pattern.  The background fabric is Robert Kaufman Indigo Chambray.  Chambrays are nice fabrics for backgrounds because they have a little more interest to them than solids. 

I used Warm and Natural cotton batting and quilted it on the diagonal, right over all the background squares.  Then I made a bias binding in a Hawthorne Thread fabric called “Artisan Stripe in Gold“.   They have this great stripe in 93 COLORS – do you believe that?  I cut 2.5” strips on the diagonal and made binding from that.  I love the look and the gold binding matches the metallic gold in the confetti fabric so well.  I used my usual machine binding technique.

The backing was a fabric from Art Gallery called “Dream Big” in baby blue.  It has large words that say, “love dream believe repeat” and it makes a great backing fabric.  The finished quilt was 32″x48″. 

The customer also wanted a reading pocket pillow, so I made one.  I plan on a pattern soon in the shop for this.  Stay tuned!

This quilt and pillow are SOLD. 

Thanks for dropping by!
Elaine

Storybook Vacation Baby Quilt

Storybook Vacation Quilt Folds

I have always loved the whole line of Windham’s Storybook Vacation fabrics – they are just the sweetest vintage looking fabrics.  I got to use them recently on a custom order baby quilt  along with some cute fabrics from Hawthorne Supply Co.

Storybook Vacation Quilt

Storybook Vacation Quilt stacked

The fabrics I used from Storybook Vacation were “Sailing Dogs in Blue” and “Blue Bubbles”.   The swiss dot fabric that was the “anchor” fabric on the checkerboard is “Essential Dots in Baby Blue” from Moda. I used a cute multicolor dot fabric from Hawthorne Supply Co. called “Multi Dot in Fair Isle Glacier”.  Did you know that Hawthorne has a whole line of fabrics they design in house that are printed digitally?   That means they can print them in a huge array of colors. It’s pretty awesome.  So the Multi Dot fabric comes in many colors.

Storybook Vacation Quilt Binding

I also got the binding fabric from Hawthorne  –  it is “Dress Stripe in Nectar”.  Again – this fabric is printed digitally and comes in tons of colors and makes a great binding fabric.  I love diagonal stripes for a baby binding, so I cut 2.5″ bias strips and sewed them together.  It takes a little more fabric to do this, but the effect is so cute.  Here is a tutorial on how to cut your own bias binding that is helpful if you like the diagonal stripes.

Storybook Vacation Quilt front and back

For the backing fabric I again selected a fabric from Hawthorne that I thought was so cute –  “Tossed Numbers in Robin’s Egg”.  It is from their “Back to School” line.  It’s a cute tumble of numbers and makes a great backing for a child’s quilt.

The quilt squares are 3″ finished.  I quilted a double set of lines on the quilt using 50# wt Aurifil thread in Natural White.  The batting is White Warm and Natural, which is great when you have white fabrics and you don’t want the batting to dull them down.

Storybook Vacation Quilt Folds II

When quilting, I switched to a #14 quilting needle and used my walking foot.  I talk about the importance of this in this post – it really makes a difference in preventing skipped stitches and puckers.

Storybook Vacation Quilt Detail

My customer also wanted a Reading Pillow, so here is a photo that.

Storybook Vacation Pillow

This quilt is sold.

Hope you’re making something – have a great week!

Elaine

Split Rail Quilt

Split Rail Top Folded

It’s fun to make a quick quilt and this one certainly was.  It uses Split Rail blocks, which are made just by sewing width of fabric strips together and then subcutting them into sections that you sew together to form the blocks. It just flies off your sewing machine.

Split Rail top and bottom

I made this quilt to match the color of an upholstered rocking chair at a cottage – I used four different minty green fabrics and used a batik backing that reminded me of water.  The background fabric is Kona Snow.

Split Rail FoldsThis is a throw size quilt and I used my much favored batting for this – Quilter’s Dream 100% cotton batting in its heaviest version – Supreme.  It has a lot of heft to it, making it a great quilt to curl up with, but is still great for machine quilting.

Split Rail Quilt Stacked

I quilted this using Aurifil #40 weight thread on top at a 4.0 stitch length.  I love this thread for the top thread – it is a little heavier and shows well.  I used a green Aurifil #50 weight thread in the bobbin and it worked just fine.  I know everyone says to match the weight of the top thread with the bottom thread, but my Janome handled it perfectly.

Split Rail TopSplit Rail Quilt Ladder


I’m working on a pattern for this quilt and I’m excited about it because it will be a great quilt for beginners or just someone who wants to crank something out quickly!

Hope you’re making something!

Elaine


Ombré Confetti Herringbone Child’s Quilt

Ombre Confetti Herringbone Quilt Front

(Note:  This quilt is now available in a PDF pattern!  It includes instructions for two sizes:  baby/crib 36″ x 48″ and throw 48″ x 60″.   The pattern is available in my shop. )

I am a big fan of Moda’s V&Co Ombré gradient fabric.  So when they came out with Ombré Confetti Metallic this year, I was very excited to use it.  It’s Ombré with confetti sprinkled on it! The design possibilities are endless with these fabrics and so much fun.  I know I’m going to be sewing with them for a while.  The colors are amazing – there are twenty different ones in all! For this quilt, I kept it to just 5 colors, with the grey being the predominant color.

Herringbone Quilt Folded

I had so many ideas for different quilts using this fun fabric.  I wanted a block where I could pair the solid Ombré with the Confetti Ombré,  so I designed a little herringbone child’s quilt.

Herringbone Quilt back and front

I made 192 Half Square Triangles for this quilt.  The quilt finished size is 36″ x 48″.  I made all the HSTs by using my eight-at-a-time method, which is just so fast.  The HSTs were 3.5″ trimmed and 3″ after being sewn in.

Herringbone Quilt Folded II

I used five colors and Kona White for the background.  The graphite grey color was sort of my anchor color and I used twice as many HSTs in that color than the other four.

Herringbone Quilt front

For the backing fabric, I knew I wanted something that was not as busy as the front of the quilt and I was hoping to find something in a grey that I liked.  I found this fabric, by Moda, called “Shooting Stars” from the “Stellar Baby” line that I really liked and had some sweet words:

Herringbone Quilt Backing Detail


Herringbone Quilt folds

I used two layers of Warm and Natural cotton batting for this quilt.  Do you feel sometimes that one layer of Warm and Natural is just too light? Sometimes I want a warmer quilt and so I tried it on this one.  The basting process went great and it quilted up like a champ, with no puckers or problems.  And it has double the warmth.

Herringone Quilt Stacked

I debated how to quilt this herringbone pattern.  I decided to go ahead and follow the zigzag pattern of the quilt, although this was going to require a lot of shifting of the quilt in the machine.  However, I broke out my knee lifter and that helped a ton – I didn’t have to take my hands off the quilt to lift up the presser foot to shift the quilt.  I don’t need this gadget often, but when I do, I’m so glad I have it.

Herringbone Quilt Front Scrunched

For the binding, there was no question I was going to carry the grey dominant color to the binding – and that confetti fabric is perfect for a fun binding.  I cut 2.5″ strips to make the binding.  Here is a tutorial on how I did that.


Herringbone quilt detail

I can’t wait to sew with some more Ombré Confetti!  It’s so fun.

I’m listing the quilt in the Shop.

Thanks for stopping in!
Elaine


Shifting Strips Beach Quilt

Shifting Strips Beach Quilt - Beech Tree Lane Handmade

I had a vision for this quilt – something light, airy and fresh looking that had fabrics that reminded me of the ocean, sky and beach. I am so pleased with how it turned out and it has exactly the look I was going for.  Of  course, I had to make a rope bowl to go with it – my new fun thing to make.

Shifting Strips Beach Quilt with Rope Bowl by Beech Tree Lane Handmade

I had so much fun picking out these fabrics.  I got a lot of help from Hawthorne Threads, which has their own fabric designs that are printed digitally.  This enables them to offer them in a very wide variety of colors.  I selected water and sky colors:  Skipping Stones in Sky, Doodle in Powder Blue, Watercolor in Robin’s Egg, Stardust in Sky, Multi Dot in Fair Isle Glacier,  and for the binding Rogue Stripe in Cornflower.

The other fabrics in this quilt were Seaside Blue Waves Anchors, Reef Sky Dots by Robert Kaufman, Laura Gunn Painter’s Canvas, and Timeless Treasures Sand Dollar Beach, which I love and was so lucky to find – I love the delicate little sand dollars.

Shifting Strips Beach Quilt by Beech Tree Lane Handmade

The backing fabric was a real find, too – Indigo Coastal Words in Blue from Studio e Fabrics.  It’s a perfect beach/ocean fabric and gave some interesting punch to the backing.

Beach Quilt Backing Fabric


Beach quilt Back front back

I thought about the design of this quilt for a while – I wanted to use larger pieces of fabric.  I really didn’t want to do a lot of cutting up fabric and making blocks – I really wanted these fabrics to be the star.  So I decided to just sew strips of various widths together into sets and then subcut those sets into strips.  I laid out the strips into a design I liked then sewed them into rows – since all the strips’ widths were different, there were no seams to match up!

Shifting Strips Beach Quilt by Beech Tree Lane Handmade

Here you can see the completed strips that were sewn together:

I really loved the design of this quilt and since there are no blocks to assemble, it goes really fast!  I am working on a pattern now and hope to have it available soon.

I used my new favorite thicker batting, Quilter’s Dream Supreme.  It makes such a nice hefty quilt.

I love this binding because I love bias binding.  And now you don’t have to cut diagonal strips to get bias binding – Hawthorne Threads has a wide selection of colors of stripes on the diagonal, called Rogue Stripe.  This one is Cornflower.  Makes it so simple when you can cut crossgrain strips and get bias binding!

When you use a Stripology ruler, cutting same size strips is even faster.  Like really fast:

You don’t have to lift up the ruler to measure each strip. You make your cuts, lift up the ruler and they are all done.

I quilted this using Aurifil cotton thread, a natural white on the top and a light blue color in the bobbin.  I used a 4.0 stitch length and a walking foot.  The vertical quilting cut across the strips and the horizontal quilting was all in the ditch.


Thanks for coming by,
Elaine


Little Lamb Checkerboard Quilt

IMG_5624

I’ve made several checkerboard baby quilts in the past and have so many people ask me for patterns, that I finally made another quilt and spent some time making up a pattern.  In the past, I have made these checkerboard quilts using a traditional 16-patch block but I’ve thought about it and feel that sewing width of fabric strips together and then subcutting them is faster.  So this pattern utilizes a super easy and quick strip piecing method.

This little quilt is my “less is more” philosophy that using just a handful of prints can have more impact than many prints.  In this instance, I’m using just four fabrics – my main fabric, which is a little lamb print, a dot, a solid and a subtle checked print.  This is similar to the Little Owl Quilt that I did and which got such a great response and so many requests for a pattern. *

* The pattern to make this quilt is now available in my Shop.

IMG_5667

The little lamb fabric is called Clover from Cotton + Steel. It’s so sweet!  I selected my favorite dot fabric from Art Gallery Fabrics called Firefly in Whisper from the Hello Bear collection.  I added a Moda Solid and a little bit of a check fabric from Camelot called Mixology Woven in Rainwater.

For the backing, I found a fabric I thought went so well with the top – it’s called Scattered Hashtags from  Moda Mixology.

For the batting, I used a low loft Warm and Natural 100% cotton.  I quilted it with Aurifil thread, using a 4.0 stitch length and a walking foot.  I just used the seams on each square as my guide.

For the binding, I used Squared Elements in Turquoise.  I machine stitched the binding using my usual method.


I have this pattern out to testers right now  and when I have it available very soon, I will announce it here on the blog and it will be available for purchase.  If you follow me on Instagram, you will see it there also.  I will be very happy to finally be able to provide you with a pattern for this simple, fun quilt.

This quilt itself is now listed in the Shop.

** A pattern to make this kind of quilt is now available in my Shop.

Thanks for coming by!
Elaine


Compass 16-Patch Quilt

Compass Quilt Full Front

I found this really interesting line from Windham Fabrics called “Measure”.  They have fabrics that show compasses and rulers and writing and I just loved it.  I had been looking for a color palette of browns, creams and maybe a touch of black.  This fabric line was perfect for the 16-patch quilt I had in mind.

I’m also going to show you how I made the 16-patch blocks and give you my measurements for cutting.

Compass Quilt fabric pull.JPG

I added some Kona solids and another text print called “Bee Creative” by Deb Strain for Moda.  For the background, I used Kona Ivory.  The finished quilt size is 48″ x 60″, which I consider an ideal size for a throw quilt to curl up with on the sofa.

Compass Quilt over chair

Compass Quilt stacked

This quilt was composed of twenty 16-patch blocks.  The squares in the finished quilt are 3″.  The 16-patch blocks in the finished quilt are 12″.  I prewash all my fabrics – if there are any surprises, I want them now and not when I wash the finished quilt.

Compass Quilt folds

If you are interested in some of the particulars, here’s what I did:
I cut (40) 3.5″ WOF strips total, 20 in the various prints and 20 in the background fabric.  You need 2 yards of the background fabric and 2 yards of various prints.

I cut the WOF strips into 15″ strips.  I sewed 2 prints and 2 background strips together, like this:

compass strips sewn together

Press seams to dark sides.  This strip set gets subcut into (4) 3.5″ sections:

compass subcuts

Repeat with your other prints, varying which fabrics you have in the top and third positions, so you have a great variety.

compass finshed subcuts

Then lay these out into 16-patch blocks, starting with a dark fabric in the top left position.

compass subcuts ready for sewing

Sew together into blocks.  The seams should all nest.

finished compass block

Repeat until you have 20 16-patch blocks and then just lay all the blocks in a pleasing array  – four blocks across, five blocks down, and sew together.

Compass Quilt folded

I used a fabric for the backing called “Henry Glass Principle Circle Play in Cream“.   It is a 108″ wide quiltback which is terrific – no piecing of the back!  There seems to be more 108″ wideback fabrics available now than there used to be.

henry glass fabric

Compass Quilt front and back

I used my new favorite quilt batting, Quilter’s Dream in the Supreme loft.  I love this batting – it’s more expensive, but it makes a heftier, cozier and softer quilt than Warm and Natural.

Compass Quilt in basket

I quilted this using a 4.5″ stitch length and used Aurifil 40# cotton thread.

For the binding, I did go with a classic stripe.  Hawthorne Threads actually digitally prints lots of really interesting fabrics themselves and they do a whole line of stripes called “Dress Stripes” that are perfect for bindings – if you can’t find the color you want for stripes, check them out – they have almost any color you need.  I used “Ochre” for this binding.

Compass Quilt binding

Compass Quilt binding detail

I cut 2.5″ strips for the binding.  I have a tutorial on how to machine bind a quilt, if you need to know how to do that.  I do use a walking foot when I attach the binding.

Compass Quilt fabric varation

Compass Quilt on chair

And here is the quilt after I washed it.  I definitely wanted that crinkle look for this one:

Compass Quilt Washed.jpg

Can’t wait to send this off to its new owner!

Thanks for stopping by.  Hope you’re making something!
Elaine


Grey and Mustard Arrow Quilt

Grey Mustard Quilt

(Note:  After many requests, I have now written a PDF pattern for this quilt!  You can find it here.)

This is my last quilt for 2017 and I wanted to get it posted before the holidays!  I photograph my quilts outside and so this was a real challenge because it was 17° and we were going to get 6 inches of snow that day.  I sort of had one shot to get some pictures. The rest of the week would have too much snow to be able to shoot.  I was freezing, but managed to get decent photos.   I’ve had a few inquiries asking if there is a pattern – no, there isn’t but I’m going to give you my cutting instructions and hope that helps.

Arrow Quilt back and front

I can’t help myself with mustard and greys together – I just love that color combination.  The big reason for making this quilt, though, was that I wanted to experiment with a new type of batting.  I wanted a bigger, heavier quilt but still wanted to machine quilt.  I have used two layers of Warm and Natural in the past, but found that too stiff.  A woman in a quilt shop suggested Quilter’s Dream.  They make several different lofts and I wanted to see if I could use the heaviest loft, Supreme,  and still machine quilt successfully.  The answer was yes, although it takes a little muscle to manipulate the quilt as you are quilting it!  The quilt ended up having a very nice heft to it without being bulky and is perfect for curling up with on the sofa.  Also, I believe the Quilter’s Dream is less stiff than Warm and Natural.  It is more expensive, but worth it if a little more suppleness is important to you.

Arrow Quilt Fabric Pull

The fabrics were all from my stash. Some of the mustard fabrics were from one of my all time favorite lines, Magnolia,  from Camelot Fabrics.  Some of the greys were from Zen Chic for Moda, Robert Kaufman Basketweave and Light and Shade.  Many of these fabrics are no longer available but you can find some from Etsy sellers.

My background color for this was Robert Kaufman Kona Cotton Solid in Snow.

arrow quilt layers binding

The quilt ended up being 48″ x 60″, which I consider about the perfect throw size.  I played around with the arrow blocks and how to lay them out – there were so many good patterns they could make.  I made 80 arrow blocks total.  I used 20 different print fabrics and made 4 arrow blocks for each fabric.

Each arrow block requires:   (1) 3.5″ square print,  (1) 3.5″ square background and (2) Half Square Triangles of the print and the background.

Here is how I did my cutting:
For each different print fabric, I cut (4) 3.5″ squares  (80 print squares total)
I cut (80) 3.5″ squares of the background fabric
I made (8) HSTs of each print fabric  (160 HSTs total)

This is all you need to make the top.  I made the HSTs by doing the eight-at-a-time method, which is fast and perfect for this top, because each different print fabric took just that many HSTs.   I cut (1) 8.25″ square of each print fabric and (1) 8.25″ square of the background fabric.  Then follow the eight-at-a-time method.

Arrow Quilt HSTs


HST1HST2HST3

For the binding, I used my favorite gingham  – Robert Kaufman Carolina Gingham in silver. This gingham comes in many colors and I love keeping it in my binding stash drawer.  It was also one of the prints in the quilt.   I made 2.5″ binding and used this method to attach it. I keep my walking foot on when I attach the binding now.

arrow quilt top and binding

arrow quilt gingham binding

For the backing fabric, I used an old favorite from the Maker Line by Art Gallery called “Make and Pin”.  I love this fabric and it makes a great backing fabric because of the random pattern.  I used this method to make the backing, avoiding the dreaded cutting and piecing of the backing, which I hate.

Arrow Quilt Back:Front

Arrow Quilt top:back

I machine quilted using Aurifil 40 wt thread in Muslin.  It’s a little heavier than the 50 wt and I like the way it looks on the quilt.  I used a 4.0″ stitch length with a walking foot.

arrow quilt layers

arrow quil top

arroq quilt stacked

I love the way this quilt turned out and I made it just for us, so I’m looking forward to curling up with it in the years to come.

I hope these cutting instructions are helpful to you.  If you have any questions, just e-mail me.

Have a great holiday season and a wonderful New Year.  See you in 2018!
Elaine

Children at Play Baby Quilt

Children at Play Back & Front

This is a custom order baby quilt and pillow that I just finished and wanted to share with you.  I was excited to use this “Children at Play” balloon fabric and had quite a nice time deciding which colors to pull out from it for the quilt.

Many of you contact me with questions about specifics on making quilts, so although this isn’t a pattern, I’m going to try to give you some better cutting details for this quilt.


Children at Play Closeup

The finished quilt measures 36″ x 48″.  It is made up of twelve 16-patch blocks. Each patch is 3″ finished.  I have prewashed all fabrics.

Here are the fabrics I used:

Seven different fabrics for the top:
(See cutting instructions below)
Robert Kaufman Kona Solid Pansy  –  3 strips
Robert Kaufman Kona Solid White  –   2 strips
Robert Kaufman Kona Solid Carnation  –  3 strips
Moda Essental Dots  –  3 strips
Michael Miller Children at Play Balloon   –  5 strips
Brother/Sister Design Studio Pink & White Dots  –  3 strips
Pink and White Dots (unidentified)  –  3 strips

Binding:  Michael Miller “Little Stripe” in purple (no longer available)
BackingMichael Miller Children at Play Balloon
 

Children at Play Fabric Pull

Children at Play Detail

To make the 16-patch blocks, I cut (22) 3.5″ strips of fabric from the WOF.    (I cut more strips from the balloon fabric than the solids or dots because I wanted the balloon fabric to repeat more  in the quilt.)  Then I cut these strips down into 16″ lengths. I sewed together four 16″ lengths to get a strip set.   I varied the position of the fabrics as much as I could to get different combinations of fabrics within each strip set for a total of 11 strip sets.  Then I subcut these strip sets into 3.5″ strips.  Four of these subcuts were sewn together randomly to make (11) 16-patch blocks.  I used the leftover fabric from the initial cutting of strips to make the 12th block that I needed.  I didn’t keep strict track, but I believe I used about 2.25 yards of fabric for the top.  I had scraps left over with which to make a pillow top also.

Children at Play Stacked II


Children at Play Strip Set I


Children At Play Strips


Children at Play Block


After you have all your blocks sewn, lay the blocks out to see what kind of order you want them in.  Sew them into rows, making sure to press the seams of the blocks all the same way in each row.   Alternate the direction of this for each row so that when you sew the rows together, the seams will nest.

Children At Play Quilt Binding


I used Warm and White for the batting.

The binding is a cute stripe from Michael Miller called “It’s a Girl Thing – Little Stripes” in purple.  Sadly, it’s no longer available. I considered a bright pink bias stripe first, but decided the purple was the perfect color for the binding.  I’m really glad I went with it. I cut 2.5″ strips and used this machine binding technique.  To cut 2.5″ strips quickly, I used my trusty Stripology ruler. I do love that thing.  Makes cutting lots of strips so fast.

Children at Play Stacked Binding

For the backing, I used the Michael Miller balloon fabric and was so happy with it.  It’s such a cute backing.  The little whimsical girls and rabbits are so fun.

Children at Play Fabric

I machine stitched the quilt with Aurifil Natural White in 40 wt.  It’s a little heavier than the 50 wt. and I like the way it stands out more for machine quilting.  (I do use the 50 wt. for piecing.)   I quilted this at a 4.0 stitch length with a walking foot.

Children at Play Label

Children at Play Quilt Front

There was also a Reading Pillow made to order to go along with the quilt.

Children at Play Pillow

This quilt is sold.

I do hope these instructions are helpful.  Feel free to contact me with any questions.

Hope you’re making something!

Elaine