Tessa Basket

Tessa Basket

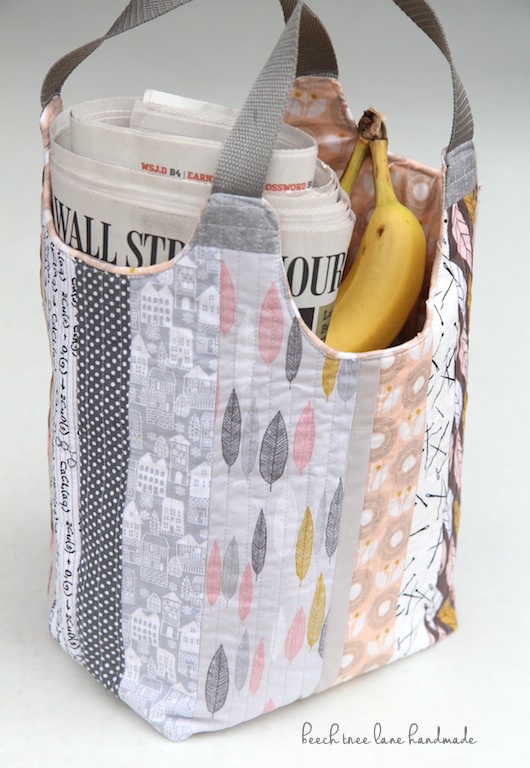
I’ve been wanting to make this Tessa Basket for a while now and finally got the chance when I had to stop work on my current quilt because I ran out of a certain fabric.  Good excuse to whip this up!

tessa basket corners

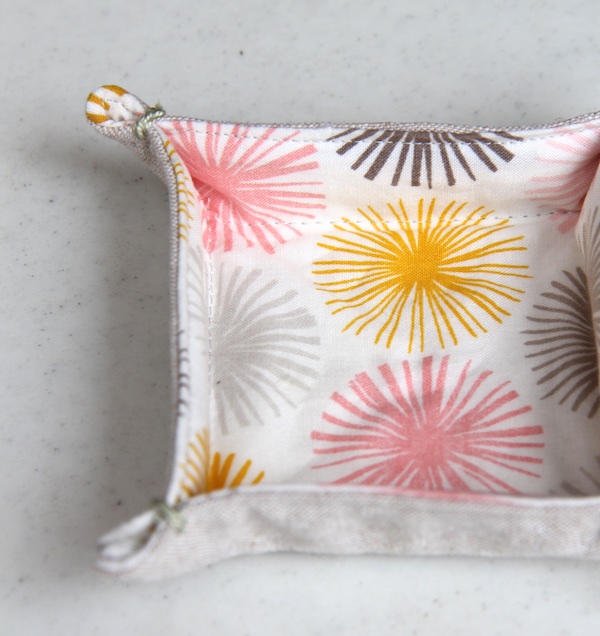
It took my just a couple of evenings to make this. The most fun was the quilting of the panels.  My Janome makes such even, beautiful stitches – it’s so fun to machine quilt with it.

tessa quilting

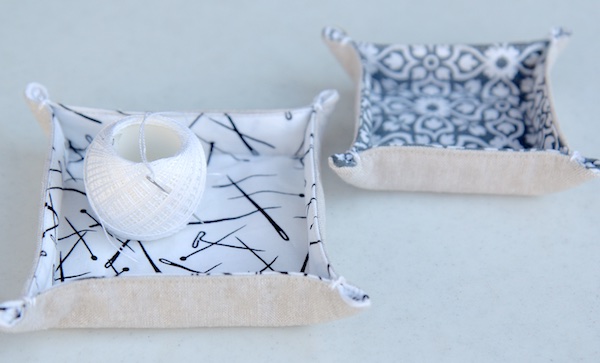
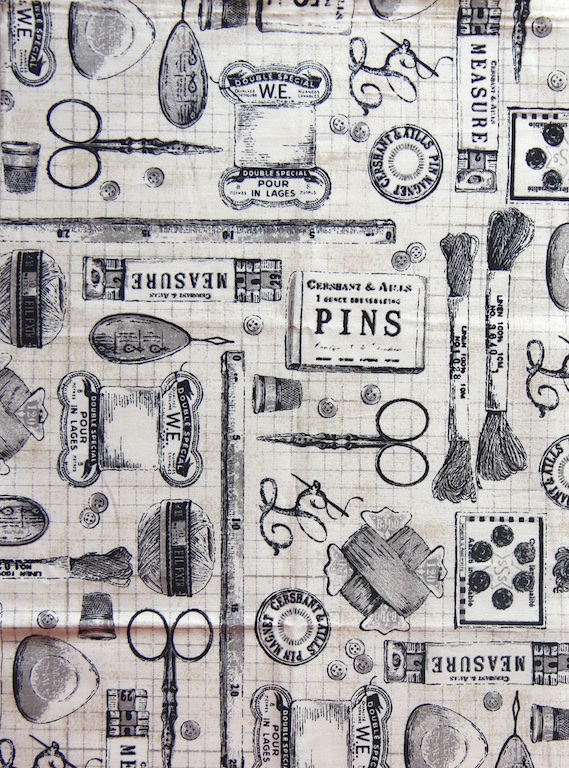
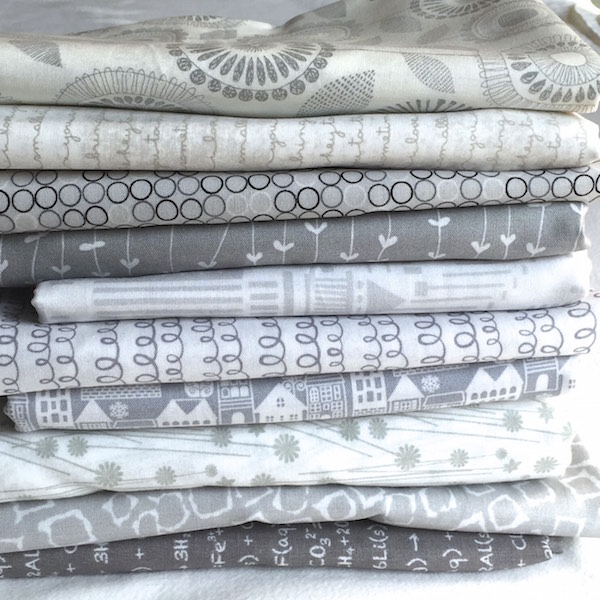
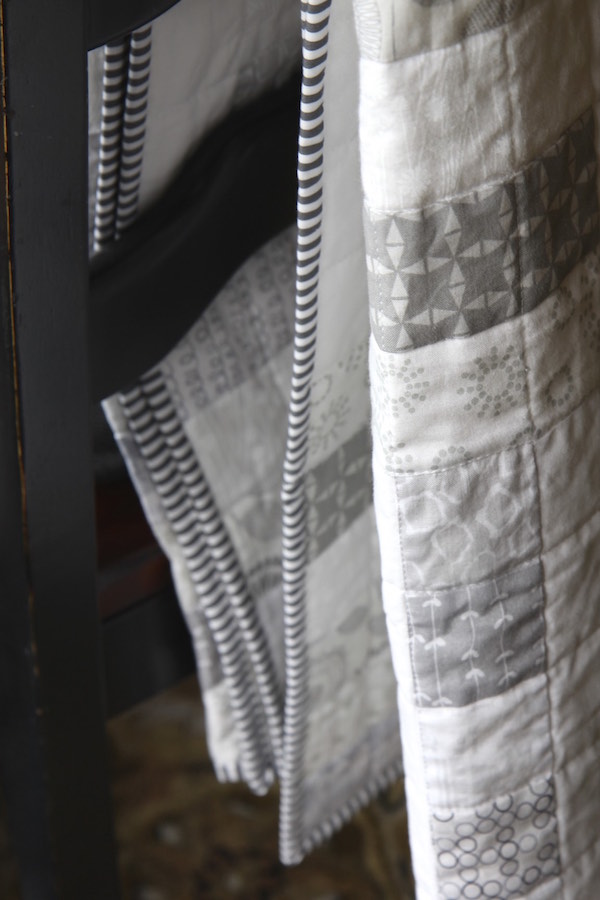
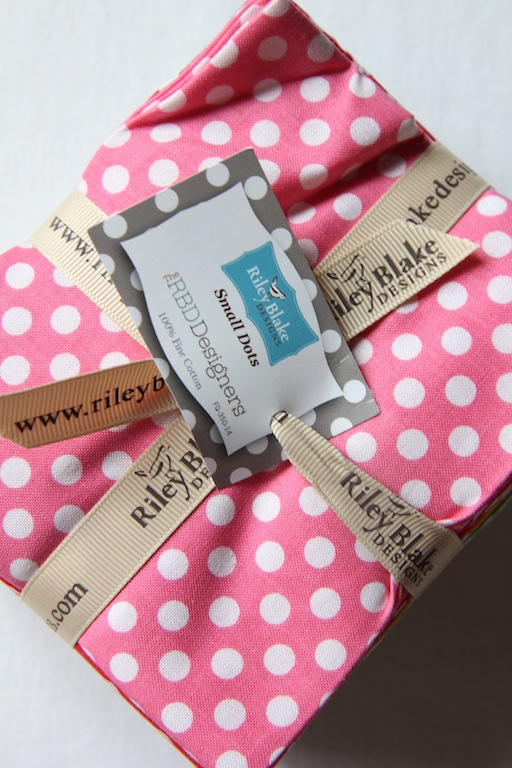
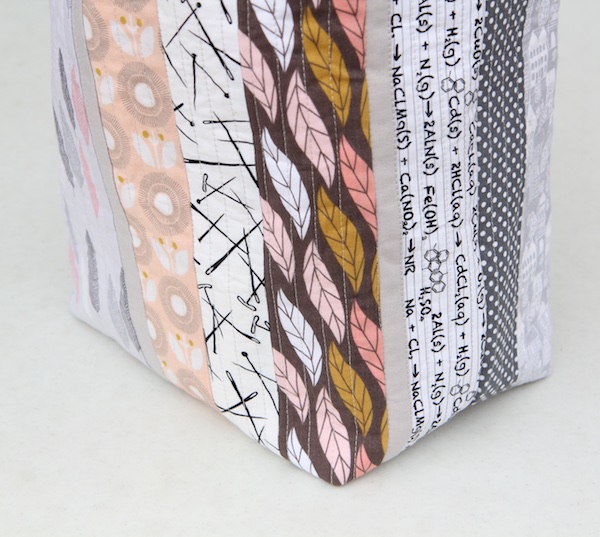
I used several favorite fabrics, including Cloud 9 First Light Leaf in Pink, Leaves in Dark Taupe from the Magnolia line, and the ever awesome Make and Pin from the Maker collection.

tessa basket d-ring

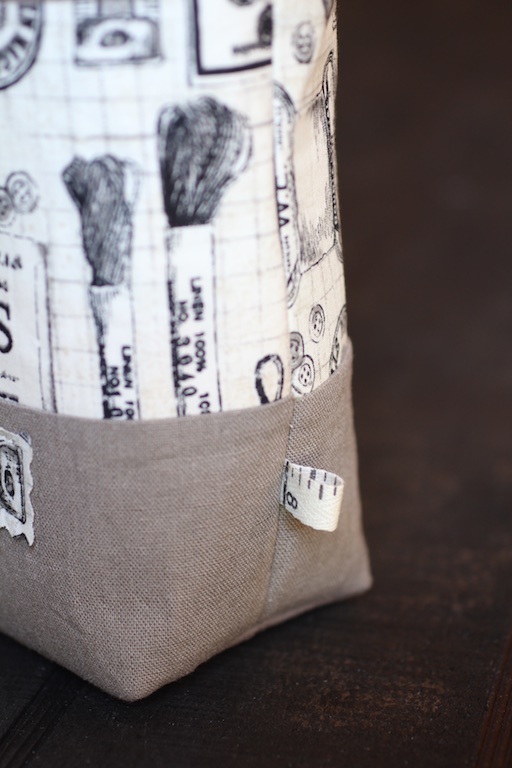
I added a D-ring on the side so I can clip a key if I want to.  I used Pellon firm stabilizer, because I made the tote a little taller than the pattern called for and I needed some structure.

tessa interior pocket

I also added a handy interior pocket.

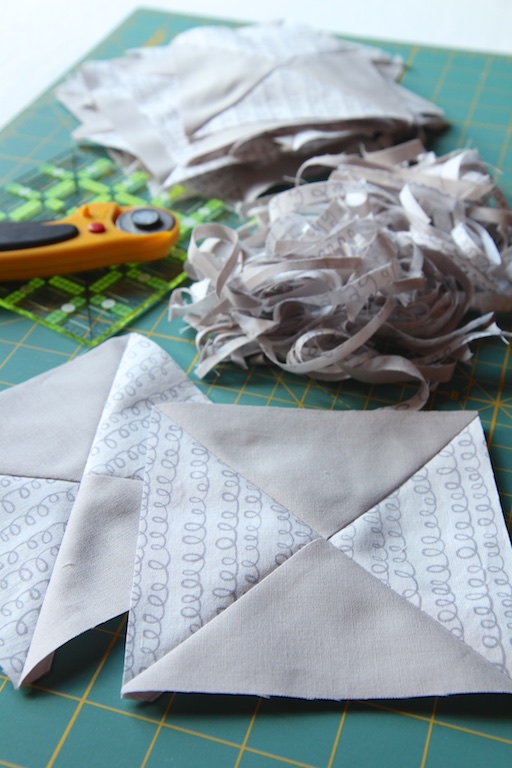
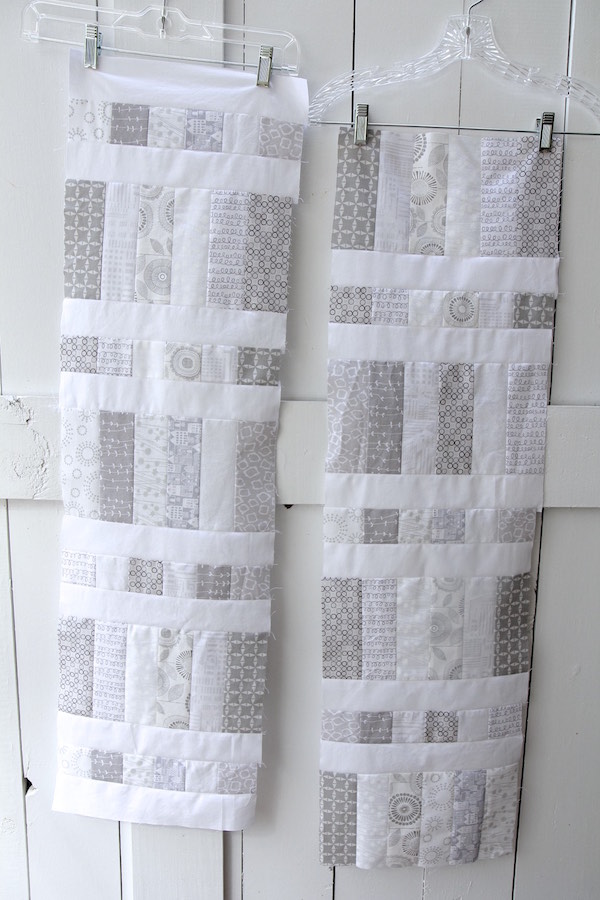
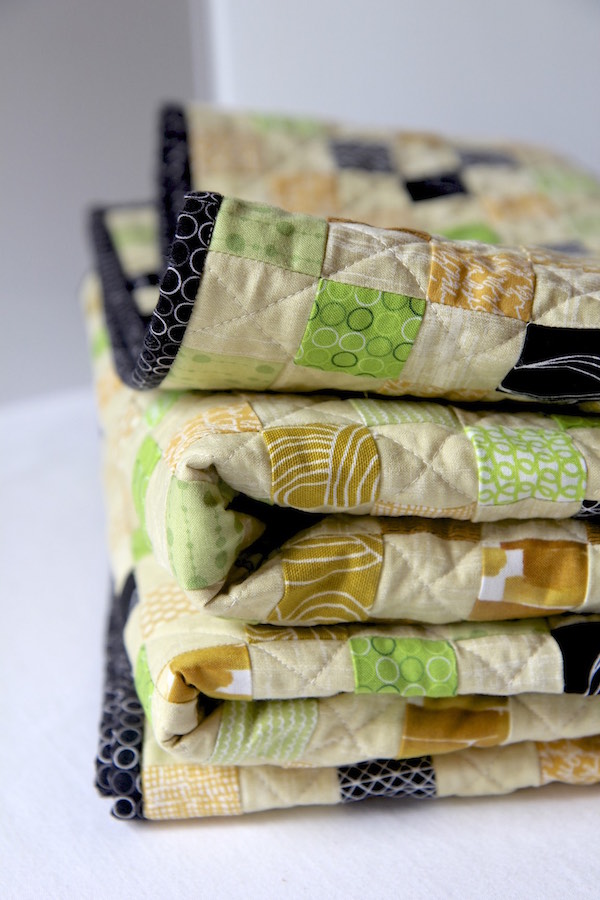
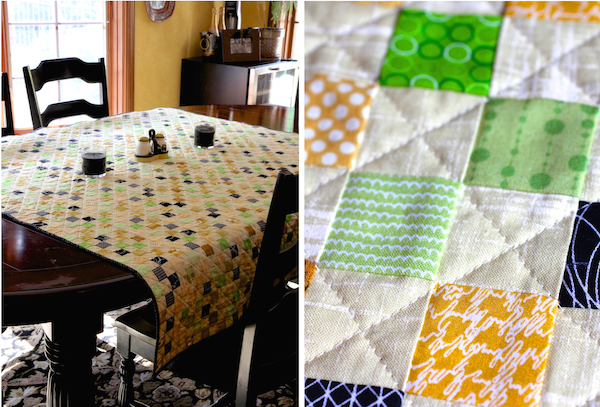
Here are the panels before assembly.  I just used Warm & Natural cotton batting to quilt them with.

tessa basket panels

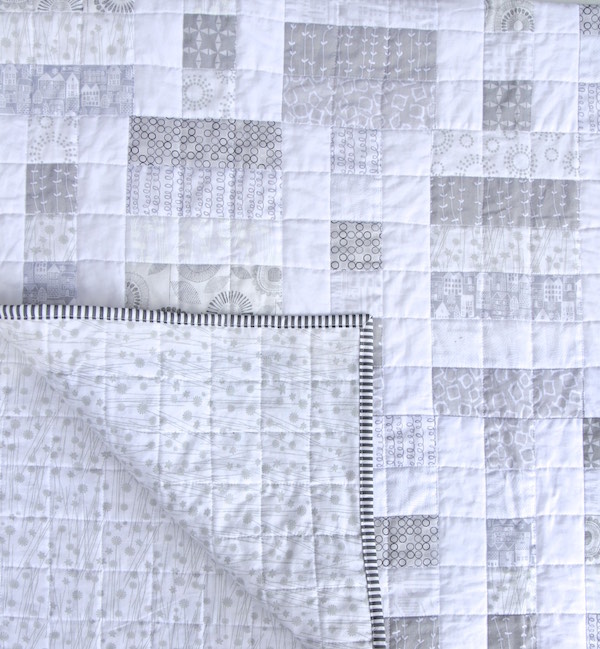
I quilted the gray bottom fabric in a checkerboard, just for added texture on the bottom of the tote:

tessa bottom

It took a lot of Wonder Clips to assemble this thing!

tessa basket clippedtessa basket side

Grab the pattern here in Bonnie’s Etsy store.

Want to see more versions of this pattern?  Check out these Tessa Baskets:

Gemini Stitches
Wooden Spoon QuiltsThe Sewing Chick
s.o.t.a.k. handmade
mommy by day, crafter by night
nana company

Have a wonderful weekend!
Elaine

Fabric Trays to Sew

fabric trays

Sometimes  you just have to sew something cute and sweet.

I love linen and patterned fabric together.  So when I decided to make these little trays, I knew linen would have to be involved.

And since I’m a little bit obsessed with Alisse Courter’s Magnolia collection, I had to include a little bit of this sweet fabric:

Magnolia Fabric for Tray

Have you sewn with this fabric? It is so soft and luxurious.  That whole collection is definitely going to be showing up in a  quilt one day that I’m going to make. And it may have to involve a bit of linen, also.

fabric tray before corners

These little trays are a snap to make.  I used A Spoonful of Sugar’s great little tutorial for making these.  You can whip one up in about 15 minutes.  She uses charm fabrics, which are 5″ square.  I did one in that size and did the next one at 6″ square.

fabric tray aubade

aubade cloud 9 fabric

I couldn’t resist cutting into this Cloud 9 Aubade fabric for one of the trays.  The linen I used was Robert Kaufman Essex Wide in Flax, a great linen blend that’s easy to cut and sew.  You can use any fabric for the outer lining, though.  The corners are just sewn up with embroidery floss or pearl cotton (which I used).

I’m using one to hold my beloved Wonder Clips.  They would obviously be great for jewelry, too.  What great little gifts they would make.

fabric tray wonder clipsFabric Trays two

Hourglass Quilt in Mustard and Grey

HourglassMG binding

I have this color combo love right now that involves greys and mustards and I just had to make a quilt with these colors.  I’m picturing lots of variations on this theme in the future!  Combine that with my love of Half Square Triangles and you have this quilt.  I’ve been staying up way too late at night working on this.  We’ve also had some windy and rainy weather lately – courtesy of Hurricane Patricia – so it’s allowed me to ditch some of my Fall yard work in favor of sewing and finishing this quilt!

HourglassMG Stacked

I used a variety of favorite quilting fabrics for this, including the ever awesome Rainwalk Ripple by Anna Graham. I can’t get enough of that fabric.  It’s a canvas fabric, but sewed up nicely right alongside the quilting cottons.  I also used a couple I pulled from the beautiful Magnolia line by Alisse Courter.  And, since I always love a little text fabric sneaked in, I used a little bit of Robert Kaufman Scribble Notes in White. This makes me very happy.

Hourglass MG Quilt two shot

The solid color is Robert Kaufman Kona Cotton Ash – such a great neutral and my favorite solid. And the binding is Squared Elements in Shadow.

HourglassMG Roll

I did simple straight quilting, at 3.5 stitches/inch, which I really like and went well with the lines of the blocks.  Each block was trimmed to 5 inches square.

HourglassMG on chairHourglassMG closeup

I used Warm & Plush cotton batting, which I washed and dried before using, even though it has no scrim.  I live dangerously.   It worked out.

My favorite part of the quilt is doing the mitered binding at the end.

The finished size of this quilt is 44″ x 54″, a very nice lap size quilt to snuggle with, just big enough for two.

HourglassMG blocksHourglassMG Hanging

Tall “Pin” Basket

PinBasket

Although I call this my “Pin” basket, I don’t use it for pins!   But I love text and novelty fabrics and so I sort of call this fabric my “Pin” fabric.  I found this fabric when we out in the Seattle area, in a fabric store on Whidbey Island.  I think I bought all they had – they were just some fat quarters.  There was no selvage identification or anything, so I don’t know what it is! But the fabric is great for fussy cutting.

PIn Fabric

PinBasketGrommet

I used some linen that I had and cut out motifs from the Pin fabric with pinking shears. I used very firm stabilizer and boxed the corners so it would stand up.  I made a custom button for the front and  I added a grommet just for fun so I have it hanging from a hook in my sewing area.   I also added a little detail tab from tape measure ribbon that I had:

PInBasketDetailpin-basket

This is actually one of my favorite things I’ve ever sewn and I was just sort of fooling around when I made it – a pleasant surprise!

Stash Builder – Milk, Sugar, and Flower

milksugarflowerfriends

How adorable is this fabric from Penny Rose called Milk, Sugar and Flower Friends?  I can’t wait to cut into these.  This collection has several designs that are so darn cute. Here are a couple of more from that line and also a few fabrics that I thought would go well with these  – a pink stripe from Dear Stella and pink flowers from Storybook Vacation, another awesome line of vintage 30’s fabrics that I need to stash.

fwfbundle

This  fabric will be perfect for fussy cutting:

milksugarfriends

WIP Sneak Peak

hourglassmustardhanging

There’s been a lot of strip cutting and sewing going on around here.  Here is a little sneak peak at what I’m working on.  Some of my favorite fabrics are going into this quilt with some beautiful Robert Kaufman Kona Ash in the hourglass blocks.

hourglassmustardfabrics hourglassmustardcutting

Got to get those hourglass points just right:

hourglassmustardblock
I have to restash that great Scribble stripe fabric from Kanvas Green Farms – I’ve been using it a lot lately.  I love these colors together so much – mustard, grey and white.  And I love making hourglass blocks.  Can’t wait to get the top pieced so I can figure out a backing fabric.

stay tuned,
Elaine

hourglassmustardpeak

Machine Binding Tutorial

MachineBindingTutorial1

Having a beautiful mitered binding on a quilt is the perfect finishing touch and the part I love the most. There are different ways to produce a binding like this  – I prefer to stitch my binding down on the front, wrap it around to the back and stitch in the ditch on the front, so the stitches are hidden and the sewing line only shows on the back.  It is just personal preference and you will have to decide how you like your binding to look.

I like to make my own binding, choosing a fabric that complements the quilt and sets it off nicely. A stripey binding is very popular with quilters and adds a little zing to the edges.  Any small repeat is nice, too.  You can also use a solid or even use scraps and make a scrappy binding.

You will be cutting strips cross-grain to make this kind of binding and then sewing them together to make one long continuous strip.  The tutorial shows you how to join the strips together on a diagonal, so the seams lay a little nicer.

This binding is not difficult to do, but requires slow stitching for precision.  I recommend using Wonder Clips from Clover instead of pins.  They are faster, easier to use and more precise.  They will hold your binding better than pins and will not shift as you clip and unclip them.

Calculating Yardage:
There are several ways to calculate how much yardage/strips you will need to make your binding.  Different people use different formulas, some of which are way too generous and I think waste a lot of fabric.  I personally love to use this app by Robert Kaufman that is super easy.  I downloaded it from the iTunes store and I highly recommend it.

If you don’t want to use a phone app, here is a web site that functions very close to the Robert Kaufman app and is very easy to calculate your binding: lily street quilts.  Just plug in the dimensions of your quilt and scroll down to the bottom of the page and plug in your binding width desired.  Click “calculate” and it will give you the yardage and # of strips you need.

If you don’t want to use an app like this, here is a good formula to calculate the strips.  You simply add up the sides of the quilt (width, width, length, length), add a few extra inches for the corners (about 10) and the tail ends and divide by 40, which is a safe usable area of fabric from a common 44/45″ width piece of fabric:

W+W+L+L+10″ ÷ 40 = how many strips you will need (always round up)


STEP-BY-STEP PHOTO TUTORIAL:
Make your binding by cutting strips from selvage to selvage:

bindingpage1

bindingpage2

bindingpage3

bindingpage4

bindingpage5

bindingpage6

bindingpage7

bindingpage8

bindingpage9

bindingpage13

bindingpage11

bindingpage12

bindingpage14new

bindingpage15


bindingpage16


bindingpage17


bindingpage18


bindingpage19


bindingpage20


bindingpage21


bindingpage23


bindingpage24


bindingpage25


bindingpage26


bindingpage27


bindingpage28


bindingpage29

Save

Save

Save

Grey Havens Quilt

greyhavensquilt
I had a vision for this quilt that I wanted something light and airy that reminded me of fresh white laundry hanging on a clothesline – lots of whites and light greys and nothing else.
GreyHavensQuiltFullThere were so many fun fabrics to chose from. I scoured online fabric stores for grey and white designs that caught my eye.  A couple of these in the stack below did not make the final cut, but it was a hard decision because I liked them all so much. Sometimes a fabric just doesn’t go with what you had in mind.

greyhavensfabricI think my favorite fabric of all time is this Cloud 9 fabric called Petal Print Twig.  It reminds me of a pencil drawing and is so delicate.  I wanted to sort of build the quilt around that. Isn’t it pretty?  I ended up using 12 different fabrics plus Robert Kaufman Kona White, which is such a great pure white.

petal print twig
For the quilt design, I did not want to chop up some of the fabric into small squares because I wanted to keep more of the pattern repeats, so I settled on finished strips of 2″ x 6″ with a smaller strip of squares alongside.

The finished size of the quilt is 42″ x 57″.

greyhavensquiltroll

greyhavensonchair greyhavensfrontandbackFor the backing, I used Get Back! 108″ wide backing fabric in white and gray.  Although this is a convenient fabric to use for backing because of it’s width, I probably won’t use it again because it’s too thin for my taste.

greyhavenshangingpanel

These are a couple of panels as I was working on them.

I love the binding fabric so much  – it’s Dress Stripes in Charcoal by Hawthorne Threads.  They have started manufacturing their own fabrics using a digital printing method.  The fabric was crisp and really nice to work with.

hawthornefabricstripes

As for the name of the quilt – Grey Havens?  I’m a big LOTR fan!

greyhavensbinding

Stash Builder – Riley Blake Dots

rileyblakedots

Adding dots to your stash is always a good idea – they look so great in scrap quilts. This little bundle from Riley Blake is a nice little collection of small dots, my favorite size to use in quilts.

rileyblakedotstag

Follow my blog with Bloglovin

Kitchen Tabletop Quilt

kitchenquiltopen

I love the look of a quilt used as a tablecloth.  So I thought I would make one for our kitchen table.  We’re empty nesters now, the kitchen table doesn’t get used for meals nearly as much as when my kids were at home and so I made one.  I don’t care if gets some crumbs or spills on it – it’s meant to be used and thrown in the washer.

KitchenTabletopQuiltFull

kitchenquiltfolded2kitchenquiltpiecing

I love postage stamp quilts but I wanted to use coordinated fabrics that would look right in the kitchen area, which is black and gold.  Then I wanted a touch of green to complement all the greenery outside the window.  I used Hawthorne Thread’s color grid tool to select fabrics and found so many that I liked.  I decided on about twelve fabrics I really liked and did 16-patch blocks.  The background fabric is Laura Gunn’s Painter’s Canvas in Cream.

kitchenquiltfabricscutting

kitchenquiltbacking

There are 2,304 squares in this quilt!  The top took close to 30 hours to make – there was a lot of rotary cutting, piecing and matching seams. The finished quilt is about 60″ x 60″.

For the backing, I chose a fabric from the Maker line called Make and Pin.  I really love this fabric.  For the binding, I chose Robert Kaufman Ring Spots in Pepper.  And the batting is Warm and Natural Cotton.   It drapes very nicely but has a lot of structure because of all those seams!  Lots of seams.

kitchenquiltbindingkitchenquiltrolledkitchenquiltinkitchen

It’s nice to have a quilt you enjoyed making so much right out where you can see it all the time.